Simple Potato Chips

There are a plethora of healthy chip recipes out on the internet.  I have tried probably about half of them and usually end up with a soggy pile of potatoes that no one could even generously call potato chips.  I set out to try and figure out what the secret trick was to make crispy and yummy chips.  I think that I got pretty close, not exactly like a bag of Lays, but pretty close.  I will say that you might want a few special tools to make sure you get as close to a store bought potato chip as possible.  These two tools are a Silpat and a mandoline.  The Silpat really helps so that your potato slices don’t stick to the pan while you are cooking them, but if you don’t have one parchment paper can work as well.  The mandoline helps to slice the potato very thin, which is uber important to a crispy chip.  If you don’t have a mandoline, you can use a regular knife.  Just make sure to cut the potatoes as thin as possible.  Alright enough talking, let’s make some chips!

Simple Potato Chips 

photo (59)

  • 3-4 medium potatoes (I used red potatoes because that’s what I had on hand.  Russet also works really well)
  • 1 big pot of boiling water
  • 1 big bowl of cold water
  • Olive oil
  • sea salt
  • pepper or garlic powder or any other seasoning you want, optional


1. Bring your pot of water to a boil.  Wash and dry your potatoes.  With either a mandoline or a knife, slice the potatoes into thin rounds.

2. Bring your bowl of cold water over to the boiling water and place your potatoes into the boiling water.  Cook for 2-5 minutes and then immediately put them into the cold water.  Drain the potatoes and pat dry as best as possible.

3. Preheat oven to 450 and line a large baking sheet with either a Silpat or parchment paper.  Lay your potato rounds in a single layer on the baking sheet, making sure they aren’t touching or overlapping.  You may have to make them in batches.

4.  Lightly brush or spray the potatoes with olive oil (you don’t need a ton), and then sprinkle with sea salt and any other seasonings you want.

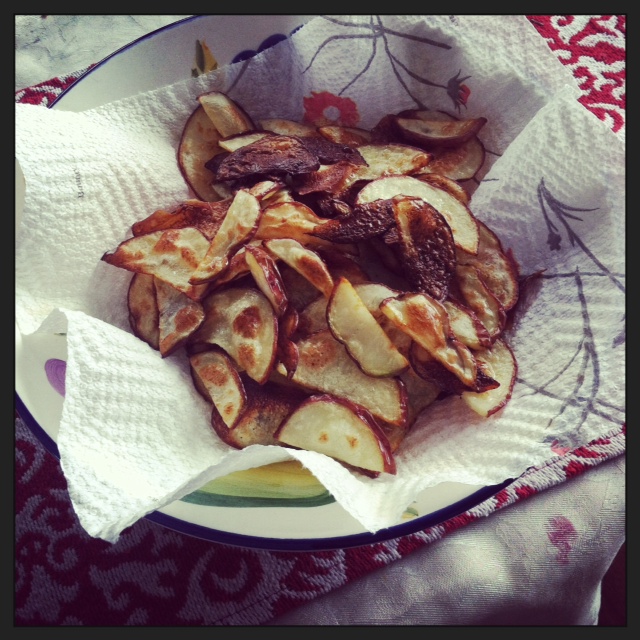
5. Bake in the oven for 15 minutes. Remove and flip over the slices and bake for another 5 to 10 minutes.  Keep checking to make sure your chips don’t burn.  Remove from the oven and let them cool on a wire rack.  This also helps them to crisp up a little as the cool.

You can experiment with seasonings as well as cook time to make the perfectly crispy chip.  This is just what worked best for me and my oven.  Now go enjoy your tasty snack!

Oven Roasted Brussels Sprouts

I know, I know.  The title of this post might be enough to make a lot of you turn right around and run away screaming.  Brussels sprouts are not a very popular vegetable, but I think they get a bad rap because they aren’t prepared properly.  I think that most of the people who don’t like brussels sprouts have been served bland, over-boiled, and mushy sprouts.  Anyone would push that mess away from them.  Enter my brussels sprouts.  Now I’m not going to say that these will instantly convert you to a sprout lover, but it is a step in the right direction.  By roasting these in the oven, you add a delicious flavor without overcooking them.  The seasonings add even more flavor and can be customized to your tastes.  This is a great side dish for any holiday meal, and a great way to get in a delicious serving of vegetables. So disregard your thoughts about stinky, gross brussels sprouts and give these a try.  You might just find a new favorite!

photo (52)

Oven Roasted Brussels Sprouts

  • 1 lb brussels sprouts
  • Extra virgin Olive Oil
  • 1-2 cloves garlic minced
  • fresh black pepper
  • 1-2 tsp smoked paprika (I highly suggest smoked paprika instead of sweet. It adds an awesome smoky flavor to the sprouts)


1. Preheat oven to 425 and line a baking sheet with aluminum foil.

2. Cut the ends off of the brussels sprouts and remove any loose or discolored leaves.  If some of the greener leaves come off, that’s fine  Keep those and you can roast those as well.

3.  Place your brussels sprouts in a bowl and drizzle a little EVOO over them.  Coat them and then spread them on the baking sheet.  Add in your garlic cloves and sprinkle everything with the smoked paprika and pepper.

4.  Place the sheet in the oven and roast for about 15 to 25 minutes.  The sprouts will be done when they have a nice golden brown color.

That’s it!  A very simple way to prepare a great dish.  Like I said you can experiment with the seasonings and find one that is your favorite.  Eat up and enjoy!

Creamy Tomato Soup

Hello everyone!  I know that I haven’t posted in awhile, but with the holiday season upon us, things get just a bit crazier.  I also like to spend time with my friends and family, away from the computer and all other social media.  It’s nice to unplug and enjoy the company of real humans!  That being said, I do have a new recipe for you!  One of my favorite meals as a kid was tomato soup and grilled cheese.  I had a hankering for it the other day, but I wanted to make it in a healthier way (read: not from a can or with mounds of cheese).  I used cashews to add the creaminess to the soup and I think that this meal was a winner in the Dawson house! Plus you can make it in the slow cooker, what’s better than that?

Creamy Tomato Soup with Grilled Cheese

  • photo (49)2 cups raw cashews
  • 2 cups water
  • 1 large onion, diced
  • 4 cloves garlic, minced
  • 3 carrots, peeled and diced
  • 2 stalks celery, chopped
  • 4 cups diced tomatoes (about 2 cans worth)
  • 1 tbsp oregano
  • 1 tsp dill weed
  • 1 tsp basil
  • 1 tsp cumin
  • 1 tsp coriander
  • 1 tsp curry powder, optional (but it adds a really nice flavor)
  • 1 tbsp fresh parsley

1. Place cashews and water in a bowl and soak for at least an hour or overnight if you have the time.  Using an immersion blender, blender, or food processor, blend the cashews and water until they are smooth.  Set aside

2. Saute all your vegetables except for the tomatoes, for about 7-10 minutes.  Place everything in your slow cooker and mix well.  Cook on low for 6-8 hours.

3. If you would like a smooth soup, use your immersion blender to blend the soup to your desired consistency.  You can also leave it chunkier, totally up to you!

For the grilled cheese, my husband Adam made me some gluten free bread and I used my “cheese” sauce from the taco casserole.  I just omitted the chili powder.  You can make your grilled cheese however you like it best, but this was actually REALLY good and totally filled my craving.

In the next few weeks, I will try to regularly post on the blog, but there may be some days when I don’t.  Think of it as a winter vacation!  Go and enjoy the Christmas spirit and this soup!

Slow Cooker Minestrone Soup

Another slow cooker recipe for you today! I have been on a soup kick lately, probably because of the colder weather.  I have been craving warm and hearty and delicious soup. Plus the house smells amazing all day as the soup simmers in the slow cooker!  Slow Cooker Minestrone Soup | Life Healthfully Lived Continue reading

Baked Falafel with Tahini Sauce

I didn’t think that this recipe would be a winner.  I had a vague idea of what I wanted to do, and in my head I could see it working, but as I started to put this together, I got nervous.  Luckily it all worked out and this turned into a favorite around here!  This makes a lot of falafel, so it would be good for a get-together or even as appetizers at a party.

Baked Falafel with Tahini Sauce 

photo (41)

  • 2 cups dried chickpeas, soaked in a big pot overnight
  • 1 onion, diced small
  • 5 cloves garlic, minced
  • 1 bunch fresh parsley
  • 1 bunch fresh cilantro
  • 3 tbsp almond flour
  • 1 tbsp coriander
  • 3 tsp cumin
  • 2 tsp salt
  • 1/2-1 tsp cayenne, depending on how spicy you want your falafel
  • 1 tsp baking soda
  • 1/2 tsp baking powder

Tahini Sauce

  • 1 cup unsweetened coconut milk (you could use any non-dairy milk, but I think coconut works the best)
  • 1/4 cup tahini (sesame seed butter)
  • 2 cloves garlic, minced
  • 1 tbsp lemon juice
  • 2 tbsp liquid aminos or soy sauce or coconut aminos
  • 1/2 tsp cayenne

1.  Preheat oven to 400.  Drain and rinse your soaked chickpeas, place them in a food processor and pulse until crumbly.  Place in a large bowl.  Place the diced onion, parsley, cilantro, and garlic cloves into the processor and pulse until it looks like paste.  Add the herb paste to the chickpeas and combine.  Mix in the seasonings and then the baking soda and powder.

2.  Using a tablespoon, ice cream or cookie scooper, form the chickpea mixture into little balls.  Don’t make them too big or they will fall apart.  Place the falafel onto a cookie sheet that has been oiled or use a baking mat.  Flatten the balls just a little, brush with a little olive oil and bake in the oven for 10 min.  After 10 minutes, flip the falafel and place back in the oven for another 10 minutes.

3.  For the sauce, combine all ingredients in a medium saucepan and heat over medium-low heat until thick.  Pour over falafel or use it as a dipping sauce.  Either way is delicious!

Don’t freak out if it looks like the falafel is not going to hold together, it will.  Do be gentle with these, though, since falafel is usually fried, these are just a little bit more delicate (and healthier).  So get to cooking and let me know what you think!