Mac N’ Greens

In one week, Adam and I will officially live in Chicago.  Technically our lease started yesterday but we won’t be moving until next Thursday.  This move has come really fast and while I still have a to do list a mile long, I don’t feel as stressed as I usually do when we move.  Although that could all change in an instant, talk to me next week!  This will probably be my last post for a few weeks while we get everything moved and settled in our new place.  Once we’re in Chicago though my blogging will be much more regular and there will be some changes happening to the site!  Excited for all the new things that we are going to do and experience in the next few weeks!


This meal is a quick and easy meal to throw together and it makes a lot of leftovers.  It’s kind of the perfect meal to make when you’re moving to a new city…

Mac N’ Greens

photo (69)

  • 1 package of pasta (I used brown rice pasta to keep it gluten free.  Whole wheat would be good too)
  • 1 bag of frozen kale or spinach, thawed (could also use fresh and whatever green you want like collard or mustard)
  • Olive oil
  • 1 onion, diced
  • 3-4 cloves garlic, minced
  • 1/2 cup raw cashews
  • 1 3/4 cup vegetable broth or water
  • 1 1/2 cup cooked cannellini beans (or 1 can)
  • 2 tsp lemon juice
  • 1 tsp brown mustard


1.  If you’re using dried beans, soak them overnight, then drain and rinse them and cook them on the stove for about 20 minutes.  Drain and set aside.

2.  Make sure your greens are completely thawed.  If you are using fresh, chop them up and set aside.  Cook your pasta according to the directions on the package.  Once the pasta is cooked, drain and set aside.

3.  In a medium skillet saute the onions in olive oil for about 5 to 7 minutes until they are soft.  Add in the garlic and saute for another minute or two.

4.  In a blender or food processor, grind the cashews until they are a fine powder.  Add in about 1 cup of the broth or water and blend until smooth.  Add in the onions and garlic, beans, lemon juice, and mustard.  Combine until smooth and add in salt and pepper to taste.

5.  In a large pot, combine the pasta and greens until fully mixed together.  Pour the sauce into the pot and heat over medium heat until everything is warmed through.


Enjoy your delicious and nutritious pasta dish, and I’ll see you in Chicago!

“Parmesan” Topping

Growing up, my sister and I topped many a meal with the green container of “shake-y cheese”.  Thats what we called it in our house, because you could shake cheesy goodness on to anything.  Clever I know.  I also know that shake-y cheese isn’t really cheese at all, but that didn’t stop it from tasting delicious sprinkled on top of a big ol’ plate of spaghetti.  There are a variety of different healthier and dairy free versions of this topping out there, but I think this one comes closest to the salty and slightly buttery taste of my beloved shake-y cheese.  Plus it is really simple to make a bunch and then store it in a container in the fridge.  Make this and get to shakin’!


“Parmesan” Topping  

photo (68)

  • 1 cup walnut pieces
  • 3-4 tablespoons nutritional yeast, depending on how cheesy you want the flavor to be
  • 2-3 tsp salt, depending on taste


1. Preheat oven to 250.  In a blender or food processor, pulse the walnuts a few times until coarsely chopped.  Add in nutritional yeast and salt and process everything until it has a fine breadcrumb like texture.

2. Line a large baking pan with parchment paper or a silpat.  Spread the walnut mixture evenly over the pan and place in the oven.  Bake for 30-40 minutes in 10 minute increments.  After each 10 minutes move the mixture around so it doesn’t burn.  It will be done when it has a nice golden brown color.

3. Let the topping cool and then transfer to a container.  You can store this in your fridge for up to a month.


Simple and easy way to add flavor to any of your meals!  This is great on vegetables, lasagna, spaghetti, casseroles, or anything else your little heart desires.  Enjoy!

Health Reminders

I think that we can all agree and say that no one is perfect, especially when it comes to health.  Even celebrities and fitness trainers and those in the health world have their imperfect moments no matter how healthy they seem.  As we move from winter into spring, I thought it would be a good idea to give a few tips and reminders about your health.  You can call it spring cleaning if you’d like, but take just a few moments and assess your lifestyle and make sure you’re getting the most out of your healthy journey.


1. Water, water, WATER!!!  This was the biggest reminder for me lately.  I had been really good about drinking a lot of water heading into the winter months, but as it got colder and colder, water seemed less appealing to me.  I pretty much stopped drinking any extra water January through February and boy could my body tell!  I was tired, sluggish, and just had an overall lack of energy.  I attributed it to the long, cold winter months but in all honesty, part of it was my lack of water consumption.  Now I have a 1 liter water bottle that I keep with me and try to drink one if not more of those per day.  I’m not going to tell you some specific amount of water that you have to drink in order to be healthy, just make sure to drink enough where you don’t feel water-logged or too thirsty.  It really helps to keep a refillable bottle with you at all times and just sip throughout the day.  Don’t like the taste of just plain water?  Try adding lemon or lime for a little flavor!

8-glasses-of-water_blue


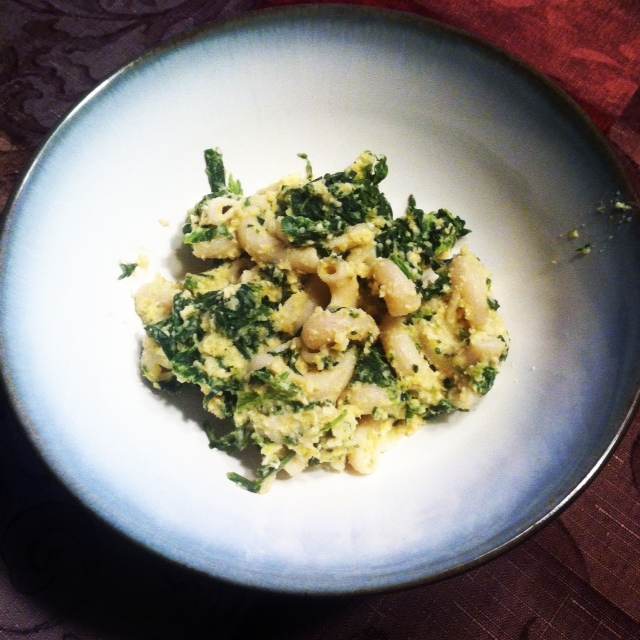
2. Eat Seasonally.  Many of us can get any fruit or vegetable that we want at any time of the year, whether it is in season or not.  This isn’t a bad thing, believe me, I have my fair share of out of season food all the time (hello sweet potatoes!).  I’m not saying you have to eat only foods that are in season, but it does make a difference.  For example, I had been roasting up a whole butternut squash over the fall/winter months and using that in meals throughout the week.  I started to notice though that around the end of January and into February, the butternut squash didn’t taste as good as it had before, the selection was getting smaller, and the price was getting higher.  Take a look at the food you regularly prepare and see if there are any seasonal changes that you can make.  Check out your local grocery store and see what produce they have on sale or look at a list of seasonal foods and pick something new to work with.  Eating seasonally is a great way to keep your diet varied, eat the most nutrient dense food possible, and spend your money smartly.


3. Get Some Sun.  Most of us stay squirreled away in our homes during the winter months, trying to stay as warm and cozy as possible.  This past winter was a doozy, and if I could avoid it I stayed away from the great outdoors as much as possible.  When I did have to venture out into the tundra, I was so bundled up that only a slit for my eyes was all that was exposed to the air.  With the warmer weather, it’s time to get some outside time in!  You don’t have to spend a ton of time outside, but even 10 minutes in the fresh air will do you wonders.  Take a bike ride, go for a walk, read a book on a park bench, do your workout outside if you can, or play with your dog.  It’s time to soak up some vitamin D, breath in the fresh air, and rejoice in the fact that you no longer have to wear 50 layers to walk the ten feet to your car!

wpid-grumpy-cat-going-for-a-walk

4. Clear the Clutter.  I’m a weirdo who actually loves cleaning.  I am very type A when it comes to my apartment and how clean it is.  I hate clutter and junk lying around and I hate when something doesn’t have a place.  With our impending move, I have gone into hyperdrive with clearing out the clutter.  I already dislike packing, so there is no way that I am packing AND moving junk that I don’t even need or use.  It has been shocking to me just how much “stuff” Adam and I have lying around that we don’t even actually use.  It has been great to go through and get rid of all the superfluous stuff and pare down to the essentials.  I’m going to bet that some of you might have a few things lying around that you could get rid of too.  Take a few minutes and just go through one room and see if there is anything that you don’t need that you could donate/sell/toss.  Trust me, you will feel a lot better when you’ve “cleared the air” and gotten rid of the extra stuff.


These are just a few of the things that I have reminded myself about lately.  Hopefully one or two of them helped you out.  Take a few moments and look at your life and see what little tweaks or changes you can make to get the most out of your healthy lifestyle.  It’s always a good idea to reassess how things are going and make sure that everything is still making a positive impact on you.  Have a great Monday and a fabulous week!

cheerios-happy-monday-quotes-sayings-Favim.com-572679


Dairy Free Lasagna

I don’t eat dairy anymore, and for the most part, I really haven’t missed it all that much.  But every once in awhile, I get a hankering for something gooey, cheesy, and delicious.  Those hankerings usually lead to creative and tasty recipes.  This one is no different.  You might be thinking to yourself, “There is no way that you can have a delicious lasagna without wonderfully yummy ricotta cheese.”  And I say to you, nay nay.  You can have a delicious lasagna without wonderfully yummy ricotta.  Just ask my husband who has no problem with dairy and would love it if there were more of it in the house (there’s none).  He loved this meal and devoured second helpings.  I may have too…


Dairy Free Lasagna 

DSC_0550

  • 1 batch of my tomato sauce, or store bought sauce (just make sure to read the ingredients!)
  • 1 package of lasagna noodles (I used brown rice to keep it gluten free but whole wheat would work well too)
  • 1 cup raw cashews, soaked in water overnight
  • 1/2 cup water
  • 2 tbsp lemon juice
  • 1 tsp salt
  • 1/2 tsp rice vinegar
  • 1 to 2 tsp italian seasoning
  • 1 to 2 cloves garlic

*If you’re using my tomato sauce, you can prepare it ahead of time and store in the refrigerator.  That way you can just assemble everything.

1.  Cook noodles according to instructions on the package.  Once cooked drain and set aside to cool a little bit.  You might want to undercook your noodles just a little so they won’t turn to mush when you cook them in the oven.

2.  While the noodles are cooling, drain soaked cashews and place into a blender or food processor.  Add in water, lemon, salt, rice vinegar, italian seasoning, and garlic.  Pulse to combine everything and then let it run to smooth everything out.  You can leave it a little chunky or totally smooth, it’s your preference.

3.  Preheat oven to 375 and get out a 9 x 13 casserole dish.  Line up the tomato sauce, noodles, and cashew cheese for easy assembly.  Pour a little tomato sauce on the bottom of the pan so the noodles don’t burn.  Then put a layer of noodles down, then a layer of cheese, and finally a layer of tomato sauce.  Keep layering everything until you run out of noodles.  You might have a little cheese and sauce leftover, that’s fine  You can use it to dress up another dish!

4.  Cover lasagna with aluminum foil and bake in the oven for 20 minutes.  Remove from oven and take of the aluminum foil.  Place back in the oven for another 5 minutes.  Take lasagna out of the oven and let it rest for 5 to 10 minutes (this helps it set so when you cut it, it doesn’t fall apart).  Cut into squares and eat up!

DSC_0555


This lasagna tastes even better the next day once the flavors have melded and really set.  So make sure that you leave some leftovers for later!

Roasted Chickpeas

Hello everyone!  I hope that you have had a great week and that you are starting to emerge from the caves of winter into the warmth (sort of) of spring!  I know that I haven’t done a regular post that doesn’t include a recipe in a while, but I have a few coming your way soon and once this move is over they will be coming more often!  Today I have a quick and healthy snack recipe for you.  I have been having a love affair with chickpeas lately, I can’t seem to get enough of them!  I eat them any way I can, in hummus, in salads, sauteed with greens, and roasted.  Roasted chickpeas are a great crunchy snack that you can season any way you like.  If you want a sweeter snack you can use cinnamon or nutmeg and if you are craving salty you can try garlic and pepper.  The options are endless!


Roasted Chickpeas

photo (66)

  • 1 cup dried chickpeas, soaked overnight and rinsed (you could use canned, but the texture isn’t quite the same)
  • 2-3 tbsp olive oil
  • seasonings of your choice (I like garlic, garam masala, cumin, or italian seasonings)
  • silpat or parchment paper (aluminum foil doesn’t work well with these)
  • large baking sheet


1. Cook your soaked and rinsed chickpeas in a large pot.  Bring to a boil, then lower the heat to a simmer and cook for about 20-30  minutes.  You want a firm texture, not too mushy.

2. Preheat oven to 425.  Place your silpat or parchment paper on to a large baking sheet.  You want the baking sheet to be big enough that the chickpeas will have enough room to spread out, otherwise you’ll get chewy not crunchy chickpeas

3.  Pat the chickpeas dry and place into a large mixing bowl.  Add in the olive oil (enough to cover the chickpeas, but don’t drown them in it) and whichever seasonings you’re going to use.  Mix well so everything is coated.

4.  Spread the chickpeas out in a single layer on the baking sheet, making sure they have a enough room between each and place in the oven.  Cook for about 15 minutes, then rotate the pan and cook for about 5 more minutes.  Keep an eye on them for the last 5 minutes so they don’t burn.


That’s it!  Remove them from the oven and let them cool a bit before you dig in.  I promise I have never burnt my fingers or tongue trying to eat these right out of the oven… Enjoy your tasty and healthy snack!  Have a great weekend and see you all on Monday!