Kitchen Nightmares

Life doesn’t always go according to your plan.  In fact, it likes to do it’s own thing regardless of what you would like to happen.  This concept has always been a source of struggle and stress for me.  I am a person that likes to plan and organize and know exactly what is going to happen.  I tend to get a little anxious (ok, make that a lot anxious) when things do not go according to my plan.  This is something that I have been working on and one of my goals this year is to be able to go with the flow more.  Well, life heard that and decided to throw me a curve ball this week.

Last Sunday my oven broke.  I know this might not seem like a huge problem to some, but I rely heavily on my oven.  Not only do I use it for dinner every night, on Sunday I usually do a lot of my meal prep for the week so that I have easy access to healthy food no matter what.  I was a little stressed last Sunday when I realized AFTER I had made a bunch of things to put in the oven that it wasn’t getting hot.  I was even more stressed when the repair guy came on Monday but wouldn’t be able to actually fix the oven until Tuesday.  And I might have had a small meltdown Tuesday night in the middle of cooking dinner when I realized that the oven was no longer regulating the temperature and my food was burning to a crisp, error codes on the oven were shouting at me, and all the smoke detectors were going off at once.

Luckily, my oven did not catch on fire... yet

Luckily, my oven did not catch on fire… yet

Yes, it has been a little bit difficult here in the Dawson kitchen this week.  My oven is still broken, but after my panic attack on Tuesday, I took a deep breath and realized everything was going to be just fine.  I could still eat and eat well, I would just have to get a little creative.  This is where having a well stocked pantry and freezer come in handy as well as having some know-how in the kitchen have really saved the day.  I wanted to share some of the tips and foods I had on hand so in case you have a kitchen nightmare, you can also have a back up plan and won’t have to worry about eating well.

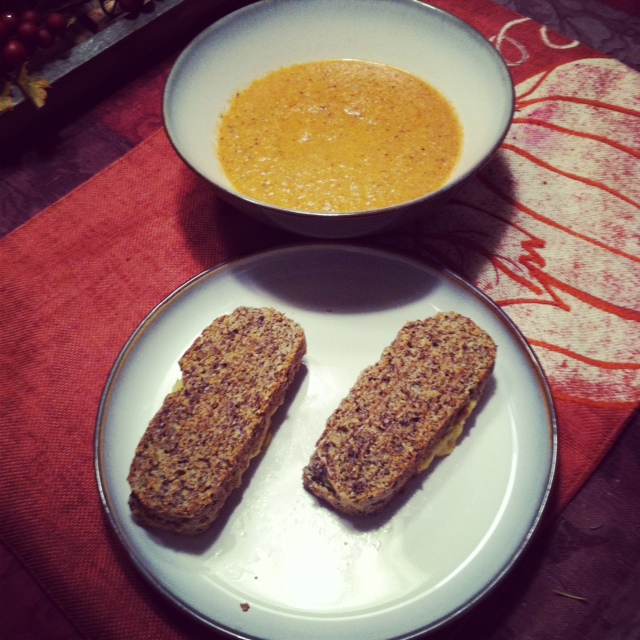
Leftovers, leftovers, leftovers.  This was a big help to me this past week.  I usually make bigger dinners and use the leftovers for lunches or sides for other meals.  Having those extra servings of food helped to round out some of the meals I made this week so that my husband and I had full meals even without the food I usually prep on Sunday.  I also have a freezer full of soups, stews, and chilis that I have made in my slow cooker.  Again, it was really helpful to be able to pull a healthy meal out of the freezer and heat it up.  I’ve said it many times, leftovers are your friends and they have certainly saved my butt this week.

Beans, grains, and legumes, oh my!  Having a good stock of dried/canned beans, grains, and legumes like lentils on hand is another great way to make filling healthy meals.  You don’t have to use an oven to make these and they fill you up with tons of healthy fiber.  Plus they are easy to throw into any meal, and you can season them to your liking.  I usually always have black beans, chickpeas, white beans, and lentils on hand and throw them into anything from frittatas to lettuce wraps.  If you don’t have time to use dried beans, canned works well too.  Just make sure you read the label and rinse the beans before you use them.

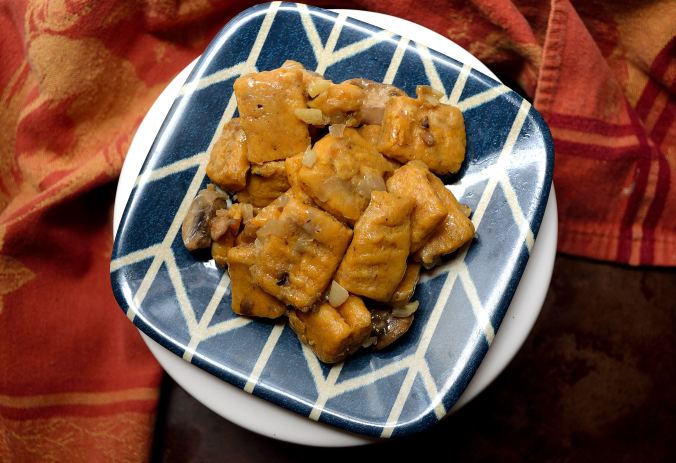
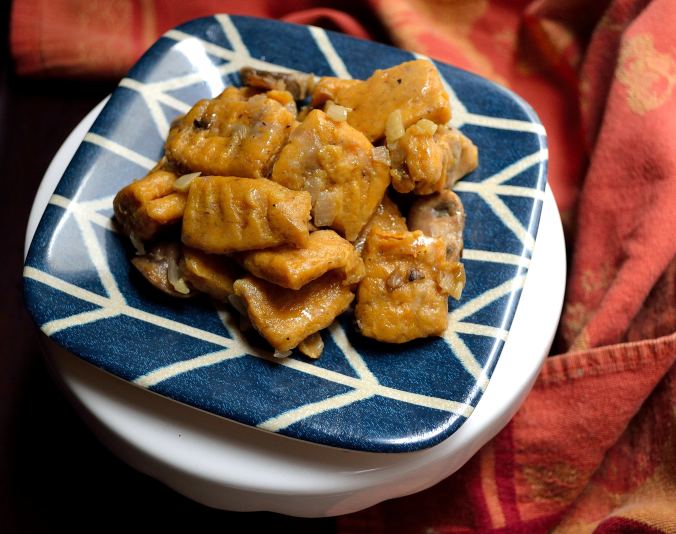
Be flexible on cooking methods.  I learned this week that there are actually a lot of ways to cook things the way I like without using the oven.  For instance, I usually roast sweet potatoes in the oven but found out they taste just as delicious cooked in a cast iron skillet on the stove top.  Sauteing vegetables in a little EVOO tastes just as good, if not better, than roasting them in the oven.  I had to step out of my comfort zone and go to other methods of cooking this week and it has worked out pretty well.  Friday night I came up with a really yummy collard green wrap that I cooked on the stove top with a homemade sweet and sour sauce.  I would have never thought of that if I had my oven working.  Don’t be afraid to experiment in the kitchen and broaden your cooking skills.  You never know when you might have to switch things up.  Plus, it’s fun to eat your regular foods in a different way!

While I am really hoping that my oven will get back to normal this week, I have learned that I can survive (for a little while) without it.  I didn’t have to totally derail my healthy eating or go hungry just because my normal method of cooking wasn’t an option.  The same goes for you  Just because something may come up in your day to day healthy eating plan doesn’t mean you have to throw your hands in the air and resort to McDonald’s.  Take a second to assess what you have, be a little creative and flexible, and come up with a new eating plan for the time being.  If life were always easy, we would never learn that we have it in us to rise above the problems thrown at us.  Pretty neat lesson to learn from a broken oven, huh?

Have a great Monday everyone!

Pumpkin Gnocchi

I’vePumpkin Gnocchi | Life Healthfully Lived always wanted to make fresh pasta, but it also intimidates me.  I worried that I would mess it up and just get frustrated.  Well after mastering another one of my culinary fears, a poached egg, I decided that I could take on pasta.

I am pleased to report that it was a huge success and now one of my favorite meals!  This isn’t a typical gnocchi, I’ve tweaked it just a little.  Italian grandmothers everywhere will probably want to beat me with a wooden spoon, but I think this is pretty darn close to the real thing in texture and taste.

If you have some extra time on the weekend, give this recipe a shot.  I think that you will be surprised at how easy it is to make and how tasty it is to eat!

Pumpkin GnocchiPumpkin Gnocchi | Life Healthfully Lived


  • 1 cup brown rice flour, plus more for rolling the dough
  • 1/4 cup psyllium husk (my grocery store sells this in the bulk section, but check in the spice or health food section too)
  • pinch of salt
  • heaping 1/2 cup of pumpkin or butternut squash puree
  • 1/4 cup vegetable broth, plus more if dough gets too dry


  1. In a large bowl mix together all your dry ingredients.  Then add in your pumpkin and vegetable broth.  Mix everything together (I find a wooden spoon works best).  Once everything is incorporated, let your dough sit for about 5 minutes.
  2. The dough will be soft, but if it is too soft or wet add in a little more flour.  If it isn’t holding its shape or is too crumbly add in some more broth.  Once you get the right consistency, take the dough out of the bowl and knead it a little into a good size ball.  Don’t get frustrated if it takes a while to get the dough just right.  It takes a little time.
  3. Cut your dough into four equal sections.  Then take each section and roll it out into a medium size rope.  Don’t make it too thick or too thin because then it won’t cook properly.  Cut each rope into about 5 or 6 little gnocchi’s.  Press each one down with the tines of a fork.  Continue this process until all your dough is used.
  4. In a medium saucepan, bring about 4 cups of water to a boil.  Drop in 10 to 12 gnocchi at a time and cook until they float to the top.  Pull them out with a slotted spoon and continue until all the gnocchi is cooked.

Now at this point you could go ahead and eat the gnocchi as is, but I like to saute them with a little olive oil, sage, and minced garlic.  I have also sauteed them with pesto, which was delicious!  I would recommend keeping whatever topping you choose light.  A tomato or alfredo sauce might overwhelm the gnocchi, and that is just no good.  I know this recipe seems a little daunting, but trust me, you can do it!  The more you make it the easier gets and you can be enjoying fresh gnocchi all the time.  I haven’t tried it yet, but if you wanted to make an extra batch of gnocchi and freeze it after it has been boiled, I bet that would work.  Now go make some delicious pasta!Pumpkin Gnocchi | Life Healthfully Lived

Oven Roasted Brussels Sprouts

I know, I know.  The title of this post might be enough to make a lot of you turn right around and run away screaming.  Brussels sprouts are not a very popular vegetable, but I think they get a bad rap because they aren’t prepared properly.  I think that most of the people who don’t like brussels sprouts have been served bland, over-boiled, and mushy sprouts.  Anyone would push that mess away from them.  Enter my brussels sprouts.  Now I’m not going to say that these will instantly convert you to a sprout lover, but it is a step in the right direction.  By roasting these in the oven, you add a delicious flavor without overcooking them.  The seasonings add even more flavor and can be customized to your tastes.  This is a great side dish for any holiday meal, and a great way to get in a delicious serving of vegetables. So disregard your thoughts about stinky, gross brussels sprouts and give these a try.  You might just find a new favorite!

photo (52)

Oven Roasted Brussels Sprouts

  • 1 lb brussels sprouts
  • Extra virgin Olive Oil
  • 1-2 cloves garlic minced
  • fresh black pepper
  • 1-2 tsp smoked paprika (I highly suggest smoked paprika instead of sweet. It adds an awesome smoky flavor to the sprouts)


1. Preheat oven to 425 and line a baking sheet with aluminum foil.

2. Cut the ends off of the brussels sprouts and remove any loose or discolored leaves.  If some of the greener leaves come off, that’s fine  Keep those and you can roast those as well.

3.  Place your brussels sprouts in a bowl and drizzle a little EVOO over them.  Coat them and then spread them on the baking sheet.  Add in your garlic cloves and sprinkle everything with the smoked paprika and pepper.

4.  Place the sheet in the oven and roast for about 15 to 25 minutes.  The sprouts will be done when they have a nice golden brown color.

That’s it!  A very simple way to prepare a great dish.  Like I said you can experiment with the seasonings and find one that is your favorite.  Eat up and enjoy!

Creamy Tomato Soup

Hello everyone!  I know that I haven’t posted in awhile, but with the holiday season upon us, things get just a bit crazier.  I also like to spend time with my friends and family, away from the computer and all other social media.  It’s nice to unplug and enjoy the company of real humans!  That being said, I do have a new recipe for you!  One of my favorite meals as a kid was tomato soup and grilled cheese.  I had a hankering for it the other day, but I wanted to make it in a healthier way (read: not from a can or with mounds of cheese).  I used cashews to add the creaminess to the soup and I think that this meal was a winner in the Dawson house! Plus you can make it in the slow cooker, what’s better than that?

Creamy Tomato Soup with Grilled Cheese

  • photo (49)2 cups raw cashews
  • 2 cups water
  • 1 large onion, diced
  • 4 cloves garlic, minced
  • 3 carrots, peeled and diced
  • 2 stalks celery, chopped
  • 4 cups diced tomatoes (about 2 cans worth)
  • 1 tbsp oregano
  • 1 tsp dill weed
  • 1 tsp basil
  • 1 tsp cumin
  • 1 tsp coriander
  • 1 tsp curry powder, optional (but it adds a really nice flavor)
  • 1 tbsp fresh parsley

1. Place cashews and water in a bowl and soak for at least an hour or overnight if you have the time.  Using an immersion blender, blender, or food processor, blend the cashews and water until they are smooth.  Set aside

2. Saute all your vegetables except for the tomatoes, for about 7-10 minutes.  Place everything in your slow cooker and mix well.  Cook on low for 6-8 hours.

3. If you would like a smooth soup, use your immersion blender to blend the soup to your desired consistency.  You can also leave it chunkier, totally up to you!

For the grilled cheese, my husband Adam made me some gluten free bread and I used my “cheese” sauce from the taco casserole.  I just omitted the chili powder.  You can make your grilled cheese however you like it best, but this was actually REALLY good and totally filled my craving.

In the next few weeks, I will try to regularly post on the blog, but there may be some days when I don’t.  Think of it as a winter vacation!  Go and enjoy the Christmas spirit and this soup!

Healthy Brownie Bites

Sometimes, you just need some chocolate.  Sometimes, that chocolate needs to come in the form of a brownie.  We all know that brownies are not the healthiest of treats, but they are delicious.  Have no worries though because the brownie bites will satisfy your chocolate/brownie craving without making all the not so good for you ingredients.  Plus they are the perfect snacking size!  With the holidays right around the corner, these are a quick and easy way to have tasty dessert on hand!

Healthy Brownie Bites

photo (44)

  • 1 cup tahini, ground sesame seeds (you could also use almond butter, but the tahini really enhances the chocolate flavor)
  • 3/4 cup canned pumpkin (not pumpkin pie filling)
  • 1 egg or 1 flax egg (1 tbsp flax meal and 3 tbsp water mixed together)
  • 1/3 cup honey or maple syrup
  • 1 tsp baking soda
  • 1/2 tsp salt, optional
  • 1 tsp cinnamon
  • 2 tbsp cocoa powder

1.  Preheat oven to 350.  Mix all the wet ingredients together and then whisk in the dry.  Make sure your batter is smooth with no lumps.

2.  In a mini muffin tin drop in about 1 tbsp of the batter.  Bake for about 15 minutes or until the middle of the bites are set.  Remove from oven and let cool before you pop them out of the tins.

See?  Super quick and easy way to get a brownie in your belly!  You could also make extra because these freeze really well.  Just pull them out of the freezer a few minutes before you want to eat them.  Eat, enjoy, and if you try them out let me know what you think!