Salted Caramel Chocolate Swirl Cookie Bars

Salted Caramel Chocolate Swirl Cookie Bars | Life Healthfully LivedWhew!  Yes that is a long name, but I had to get everything in there so you can understand just how awesome these things are.  I was really shocked when I came up with this recipe.  I had been experimenting with making caramel out of dates and after the caramel pieces that I had planned didn’t turn out as I had hoped, I thought about making a no-bake cookie bar.

These aren’t totally no bake, you do have to cook the cookie base, but that takes less than 15 minutes.  The rest you just stir together, pour, and swirl!  Which makes this perfect if you realize at the last second you said you would bring a dessert to that Christmas party you’re going to.Salted Caramel Chocolate Swirl Cookie Bars | Life Healthfully Lived

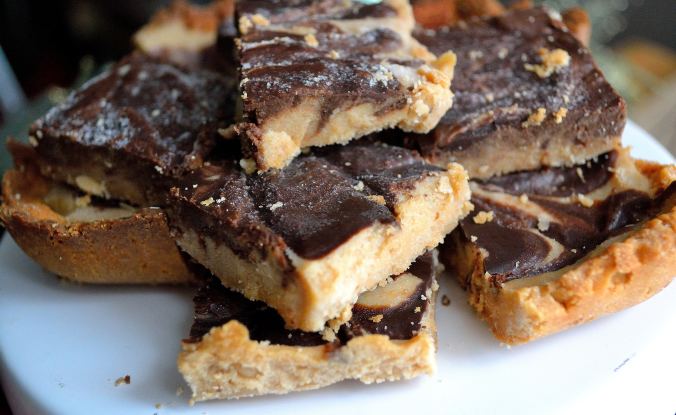
I have a few other Christmas-y recipes and posts coming your way next week before the big day, so be on the lookout for those.  I plan to spend the majority of my weekend in the kitchen.  The only time that I will be out and about is to go see the new Star Wars movie with my husband.  I have been getting a countdown for about two weeks now, so I think the man is excited.  To be honest, I am too.  While I might not be as passionate about Star Wars as he is, I really do enjoy the movies.

So if you’re going to see the movie this weekend, enjoy!  Then come home and make some hot chocolate and eat these salted caramel chocolate swirl cookie bars!  If the empire, hot chocolate, and cookie bars don’t put you in the Christmas spirit… you may have already crossed over into the dark side.

Salted Caramel Chocolate Swirl Cookie BarsSalted Caramel Chocolate Swirl Cookie Bars | Life Healthfully Lived

Cookie Base- slightly adapted from this recipe by Plated with Style

  • 3/4 cup coconut flour
  • 1/2 cup solid coconut oil (if your oil is liquid-y, put it in the freezer for a few minutes)
  • 1/4 cup maple syrup
  • 1/2 tsp sea salt
  1. Preheat oven to 350.  In a blender or food processor, pulse all of the ingredients together until you have one dough ball.
  2. Grease an 8 x 8 pan with a little more coconut oil.  Don’t skip this step or you will end up with crumbled mess.
  3. Take the dough ball and press it onto the bottom and a little up the sides of the pan.  You can use a cup if you’re having a hard time rolling the dough out. Make sure you have a fairly even layer.
  4. Bake for about 9 minutes or until it is golden brown.  Remove from oven and let it cool before you pour the rest of the layers in.

Salted Caramel

  • 10 Medjool dates, pitted and soaked in hot water for at least 20 minutes (preferably overnight if you remember)
  • 1/2 cup full fat coconut milk
  • 6 tbsp liquid coconut oil
  • 1 tsp vanilla extract
  • 2 tsp almond butter (could use cashew or peanut butter)
  • 1/4 tsp salt (a touch more if your nut butter isn’t salted)
  1. While the cookie layer is baking, make the caramel and chocolate layers.
  2. Make sure that your dates have been either soaking overnight or in boiling hot water.  You want to be able to remove the skins easily.
  3. Once your dates are done soaking, slip the skins off.  Most of them will slide right off, a few might give you a little fight.  As long as you get most of the skin off you should be just fine.
  4. Put the dates and the coconut oil into a blender and blend until you have a smooth and creamy paste.  You may have to scrape down the sides a few times before everything comes together.
  5. In a bowl, combine the date paste and the rest of the ingredients.  Mix until everything comes together.

Chocolate SwirlSalted Caramel Chocolate Swirl Cookie Bars | Life Healthfully Lived

  • 4 oz dark chocolate (I used 100% chocolate)
  • 2 tbsp liquid coconut oil
  • 1-2 tbsp maple syrup (if you used 100% chocolate like I did)
  1. In a medium bowl, grate the dark chocolate so you have little shreds.
  2. Add the coconut oil and maple syrup and stir.
  3. In the microwave or a double boiler, melt the chocolate until it is all melted and smooth.

Putting It All Together

  1. Once the cookie layer has cooled, pour in the salted caramel and smooth evenly over everything.
  2. Pour in the chocolate swirl over the top.  Using a chopstick, toothpick, or butter knife, swirl the chocolate throughout the caramel layer.
  3. Place the pan in the freezer for at least 30 minutes so the caramel and chocolate harden.
  4. To serve, Run a butter knife under hot water for a little bit and slice the bars, wiping the knife clean each time.

Ok, I know you’re panicking at this point because this does NOT look like a simple recipe.  Trust me, this comes together a lot faster than it seems.  I finished making this in about 30 to 40-ish minutes.  And  once you taste these bars, you’ll forget about this super long list.Salted Caramel Chocolate Swirl Cookie Bars | Life Healthfully Lived

Have a great weekend friends and may the force be with you!

DIY Wednesday: Gluten-Free Pie Crust

IDIY Wednesday: Gluten-Free Pie Crust | Life Healthfully Lived have another holiday edition of DIY Wednesday for you guys today.  Pie is eaten all year round, but I think that it’s most special around the holidays.  From pumpkin to pecan to sweet potato pie, there are some pretty delicious options.

Pies are a little difficult though if you have to stay away from gluten.  The store bought versions can taste a little (ok, a lot) like cardboard plus they are pretty expensive compared to the regular pie crusts.  Homemade gluten-free pie crusts are better, but can sometimes call for ingredients that you might not usually have on hand.DIY Wednesday: Gluten-Free Pie Crust | Life Healthfully Lived

I made this simple one with a pie that my mom made for Thanksgiving.  It was a crustless pumpkin pie and while it was really good, it needed some type of crust.  The beauty of this crust is that you can use it raw or cooked so if you have a tart or treat that you don’t need to bake but still want a crust, you can use this.  It also holds up to baking and adds a nice sweet flavor to any pie.

If you’re looking for a quick crust for your baked goods, try this gluten-free pie crust!

Gluten-Free Pie CrustDIY Wednesday: Gluten-Free Pie Crust | Life Healthfully Lived

  • 10 Medjool dates, soaked in water if needed
  • 1/3 cup almond flour
  • 1/2 cup pumpkin seeds
  • 1/3 cup chopped walnuts
  • 1 tsp cinnamon
  • 1/2 tsp sea salt
  1. If your dates aren’t, soak them in some hot water for 10 to 15 minutes.  Drain (save the water) and slice them in half removing the pits.
  2. Pulse the dates in a food processor or blender for a few minutes until they come together in one ball
  3. Add the rest of the ingredients to the processor and pulse until everything comes together.  If it is too dry add a tablespoon or two of the date soaking water.  If it’s too wet add a little more almond flour or pumpkin seeds/walnuts.
  4. Place the date mixture into the fridge to cool for at least an hour.  This makes it easier to handle when you put it into your pie tin.
  5. Once the date mixture is cool, grease your pie tin well.  Then, press the date mixture into the bottom of the tin and up the sides.  Make sure there are no bare spots.

You can keep it in your fridge if you will be using it later that day, in the freezer if you are going to use it later in the week (just let it thaw a bit before you use it), or pour in your filling and use it right away!DIY Wednesday: Gluten-Free Pie Crust | Life Healthfully Lived

What is your favorite kind of pie to make/eat this time of year?

Holiday Baking

I’ve said time and time again, I am not a baker.  I’m more of a create things on the fly, see if this flavor works with that one, throw a little more of this in there, wibbly-wobbly home cook.

You can’t be a wibbly-wobbly baker.Holiday Baking | Life Healthfully Lived

Baking is a science and if you put too much of one thing or not enough of the other, you end up with a pile of inedible mush.  Trust me.  I know from experience.

But something about Christmas time makes me put on my big girl baking pants and bust out baked good after baked good.  I usually pick one day and spend the whole day making cookies, candies, bars, cakes, and even a few pies.  My kitchen is a disaster afterwards, but I end up with quite the mountain of sweet treats.  Which leads me to my question for the day:

What do you do with all of those baked goods?Holiday Baking | Life Healthfully Lived

The fat kid in me wants to shove them all in my mouth at once and wash it down with a big ol’ glass of eggnog.  Dairy-free of course.  Come on, I’m not an unhealthy beast.  I can almost justify this gluttony with the fact that I make “healthy” treats.  I don’t use refined sugar, I try to use real food ingredients where I can, and most of my baking is done without dairy.

But they are still treats.  Desserts.  Sweet things.Holiday Baking | Life Healthfully Lived

And you can overdo it even with “healthy” treats.  Eating one cookie can lead to eating five cookies, can lead to eating all the desserts.  Again, trust me.  I know from experience.  I’ve also gone to the other extreme and completely refrained from eating any treats at all.  That is almost as damaging because you feel like you’re missing out and overeat on everything else.

Plus, what fun are the holidays without some Christmas cookies?

So, in my household, I try to strike a good balance.  I still go on my big Christmas bake-a-thon, and I still eat a few of my favorites, but then I share the wealth.  I send some with Adam to take to work.  I give some to friends and family.  The building supervisor and neighbors get a tin of treats and I bring some along to family gatherings.  That way I’m not tempted to turn into the Christmas cookie monster and I still get to enjoy the fun of holiday baking.Holiday Baking | Life Healthfully Lived

I also make sure that the rest of my diet is in balance during this time of year.  I try to get as much water as I can, eat plenty of vegetables, and keep up with my normal fitness routine.

Because Christmas doesn’t have to be an all or nothing time of year.  You don’t have to feel guilty about eating a cookie and you don’t have to feel the shame of eating all the cookies.  Find a balance that works for you and just enjoy the season!Holiday Baking | Life Healthfully Lived

How do you handle your sweet treats this time of year?

Italian Pasta Bake

MozzarellaItalian Pasta Bake | Life Healthfully Lived 
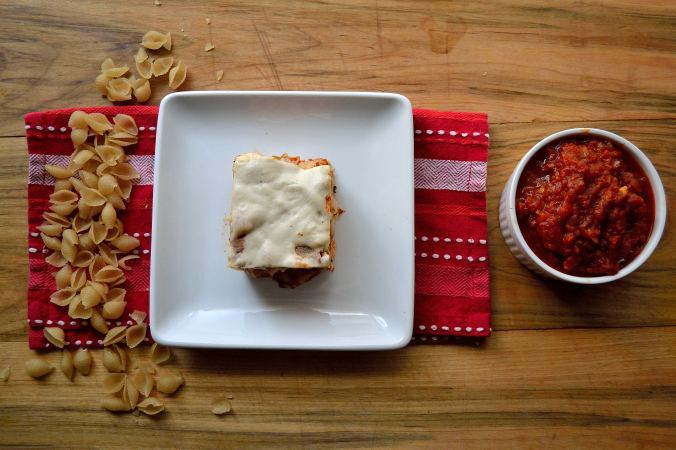
that isn’t really mozzarella.  Confusing I know, but totally awesome.  There are tons of recipes out there for fake cheese as well as plenty of products that you can buy.  My issue with store bought “cheese” is that it’s usually full of ingredients that I would rather not ingest.

I’ve made cheese sauce before for my Fusilli N’ Cheeze, but I wanted to make a cheese that was a little thicker.  My goal?  To try and recreate the mostaccioli that Adam made for me when we first started dating.Italian Pasta Bake | Life Healthfully Lived

About a month or so into our relationship, Adam decided he was going to cook for me.  He made me his mom’s mostaccioli and it was delicious.  It was super simple, but watching him make that meal for me was one of the first times that I started to fall in love with him.  When I stopped eating gluten and dairy, mostaccioli kind of went out the window. But not anymore!

Don’t be freaked out by making “cheese” that isn’t really cheese.  It isn’t difficult and there really aren’t any weird ingredients unless you think tapioca starch is weird. It isn’t.  It’s just a thickener and helps make this cheese stretchy.  You could also use potato starch, but I like tapioca better.  Once you make the cheese, this is a really fast meal and a great one to prep early and pull out for a quick weeknight meal.

Not-Mozzarella, Mozzarella Italian Pasta Bake | Life Healthfully Lived

  • 1/2 cup raw cashews, soaked in warm water overnight
  • 1 tsp apple cider vinegar
  • 1 tsp roasted garlic
  • 1/2 tsp salt
  • 1 tsp olive oil
  • 2 1/2 tbsp tapioca starch (or potato starch)
  • 1 cup hot water
  1. Add everything to a blender and blend for 2 to 3 minutes until it is completely smooth.
  2. Pour the mixture into a medium saucepan and heat over medium-high heat.  Cook while constantly stirring.  After a few minutes, the mixture will start to thicken.
  3. Turn the heat to low and keep stirring it until it is very thick and stretchy.  You can use it right away or keep it in an airtight container in the fridge for 2 to 3 days.

Italian Pasta BakeItalian Pasta Bake | Life Healthfully Lived

  • 1 batch of Not-Mozzarella, Mozzarella
  • 1 batch of my tomato sauce
  • 1 package of gluten-free pasta, I used brown rice shells
  1. Preheat oven to 350.  Cook your pasta according to the directions on the package.  Drain and set aside.
  2. Get a 9 x 13 casserole dish and spoon a thin layer of tomato sauce on the bottom.  Next, put a layer of pasta and then top with tomato sauce.  Spread some of the cheese on top of that.
  3. Keep layering the pasta, sauce, and cheese until it’s gone.  Cover the dish with aluminum foil and bake for 25 minutes.
  4. Remove from oven and take off the foil.  Cook for another 5 minutes until the cheese on top is starting to brown on the edges.
  5. Take out of the oven and let it cool for 10 minutes before you serve it.Italian Pasta Bake | Life Healthfully Lived

DIY Wednesday: Mushroom Gravy

IDIY Wednesday: Mushroom Gravy | Life Healthfully Lived 
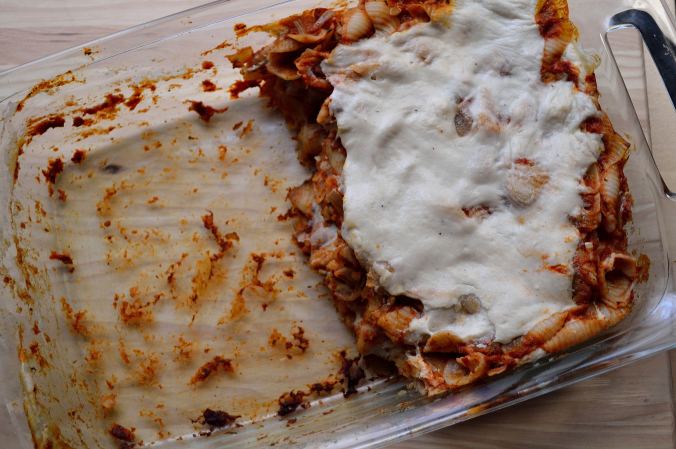
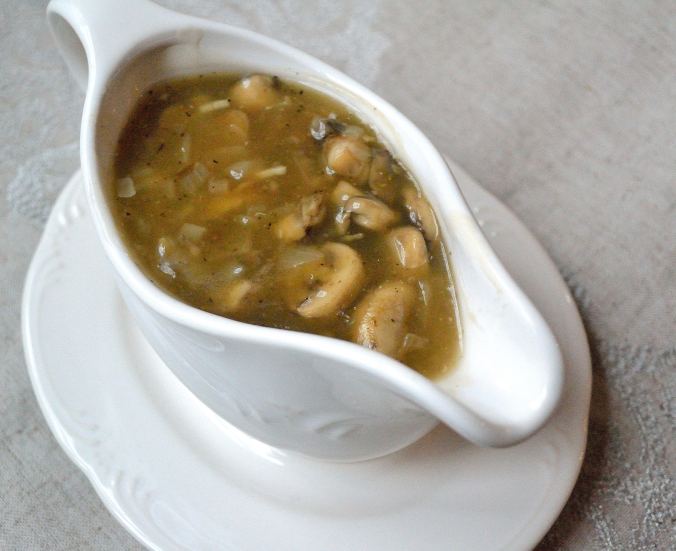
have another holiday edition of DIY Wednesday for you today: gravy.  After the ganache last week, I thought we would go savory today.  I know it’s a little late for Thanksgiving, but there are still plenty of meals this season that will warrant gravy.  I wanted to show you how easy it is to make your own gravy because I was just as surprised when I learned.

When I was younger, gravy was bought in a jar.  My mom pretty much made the rest of our Thanksgiving feast from scratch, but the gravy and the jellied cranberries came from a jar and a can.  So in my tiny kid mind, that is how all gravy was made.  In a jar and then heated up on the stove.DIY Wednesday: Mushroom Gravy | Life Healthfully Lived

As I got older and started cooking for myself and reading cookbooks, I saw recipes for gravy.  What?! You can make this from scratch?!  Yes.  Yes, you can.  And it is really easy.

I’m making a mushroom gravy for those of us who don’t eat meat, but you can make gravy from pretty much any cooked meat you have following this recipe.  Whichever you choose, it’s really simple and so much healthier to make your own gravy.  It’s also cheaper which is a must during the holiday season!

Mushroom GravyDIY Wednesday: Mushroom Gravy | Life Healthfully Lived

  • 8 oz mushrooms (I used baby bellas), sliced
  • 2 large cloves of garlic, minced
  • Olive oil
  • 1/3 cup onion, minced finely
  • 1 to 2 tbsp coconut aminos, liquid aminos, or soy sauce
  • 1/2 cup vegetable broth
  • 2 tbsp white wine vinegar
  • 1 tbsp potato starch or tapioca starch (I used potato)
  • 1 1/2 cup cool water
  • 1 tsp parsley
  • 3 tsp fresh rosemary leaves
  • salt and pepper.


  1. Heat a little olive oil in a medium skillet over medium-high heat.  Add the onions and mushrooms and saute for about 5 minutes until the onions are soft. Sprinkle in a little salt and pepper then add the garlic and saute for another minute.
  2. Add the coconut aminos or soy sauce, white wine vinegar, and the vegetable broth.  Cook until the liquid has reduced by about half and the mushrooms have gotten smaller.
  3. While the mushrooms are cooking make the starch slurry.  Combine the 1 and 1/2 cups water and 1 tablespoon of starch and mix together with a fork.  Make sure the mixture is smooth and all lumps are gone.
  4. Pour the slurry into the skillet and stir to mix everything together.  The slurry will start to thicken as it cooks.  Add the parsley and rosemary.  Taste and add salt and pepper to your taste.
  5. Once the gravy is thick enough, pour into a gravy boat or bowl and use immediately.

Gravy needs to be used right after it’s made, because unlike its store bought counterpart it doesn’t last forever.  It’s much better fresh and since it’s so easy to make you can whip it up right at the end of your cooking.DIY Wednesday: Mushroom Gravy | Life Healthfully Lived

What is your favorite holiday dish to make from scratch?