Lately, collard and beet greens have become an obsession for me. I am just really digging them, especially lightly sauteed with just a little garlic, olive oil, and lemon juice. I know that not everyone is as super excited about dark leafy greens as I may be, but I do know that dark leafy greens are nutritional powerhouses and you should be eating more of them! While you might not be as enthusiastic about eating plain greens like me, this recipe will make you want to eat all the greens! They are my version of the lettuce wraps you can get at P.F Changs mixed with cabbage rolls. Yeah, we’ll go with that! The other nice thing is you can use whatever you have on hand for the filling, you could even add ground turkey or chicken if you were so inclined. Go give them a try!
Asian Collard Wraps
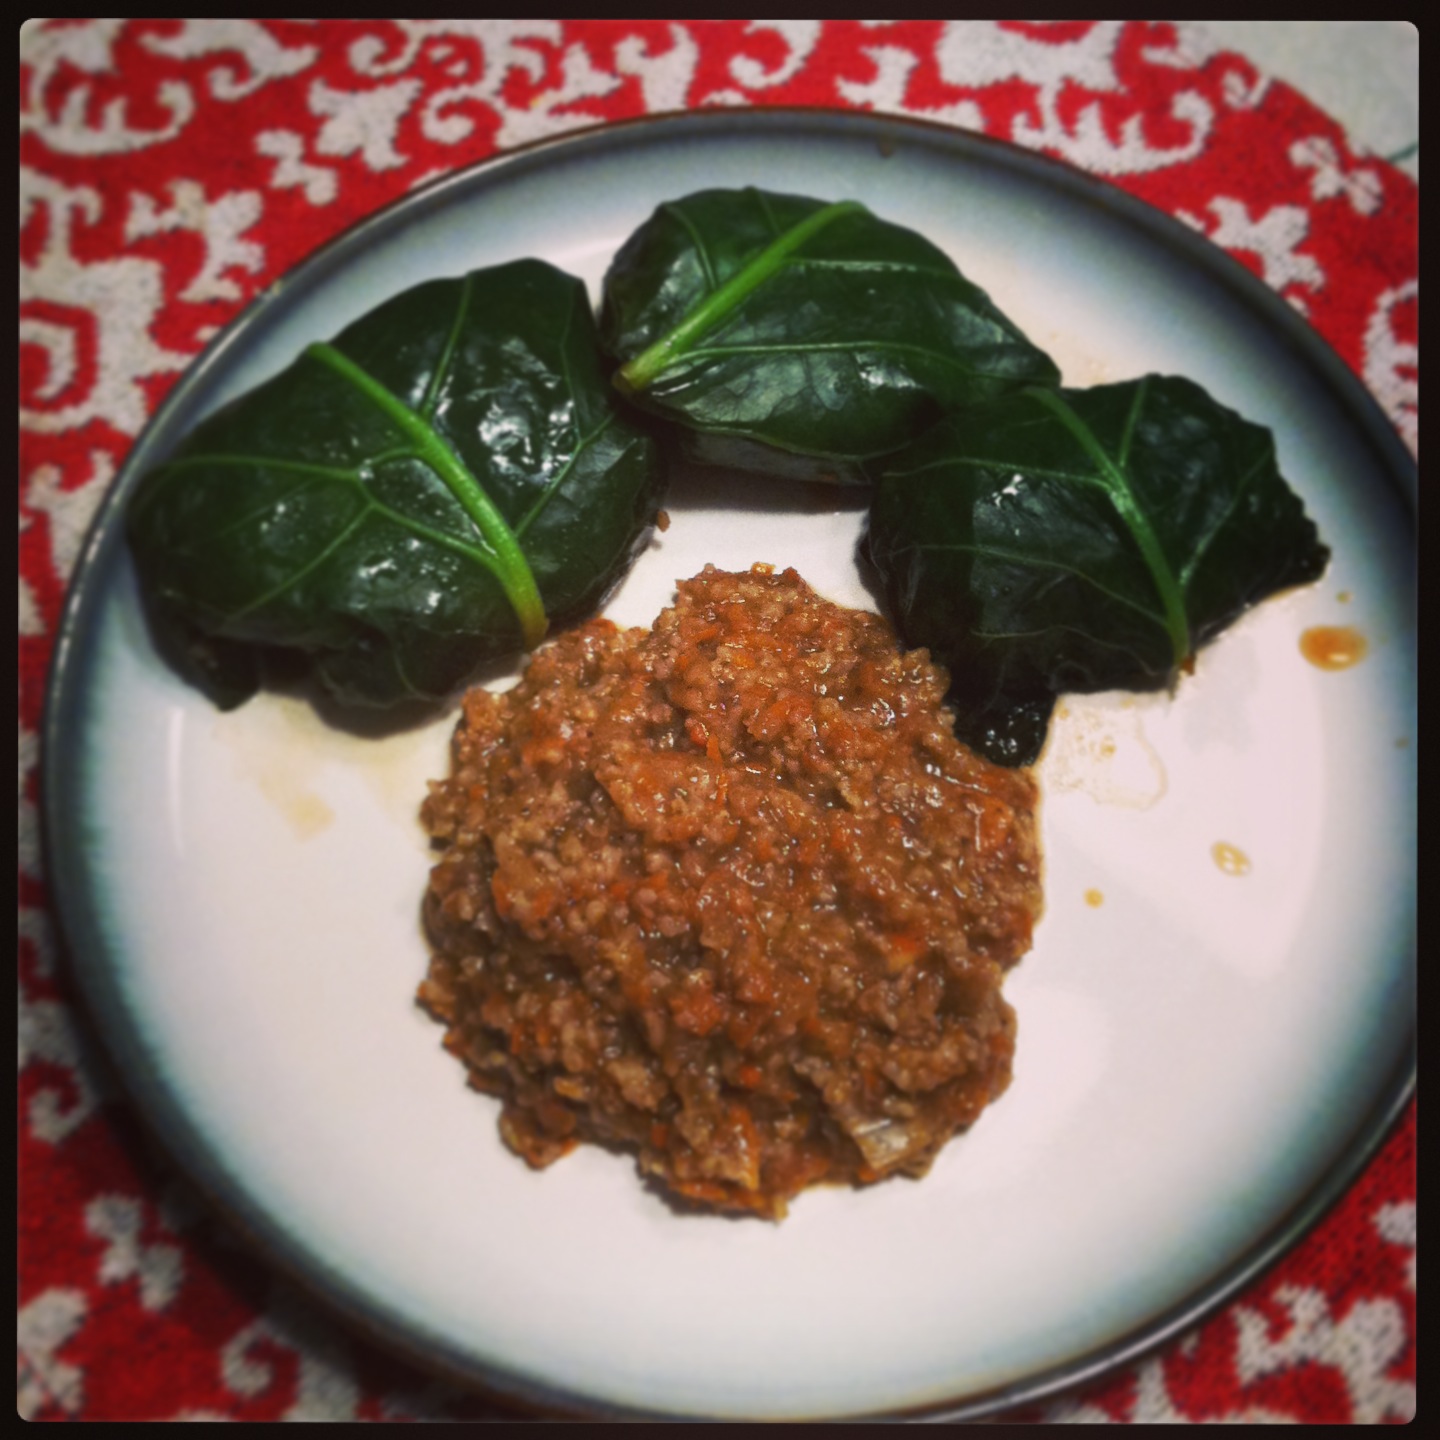
Wraps with leftover filling on the side!
- 1 bunch of collard greens (or cabbage)
- 1/2 cup millet, brown rice, quinoa, or whatever grain you have on hand (I used millet)
- 2 shredded carrots
- 2 tbsp fresh ginger, minced (or 2 tsp powder)
- 1 medium onion, diced
- 3 cloves garlic, minced
- 2 tsp sesame oil
- 1-2 tbsp liquid aminos, soy sauce, or coconut aminos
- 1 batch of my sweet and sour sauce (optional)
1. First, wash your collard greens and cut off the stems. If you are using cabbage, peel off the leaves keeping them as whole as possible. Bring a large pot of water to boil and get a large bowl full of cold water. Once the water is boiling, dunk your leaves into the water for a few minutes until they are nice and pliable. Then immediately place them into the cold water. Once you do this with all the leaves place them on a paper towel to dry.
2. Place your 1/2 cup of millet or whatever grain you are using, and 2 cups water into a medium saucepan. Bring to a boil and then cover and simmer for 10 to 15 minutes until the millet is cooked through. Add in the carrots, ginger, onion, garlic, oil, and liquid aminos. Stir so everything is combined and heat on low for about 3 minutes.
3. Remove your filling from the heat. Place a heaping tablespoon full into the middle of your leaf and then roll up the leaf like a burrito so that all sides are closed. Continue with all the leaves until you run out of filling or leaves.
Now you could eat these just as is, but I kicked it up a notch and cooked them in a large pan with my sweet and sour sauce. It really added a nice flavor. All you have to do is cook the sauce in the large pan, then add in your wraps. Cook until the wraps are heated through, about five minutes. Now go and eat those delicious and healthy collard greens!