Flashback Friday Recipes

There are two reasons that I’m doing this post:

  1. Winter lighting in my apartment is KILLING me and my ability to get some good pictures

AND

    2.  I have to relearn picture stuff.

Don’t you hate it when you finally have something down that you used to be really crappy at and then something beyond your control makes you crappy again?  Yeah, me too.

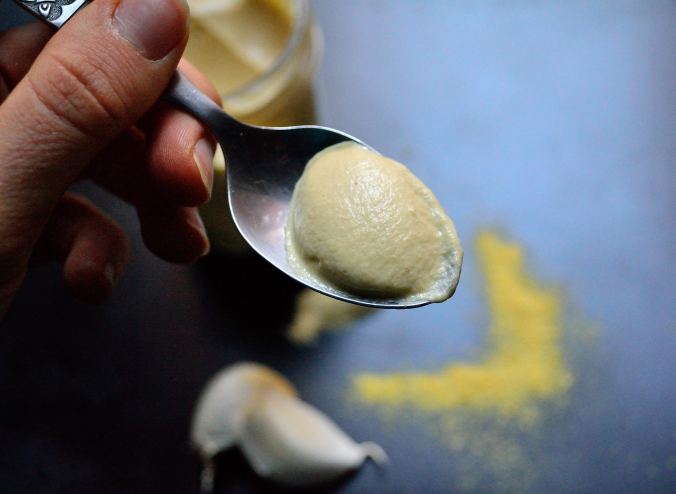
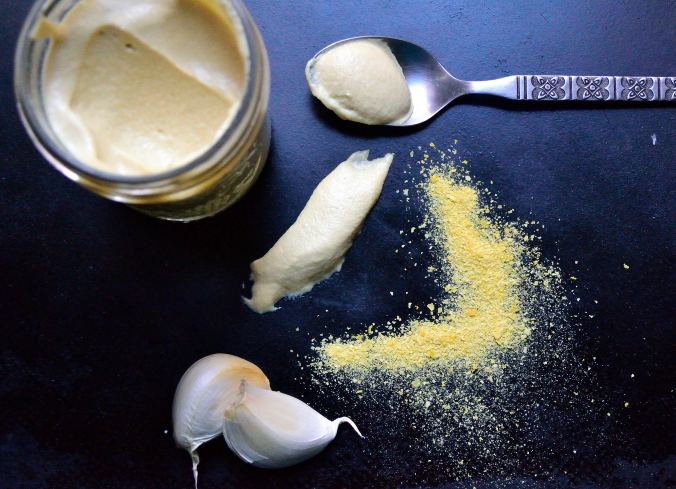
Recently I had to get a whole new photo editing program and I feel like I am back at square one with my pictures.  I have to go back and relearn everything that I already knew how to do in my old program with this new one.  Which is super frustrating because I felt like I had finally gotten into the swing of things when it came to food pictures.  Taking good pictures has been a weakness of mine and I keep trying to improve so that my blog can look all pretty for you guys.  Now I have to take some time and get back to where I was.

In the same vein, I’m battling some pretty bad light here in my apartment.  I live on the interior of my building which means that I have two windows both of which face brick walls and get no direct sunlight.  It’s kind of like living in a cave, especially in the winter when the light is already scarce.  That means natural light (a food blogger’s best friend) is very hard to come by here at Casa Dawson.

What is the point of all this rambling?  To tell you there is no brand new recipe for today.  I’m teaching myself some new photo stuff and doing everything I can to get as much good light as I can on the recipes I do have to share.  But fear not, I’m not leaving you totally recipe-less.  I thought it would be fun to bring back some old recipes from when I first started this blog.  It’s kind of fun to see where I came from and where I am now.  For the most part, the recipes are delicious and the pictures are horrendous.  But it’s all about improving right?

At least I don’t take pictures for the blog with my iPhone anymore….

Anyways, here are some Flashback Friday recipes for you and I promise I’ll be back with more new stuff next week!

Slow Cooker Minestrone SoupFlashback Friday Recipes | Life Healthfully Lived

Stir Fry With Spicy Peanut SauceFlashback Friday Recipes | Life Healthfully Lived

Eggplant LasagnaFlashback Friday Recipes | Life Healthfully Lived

Baked Falafel with Tahini SauceFlashback Friday Recipes | Life Healthfully Lived

Turmeric Scented Mushrooms and Brown Rice Noodles

https://lifehealthfullylived.wordpress.com/2013/11/08/healthy-brownie-bites/

Crispy Coconut Avocado FriesFlashback Friday Recipes | Life Healthfully Lived

Healthy Brownie Biteshttps://lifehealthfullylived.wordpress.com/2013/11/08/healthy-brownie-bites/

Creamy Avocado Fettuccine

I am really into avocados lately.  I buy a big bag at the beginning of the week and add them to my smoothies and soups and anywhere else I can squeeze them in.  They make things creamy and delicious.  Plus they are full of good for you stuff.Creamy Avocado Fettuccine | Life Healthfully Lived

People sometimes shy away from avocados because of the fat content, even though I think most understand it’s good fat.  Fat still scares people because it just makes sense that fat would make you fat.  Don’t worry, I get it.  You want to eat the best food for your body as possible and you don’t want to gain weight.  Don’t fear fat.  Trust me, fat is good and it will help you reach your goals all while being super tasty.

Now, don’t go hog wild on fat.  Too much of anything, even a good thing like fat is a bad thing.  But start including it in your diet and don’t feel guilty or worry.  And if you’re looking for a new way to use avocados other than guacamole, try this creamy avocado fettuccine.

It’s a great weeknight dinner because it comes together in less than 20 minutes.  And it’s good enough that no one will realize that there is no dairy in the sauce.  You can even make it paleo and serve it over vegetable noodles instead of brown rice ones.  It tastes good both ways, trust me, I tried it.

Creamy Avocado FettuccineCreamy Avocado Fettuccine | Life Healthfully Lived

  • 2 Hass avocados
  • 2 tbsp cheesy garlic spread
  •  juice of half a lime
  • 1 tbsp olive oil
  • 1/2 tsp chipotle chili powder OR 3 to 4 fresh chipotle chili’s
  • 1/2 tsp sea salt
  • 1 can full-fat coconut milk
  • 1 package brown rice fettuccine OR spiralized vegetable noodles (butternut squash & sweet potato work really well)
  • 2 to 3 tbsp fresh cilantro
  1. Cook the fettuccine according to the directions on the package, drain, and set aside.  Or if you’re using vegetable noodles, prepare those by cooking on a large baking sheet at 400 for 8 to 10 minutes or sauteing in a large pan with a lid until soft.
  2. Meanwhile, slice the avocados in half and remove the pit.  Scoop out the flesh into a blender.  Add the rest of the ingredients except the coconut milk.  Pulse a few times until everything is pretty mixed together.
  3. Add the coconut milk a few tablespoons at a time until you reach your desired consistency.  I ended up using about 1/3 cup for a fairly thick but still pourable sauce.
  4. Once your sauce is at the right consistency and the noodles are done, add them back to the pot they cooked in and pour all the sauce on top.  Stir everything together until all the noodles are coated.
  5. Sprinkle in the cilantro and stir just to combine.  Serve it up and enjoy!

This recipe is probably going to make it into the regular rotation because it’s quick, healthy, and tastes so darned good! Creamy Avocado Fettuccine | Life Healthfully Lived

DIY Wednesday: Cheesy Garlic Spread

Cheese and garlic are two words that need to be put together as often as possible.  Who doesn’t want something cheesy and garlicky?DIY Wednesday: Cheesy Garlic Spread | Life Healthfully Lived

People who are lactose intolerant, vegan, or a vampire.  While I can’t make a cheesy garlic spread that would be suitable for a vampire, I can make one for those people who don’t or can’t do dairy.

This spread could not be easier to put together, especially if you already have roasted garlic on hand (which you should ALWAYS have roasted garlic on hand), and it goes with everything.  On top of soup or stew, in tacos, as a salad dressing, on crackers, as a vegetable dip.  The possibilities are endless! Heck, eat it with your finger.  I won’t judge.

Make sure you have a batch of this on hand for Friday’s recipe because you aren’t going to want to miss that one.  It’s pretty awesome if I do say so myself.

Cheesy Garlic SpreadDIY Wednesday: Cheesy Garlic Spread | Life Healthfully Lived

  • 2/3 cup raw cashews, soaked in water overnight or very hot water for 4 hours
  • 1/3 cup full fat coconut milk
  • 2 tbsp roasted garlic
  • 3 to 4 tbsp nutritional yeast, depending on how cheesy you want it
  • 1 tsp sea salt
  • 1/4 tsp pepper
  1. Drain and rinse the cashews and place everything into a blender or food processor.
  2. Blend for 3 to 4 minutes until everything is completely smooth.  It will probably take less time if you have a high-speed blender.
  3. Store in an airtight container in the fridge for up to a week.

That’s it!  Now go put this on everything and save a little bit for later in the week! DIY Wednesday: Cheesy Garlic Spread | Life Healthfully Lived

Sweet Potato Hash

Sweet Potato Hash | Life Healthfully Lived
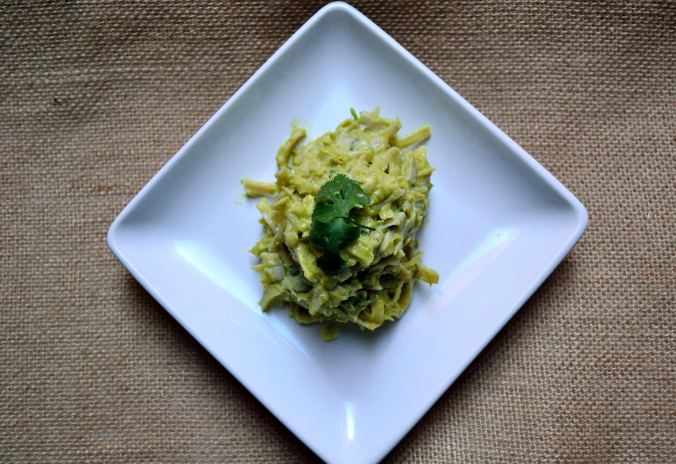
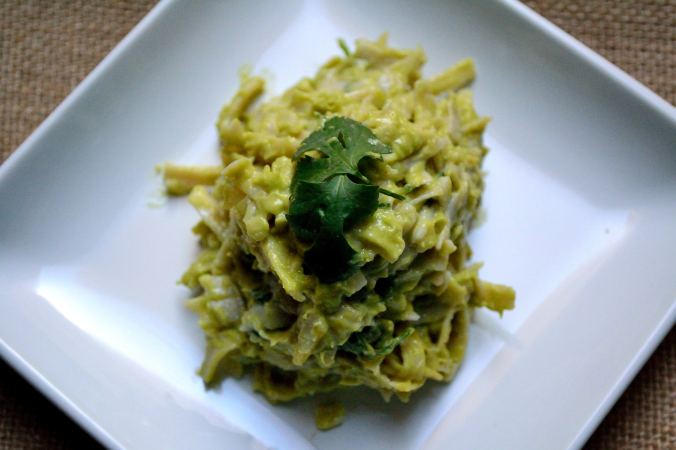
The time has come to share the sweet potato hash that won the hearts of my family over Christmas.  And they have promised me that they really do like it, not just because it was made by me and they have to pretend to like everything that I make.  It’s actually good.

Plus Adam keeps asking for me to make it which is a good indication that he really likes something.  Although the boy did use to but corn syrup on his pancakes and didn’t like mac n’ cheese as a kid.  Seriously, what kind of psycho doesn’t like cheese and noodles as a child?  My husband apparently.

Anyway, back to this sweet potato hash.  I was trying to think of something to make for a crowd for Christmas brunch that tasted good but was still a little healthy.  Gotta balance out those cookies!  I had a bunch of sweet potatoes lying around and instead of just roasting them up like I usually do, I decided to fancy them up a bit.  Ok, not that much but I added some bell peppers, onions, and cilantro and was amazed at how just a few ingredients made such a big difference.

So if you’re looking to change up your normal breakfast hash, give this sweet potato version a whirl.  Promise you won’t be disappointed!

Sweet Potato HashSweet Potato Hash | Life Healthfully Lived

  • 2-3 large sweet potatoes, washed and dried
  • 1 red bell pepper, diced
  • 1 yellow pepper, diced
  • 1 cup onions, diced
  • 2 to 3 cloves garlic, minced
  • 1 tsp Italian seasoning
  • 1 tsp smoked paprika
  • 1/2 tsp salt
  • 1/4 tsp pepper
  • handful of fresh cilantro, stems removed and chopped
  1. Once your potatoes are washed and dried, dice into small cubes.  You want to make sure they are fairly small and uniform inside so they cook properly.
  2. In a large skillet that has a lid, heat a little olive oil over medium-high heat.  Add the onions and saute for a few minutes until a little soft.  Add the bell peppers and saute for another 2 to 3 minutes.  Add the sweet potato cubes and half the minced garlic and mix everything together.
  3. Sprinkle everything with the Italian seasoning, smoked paprika, and a little salt and then cover with the lid.  Let the everything cook for about 15 minutes, stirring occasionally so the potatoes don’t stick to the bottom.
  4. Once the potatoes are fork tender remove the lid and add the rest of the garlic and seasonings.  Cook for another five minutes.  Turn off the heat and add the cilantro and stir to combine.Sweet Potato Hash | Life Healthfully Lived

This hash is awesome served with a poached or fried egg on top.  But then again, most dishes are better with an egg on top.  Tomorrow is Adam’s birthday so we plan to spend some time eating good food downtown and probably going to see Star Wars again.

What does your weekend look like?

DIY Wednesday: Better For You Banana Chocolate Chip Mini Muffins

DIY Wednesday: Better For You Banana Chocolate Chip Mini Muffins
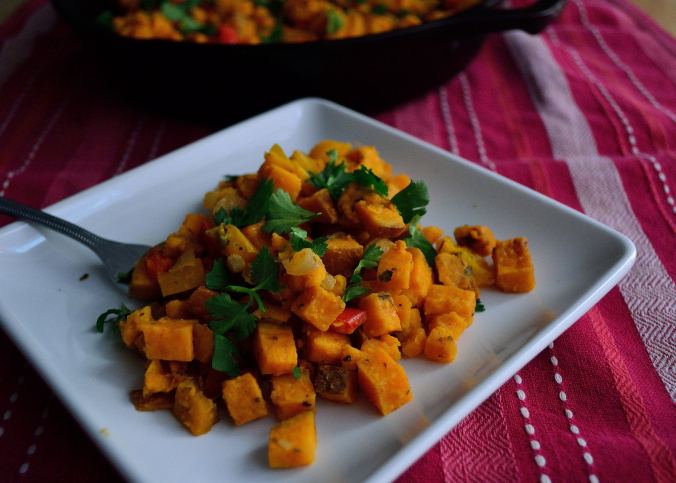
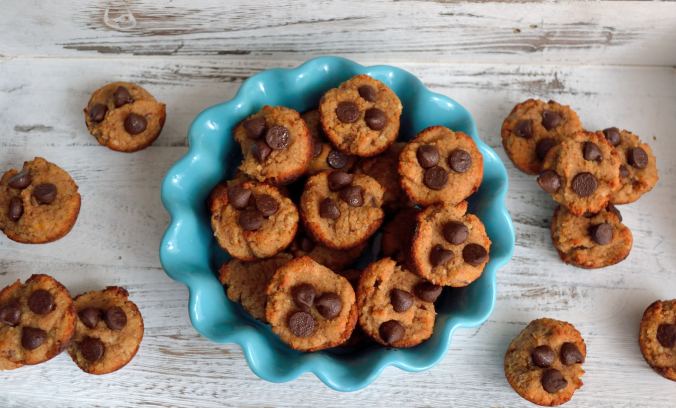
I was watching Friends the other day, a normal happening in my house and the two random episodes that I watched mentioned mini muffins.  This then made me think of the little packages of Hostess mini muffins that were all the rage in middle school.  You were someone if you had mini muffins.

Yeah, it was weird.

I usually did not have mini muffins because they were expensive and my mom wasn’t going to waste money on junk food.  Because let’s face it, muffins, even in mini form, are generally not a health food.  Especially when they’re made by Hostess.DIY Wednesday: Better For You Banana Chocolate Chip Mini Muffins

But boy are they delicious.  And something about them being mini made them even better.  Little food is always better.  That’s just science.  I decided to attempt to make a better for you mini muffin that would still taste good but wouldn’t be full of all this stuff.  That’s what’s in those little bites of happiness.  Yum….

My favorite muffin was always banana walnut but I decided to switch the walnuts for chocolate because duh, chocolate.  My version uses dark chocolate, but you can use whatever you have on hand.  I also decided to add just a few chips to the top rather than mix them throughout because I thought they would be just a little too big for mini muffins.  But you do you.  And you should do these mini-muffins.

Banana Chocolate Mini Muffins- gluten-free, dairy-free, soy-free, and egg-free.  I promise there is something in there! DIY Wednesday: Better For You Banana Chocolate Chip Mini Muffins

  • 1 1/2 cup almond meal
  • 3 tbsp coconut flour
  • 1 tsp cinnamon
  • 1 tsp baking powder
  • 1/4 tsp salt
  • 2 flax eggs (2 tbsp ground flaxseed and 5 tbsp water mixed together)
  • 1 large banana, very ripe
  • 4 tbsp almond milk
  • 3 tbsp maple syrup or honey
  • 1 tbsp coconut oil, melted
  • 1 tsp vanilla extract
  • handful of dark chocolate chips, optional
  1. Preheat your oven to 350 and mix together your flax egg and set aside. Line a mini muffin tin with muffin cups or grease with a little coconut oil.
  2. Put all of the dry ingredients into a large bowl and whisk together so there are no clumps.
  3. In another bowl, mash the banana so it is fairly smooth.  Add in the rest of the wet ingredients, including the flax eggs, and whisk with a fork to combine and smooth.
  4. Pour the wet into the dry and use a spatula to combine everything. Drop about a tablespoon of dough into each well.  These won’t rise a ton, so you don’t have to worry about them spilling over.  If you’re using chocolate chips, press about 3 or 4 into the top of each muffin.
  5. Bake the muffins for about 10 minutes and pull them out to check.  If they are brown around the edges and fairly firm in the middle you’re good.  If not, bake for another 2 minutes.
  6. Remove from the oven and let cool in the pan for a few minutes and then place on a cooling rack to cool completely.DIY Wednesday: Better For You Banana Chocolate Chip Mini Muffins

These will keep in an airtight container in the fridge for about a week or you can make a bunch and put them in the freezer to pull out whenever you need a mini muffin!

What were some of your favorite middle school snacks?