Misconceptions About Healthy

I believe that there is sometimes a common misconception when it comes to eating well:  healthy diets must contain organic foods.  They also assume that because of this idea, eating healthy is expensive.  These two ideas about a healthy diet can cause people to shy away from changing their current eating habits.  Either they don’t have the money to buy all organic all the time or they don’t even have access to organic food.  They keep eating the same way and tell themselves this is the only way that they can eat.  I’m here to say that this just isn’t true at all.  I want to help people see that a diet full of delicious and healthy food doesn’t have to be expensive and it also doesn’t have to be 100% organic.

Let’s start with the organic idea.  Thanks to marketing and media, the word organic has taken on the association of healthy and that just isn’t necessarily true.  Don’t get me wrong, I am not here to bash organic food.  I fully support the organic movement, but not everything you see labeled as organic is good for you.  I have talked before about the “health halo” that words like organic, gluten-free, and all natural assume.  But an organic candy bar is still a candy bar and a candy bar is not doing anything good for your health.  Sure, you can feel good that you aren’t eating pesticides or factory made preservatives, but don’t think that the organic candy bar is going to miraculously change your health.  Be careful in thinking that as long as everything you buy is organic, it’s healthy.  Packaged and processed organic food is still inferior to whole and real food.

Expense is the other issue that hinders people from changing their eating habits.  The fact is organic food is more expensive.  I wish that we lived in a world where organic practices were the norm and everyone could afford it.  Unfortunately that isn’t the case, but that doesn’t mean your health is doomed.  I don’t buy all organic food, yet I still manage to have a healthy diet.  We are on a tight budget and we can’t afford to buy all organic.  Many of you are probably in the same boat.  This doesn’t mean that you can’t eat well, it just means you have to be smart about how you shop.  When it comes to produce, you can use this chart to choose which foods to buy organic and which you can buy conventional.  Generally foods that you peel or discard the outer layer can be bought conventionally without too much worry.  Because I have a limited budget, I tend to favor those foods a little more.  I buy plenty of bananas and oranges and other citrus, but I also don’t worry too much about buying the other foods non-organically.  I just make sure to wash all my produce thoroughly.  In the end, a conventionally grown apple is still an apple and it will still trump processed food any day.

2013EWGPesticideGuidesml

That same idea translates to other foods as well.  If you can buy organic, that’s great, but don’t stress out about it.  As long as you are avoiding the food-like substances that you can find in the aisles of the grocery store, you can still have a healthy diet.  Check out this post and this post, to get some more tips on how to be a savvy and healthy grocery shopper.  The biggest key is to have a plan and know exactly what you need/want before you get to the store.

When I tell others that they need to eat whole or real foods, I don’t want them to immediately jump to the organic conclusion.  I don’t want people to think that I am saying the ONLY way to be healthy is to eat organically.  It isn’t the only way and no one should feel stuck in their eating habits because of money or availability.  There are ways to eat better, shop better, and ultimately feel better.  It’s totally ok if it isn’t an overnight transformation, as slow and steady wins the race.  When faced with the choice of what food to eat or buy, make the best choice possible available to you.  If that means buying the conventional lettuce, buy the conventional lettuce.  A conventional salad trumps organic junk food every time!

53020130026167

Once you pop…

No, this isn’t a post about Pringles.  Sorry!  But it is about popcorn, which happens to be one of my favorite snack foods.  I’m not a huge snacker anymore, but Friday and Saturday nights beg to have a big bowl of popcorn in your lap while you watch a movie.  I don’t have a recipe for you this Friday per say, but I do have a few ways that you can enjoy popcorn as a healthy (yes, healthy) and delicious snack.

First, let me be clear and say when I talk about popcorn I am NOT talking about movie theater popcorn covered in “butter” and salt nor am I talking about microwave popcorn that is also covered in “butter”.  I am talking about buying the actual kernels of corn and popping them yourself.  Before you stop reading and move on to other things because making popcorn yourself takes way too much time and energy, let me assure you it really doesn’t.  Making your own popcorn is a fairly simple and easy process.  The easiest way to make healthy and totally customizable popcorn is to pop it using an air popper and then add your own toppings.  This is how I make my popcorn and it is as easy as measuring out your popcorn, pouring it into the machine, and turning it on.  That’s it.  No extra oils or additives just delicious popcorn.  Most air poppers are fairly inexpensive and will last you a long time too.

Popcorn made in my air popper. Yum!

Popcorn made in my air popper. Yum!

Another way to make popcorn is on the stovetop.  In a large pot, heat a little oil (coconut oil is really good for this) and add in your kernels.  Shake the kernels occasionally and as the oil heats up your kernels will start to pop.  I’ve done this a few times and I recommend you make sure you keep an eye on the popcorn because once the kernels start to pop, it can get a little crazy.  If you’re not watching you might have a kitchen full of popcorn, which might not be a bad thing…..

For those of you who like to just put a bag of popcorn in the microwave and hit go, you can still do that too.  Place your popcorn into a paper bag and roll it closed.  Use the popcorn setting on your microwave and you’re good to go.  No added chemicals or preservatives, just popcorn!

Now that you know how easy it is to make popcorn on your own, how about some topping ideas? You can add pretty much anything your little heart desires and that is what makes popcorn such a great snack.  You can customize it to whatever craving you have at that time! For toppings try:

  • Salt and pepper. A classic flavor and really yummy
  • Garlic powder and Italian seasonings. A very savory treat
  • Nutritional yeast.  A healthy way to add a cheesy flavor and one of my favorite toppings
  • Cinnamon and nutmeg.  A nice and light sweet flavor
  • Pumpkin Pie spice.  Who doesn’t like all things pumpkin?
  • Dark chocolate or cocoa nibs.  Chocolate is a great popcorn topping.  Melt it first and drizzle it or add chips while your popcorn is hot and make melty clusters.
  • Cajun seasoning.  Like spicy? Then try some cajun or creole seasonings
  • Honey and peanuts. Ok, this might sound weird but this combo tastes an awful lot like cracker jacks.  Add in some warm honey and peanuts to your popcorn and stir to combine everything

There are seriously endless ideas when it comes to popcorn toppings.  Popcorn is a great snack that is light, fills you up, and satisfies the need to munch on something while relaxing at home.  So give homemade popcorn a try and see why I absolutely LOVE a nice big bowl of popcorn on the weekends!

Kitchen Nightmares

Life doesn’t always go according to your plan.  In fact, it likes to do it’s own thing regardless of what you would like to happen.  This concept has always been a source of struggle and stress for me.  I am a person that likes to plan and organize and know exactly what is going to happen.  I tend to get a little anxious (ok, make that a lot anxious) when things do not go according to my plan.  This is something that I have been working on and one of my goals this year is to be able to go with the flow more.  Well, life heard that and decided to throw me a curve ball this week.

Last Sunday my oven broke.  I know this might not seem like a huge problem to some, but I rely heavily on my oven.  Not only do I use it for dinner every night, on Sunday I usually do a lot of my meal prep for the week so that I have easy access to healthy food no matter what.  I was a little stressed last Sunday when I realized AFTER I had made a bunch of things to put in the oven that it wasn’t getting hot.  I was even more stressed when the repair guy came on Monday but wouldn’t be able to actually fix the oven until Tuesday.  And I might have had a small meltdown Tuesday night in the middle of cooking dinner when I realized that the oven was no longer regulating the temperature and my food was burning to a crisp, error codes on the oven were shouting at me, and all the smoke detectors were going off at once.

Luckily, my oven did not catch on fire... yet

Luckily, my oven did not catch on fire… yet

Yes, it has been a little bit difficult here in the Dawson kitchen this week.  My oven is still broken, but after my panic attack on Tuesday, I took a deep breath and realized everything was going to be just fine.  I could still eat and eat well, I would just have to get a little creative.  This is where having a well stocked pantry and freezer come in handy as well as having some know-how in the kitchen have really saved the day.  I wanted to share some of the tips and foods I had on hand so in case you have a kitchen nightmare, you can also have a back up plan and won’t have to worry about eating well.

Leftovers, leftovers, leftovers.  This was a big help to me this past week.  I usually make bigger dinners and use the leftovers for lunches or sides for other meals.  Having those extra servings of food helped to round out some of the meals I made this week so that my husband and I had full meals even without the food I usually prep on Sunday.  I also have a freezer full of soups, stews, and chilis that I have made in my slow cooker.  Again, it was really helpful to be able to pull a healthy meal out of the freezer and heat it up.  I’ve said it many times, leftovers are your friends and they have certainly saved my butt this week.

Beans, grains, and legumes, oh my!  Having a good stock of dried/canned beans, grains, and legumes like lentils on hand is another great way to make filling healthy meals.  You don’t have to use an oven to make these and they fill you up with tons of healthy fiber.  Plus they are easy to throw into any meal, and you can season them to your liking.  I usually always have black beans, chickpeas, white beans, and lentils on hand and throw them into anything from frittatas to lettuce wraps.  If you don’t have time to use dried beans, canned works well too.  Just make sure you read the label and rinse the beans before you use them.

Be flexible on cooking methods.  I learned this week that there are actually a lot of ways to cook things the way I like without using the oven.  For instance, I usually roast sweet potatoes in the oven but found out they taste just as delicious cooked in a cast iron skillet on the stove top.  Sauteing vegetables in a little EVOO tastes just as good, if not better, than roasting them in the oven.  I had to step out of my comfort zone and go to other methods of cooking this week and it has worked out pretty well.  Friday night I came up with a really yummy collard green wrap that I cooked on the stove top with a homemade sweet and sour sauce.  I would have never thought of that if I had my oven working.  Don’t be afraid to experiment in the kitchen and broaden your cooking skills.  You never know when you might have to switch things up.  Plus, it’s fun to eat your regular foods in a different way!

While I am really hoping that my oven will get back to normal this week, I have learned that I can survive (for a little while) without it.  I didn’t have to totally derail my healthy eating or go hungry just because my normal method of cooking wasn’t an option.  The same goes for you  Just because something may come up in your day to day healthy eating plan doesn’t mean you have to throw your hands in the air and resort to McDonald’s.  Take a second to assess what you have, be a little creative and flexible, and come up with a new eating plan for the time being.  If life were always easy, we would never learn that we have it in us to rise above the problems thrown at us.  Pretty neat lesson to learn from a broken oven, huh?

Have a great Monday everyone!

Lentil Meatloaf

Lentil Meatloaf

I have gotten a few requests for this recipe and since it is one of my favorite weeknight meals, I thought I would share it here!  This recipe is a lot like the meatball recipe I have posted here, but just a little different.  I usually do the prep work for this the night before or on the morning of the day I am going to eat it.  That way I can just throw it in the oven when I get home from work and not worry about it!

Lentil Meatloaf

Lentil Meatloaf


  • 1 cup cooked lentils
  • 1/2 cup rolled oats (gluten free if needed)
  • 2 large carrots, shredded
  • 2 tsp basil
  • 2 tsp oregano
  • 2 tsp parsley
  • 1 tsp thyme
  • 1/2 tsp rosemary
  • 1/2 tsp red pepper flakes (more if you like it spicier)
  • 1 medium onion chopped
  • 2 cloves garlic, minced
  • 1/4 cup vegetable broth or water
  • 2 tbsp liquid aminos or soy sauce

1. In a food processor combine lentils, oats, carrots, and all herbs and spices.  Pulse a few times to combine everything, but don’t turn it into a paste, you still want some texture.  Set aside

2. In a medium skillet, heat up some olive oil and saute onions until soft about 7 min.  Add in garlic and saute a few more minutes.  Add in your lentil mixture and cook until it starts to brown up.  About 10 minutes.

3.  Pour in your vegetable broth and liquid aminos or soy sauce.  Cook for about 10 more minutes or until most of the liquid has been absorbed.  Take the skillet of the heat and allow it to cool enough to handle it.  Pre-heat oven to 425.

4.  Grease a loaf pan with a little olive oil and once your lentil mixture is cool transfer it to the loaf pan.  Place aluminum foil over the pan and place in the oven.  Bake for 30 minutes.  After 30 minutes, remove the aluminum foil and bake for an additional 10 minutes.  Once it’s a little crispy on the edges, remove from the oven and let it cool for 5 minutes.  Slice it up and enjoy!


This is also a great meal to add in extra vegetables or use up stuff that you have in your fridge.  I’ve added green peppers, mushrooms, spinach, and fresh herbs as well.  I also sometimes pour leftover soup, salsa, or tomato sauce on the top for extra flavor.  Get creative and find the version that you really love!

Pumpkin Gnocchi

I’vePumpkin Gnocchi | Life Healthfully Lived 
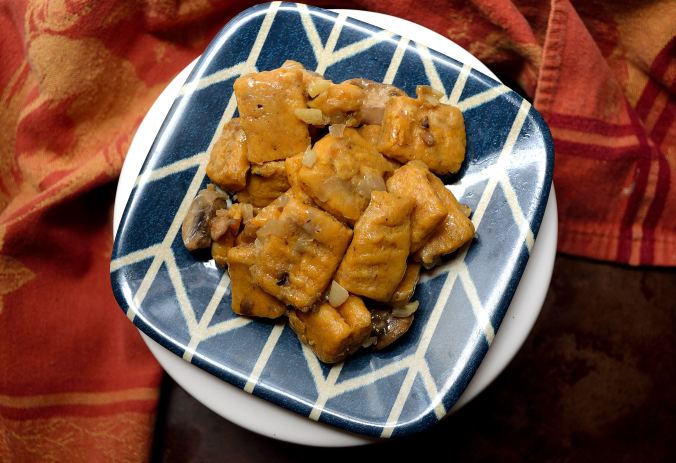
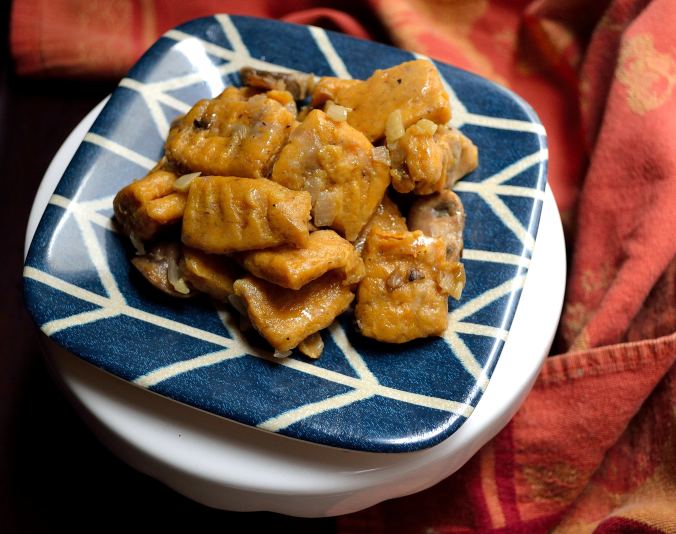
always wanted to make fresh pasta, but it also intimidates me.  I worried that I would mess it up and just get frustrated.  Well after mastering another one of my culinary fears, a poached egg, I decided that I could take on pasta.

I am pleased to report that it was a huge success and now one of my favorite meals!  This isn’t a typical gnocchi, I’ve tweaked it just a little.  Italian grandmothers everywhere will probably want to beat me with a wooden spoon, but I think this is pretty darn close to the real thing in texture and taste.

If you have some extra time on the weekend, give this recipe a shot.  I think that you will be surprised at how easy it is to make and how tasty it is to eat!

Pumpkin GnocchiPumpkin Gnocchi | Life Healthfully Lived


  • 1 cup brown rice flour, plus more for rolling the dough
  • 1/4 cup psyllium husk (my grocery store sells this in the bulk section, but check in the spice or health food section too)
  • pinch of salt
  • heaping 1/2 cup of pumpkin or butternut squash puree
  • 1/4 cup vegetable broth, plus more if dough gets too dry


  1. In a large bowl mix together all your dry ingredients.  Then add in your pumpkin and vegetable broth.  Mix everything together (I find a wooden spoon works best).  Once everything is incorporated, let your dough sit for about 5 minutes.
  2. The dough will be soft, but if it is too soft or wet add in a little more flour.  If it isn’t holding its shape or is too crumbly add in some more broth.  Once you get the right consistency, take the dough out of the bowl and knead it a little into a good size ball.  Don’t get frustrated if it takes a while to get the dough just right.  It takes a little time.
  3. Cut your dough into four equal sections.  Then take each section and roll it out into a medium size rope.  Don’t make it too thick or too thin because then it won’t cook properly.  Cut each rope into about 5 or 6 little gnocchi’s.  Press each one down with the tines of a fork.  Continue this process until all your dough is used.
  4. In a medium saucepan, bring about 4 cups of water to a boil.  Drop in 10 to 12 gnocchi at a time and cook until they float to the top.  Pull them out with a slotted spoon and continue until all the gnocchi is cooked.

Now at this point you could go ahead and eat the gnocchi as is, but I like to saute them with a little olive oil, sage, and minced garlic.  I have also sauteed them with pesto, which was delicious!  I would recommend keeping whatever topping you choose light.  A tomato or alfredo sauce might overwhelm the gnocchi, and that is just no good.  I know this recipe seems a little daunting, but trust me, you can do it!  The more you make it the easier gets and you can be enjoying fresh gnocchi all the time.  I haven’t tried it yet, but if you wanted to make an extra batch of gnocchi and freeze it after it has been boiled, I bet that would work.  Now go make some delicious pasta!Pumpkin Gnocchi | Life Healthfully Lived