Dairy Free Lasagna

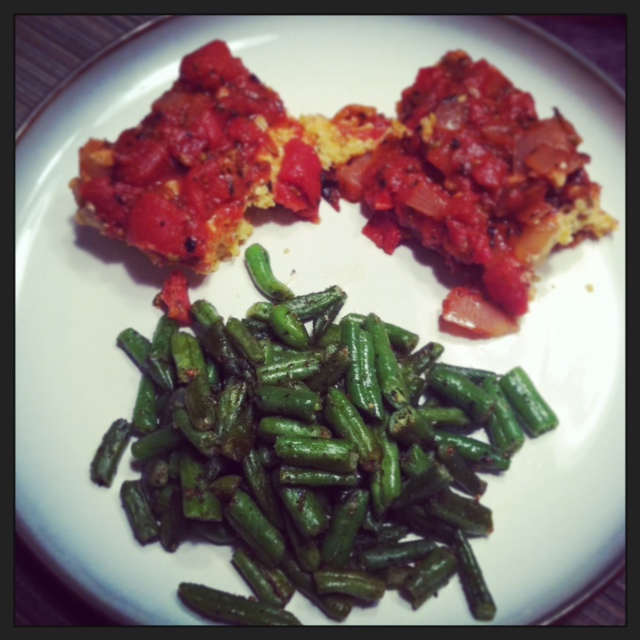
I don’t eat dairy anymore, and for the most part, I really haven’t missed it all that much.  But every once in awhile, I get a hankering for something gooey, cheesy, and delicious.  Those hankerings usually lead to creative and tasty recipes.  This one is no different.  You might be thinking to yourself, “There is no way that you can have a delicious lasagna without wonderfully yummy ricotta cheese.”  And I say to you, nay nay.  You can have a delicious lasagna without wonderfully yummy ricotta.  Just ask my husband who has no problem with dairy and would love it if there were more of it in the house (there’s none).  He loved this meal and devoured second helpings.  I may have too…


Dairy Free Lasagna 

DSC_0550

  • 1 batch of my tomato sauce, or store bought sauce (just make sure to read the ingredients!)
  • 1 package of lasagna noodles (I used brown rice to keep it gluten free but whole wheat would work well too)
  • 1 cup raw cashews, soaked in water overnight
  • 1/2 cup water
  • 2 tbsp lemon juice
  • 1 tsp salt
  • 1/2 tsp rice vinegar
  • 1 to 2 tsp italian seasoning
  • 1 to 2 cloves garlic

*If you’re using my tomato sauce, you can prepare it ahead of time and store in the refrigerator.  That way you can just assemble everything.

1.  Cook noodles according to instructions on the package.  Once cooked drain and set aside to cool a little bit.  You might want to undercook your noodles just a little so they won’t turn to mush when you cook them in the oven.

2.  While the noodles are cooling, drain soaked cashews and place into a blender or food processor.  Add in water, lemon, salt, rice vinegar, italian seasoning, and garlic.  Pulse to combine everything and then let it run to smooth everything out.  You can leave it a little chunky or totally smooth, it’s your preference.

3.  Preheat oven to 375 and get out a 9 x 13 casserole dish.  Line up the tomato sauce, noodles, and cashew cheese for easy assembly.  Pour a little tomato sauce on the bottom of the pan so the noodles don’t burn.  Then put a layer of noodles down, then a layer of cheese, and finally a layer of tomato sauce.  Keep layering everything until you run out of noodles.  You might have a little cheese and sauce leftover, that’s fine  You can use it to dress up another dish!

4.  Cover lasagna with aluminum foil and bake in the oven for 20 minutes.  Remove from oven and take of the aluminum foil.  Place back in the oven for another 5 minutes.  Take lasagna out of the oven and let it rest for 5 to 10 minutes (this helps it set so when you cut it, it doesn’t fall apart).  Cut into squares and eat up!

DSC_0555


This lasagna tastes even better the next day once the flavors have melded and really set.  So make sure that you leave some leftovers for later!

Roasted Chickpeas

Hello everyone!  I hope that you have had a great week and that you are starting to emerge from the caves of winter into the warmth (sort of) of spring!  I know that I haven’t done a regular post that doesn’t include a recipe in a while, but I have a few coming your way soon and once this move is over they will be coming more often!  Today I have a quick and healthy snack recipe for you.  I have been having a love affair with chickpeas lately, I can’t seem to get enough of them!  I eat them any way I can, in hummus, in salads, sauteed with greens, and roasted.  Roasted chickpeas are a great crunchy snack that you can season any way you like.  If you want a sweeter snack you can use cinnamon or nutmeg and if you are craving salty you can try garlic and pepper.  The options are endless!


Roasted Chickpeas

photo (66)

  • 1 cup dried chickpeas, soaked overnight and rinsed (you could use canned, but the texture isn’t quite the same)
  • 2-3 tbsp olive oil
  • seasonings of your choice (I like garlic, garam masala, cumin, or italian seasonings)
  • silpat or parchment paper (aluminum foil doesn’t work well with these)
  • large baking sheet


1. Cook your soaked and rinsed chickpeas in a large pot.  Bring to a boil, then lower the heat to a simmer and cook for about 20-30  minutes.  You want a firm texture, not too mushy.

2. Preheat oven to 425.  Place your silpat or parchment paper on to a large baking sheet.  You want the baking sheet to be big enough that the chickpeas will have enough room to spread out, otherwise you’ll get chewy not crunchy chickpeas

3.  Pat the chickpeas dry and place into a large mixing bowl.  Add in the olive oil (enough to cover the chickpeas, but don’t drown them in it) and whichever seasonings you’re going to use.  Mix well so everything is coated.

4.  Spread the chickpeas out in a single layer on the baking sheet, making sure they have a enough room between each and place in the oven.  Cook for about 15 minutes, then rotate the pan and cook for about 5 more minutes.  Keep an eye on them for the last 5 minutes so they don’t burn.


That’s it!  Remove them from the oven and let them cool a bit before you dig in.  I promise I have never burnt my fingers or tongue trying to eat these right out of the oven… Enjoy your tasty and healthy snack!  Have a great weekend and see you all on Monday!

Herb-Crusted Tilapia

I haven’t ever really posted a recipe with meat as the main ingredient mostly because I don’t eat meat.  I am a huge supporter of eating real foods that work best for you.  For some people that means including meat in their diet, I just happen to feel my best on a non-meat diet.  My husband, Adam, on the other hand tends to like having a few meat dishes a week.  One of the easiest and simple ways to do this in our house is to make fish.  Fish, and tilapia in particular, can be a nice clean slate when it comes to seasonings and flavor.  Tilapia is a very mild tasting fish so you can do anything you would like to flavor it.  This recipe is one of my go-to’s and I use it every week.  It’s simple and quick which are musts for a weekday dinner.  We buy big bags of individually wrapped frozen fish so it’s easy to just grab one filet and thaw it in the fridge before dinner.  So grab what ever fish is your favorite and give this recipe a try!


Herb-Crusted Tilapia

photo (64)

  • 1 filet tilapia or any other mild fish (sole or cod would work well)
  • 1 egg, beaten
  • 1 tbsp nutritional yeast
  • small handful of cashews (you could also use almonds or sunflower seeds)
  • 2 tsp oregano
  • 2 tsp basil
  • 1 tsp thyme
  • 1 tsp garlic powder
  • 1 tsp onion powder
  • 1/2 tsp red pepper flakes
  • salt and pepper to taste


1.  Beat your one egg in a shallow dish and set aside.  In a food processor or blender, pulse cashews (or other nut) a few times until they are broken up into small chunks.  You don’t want to pulse it into a powder.  Add in the nutritional yeast, oregano, basil, thyme, garlic, onion, and red pepper flakes.  Pulse a few times until everything is combined

2.  Dump your seasoning mix out onto a plate and spread it around evenly.  Line up your egg dish and your seasoning dish next to your stove.  In a small skillet, heat a little olive oil and heat over medium heat.

3.  Take your tilapia and add a little salt and pepper.  Then, dunk it into the egg and make sure it is coated.  Transfer the fish over to the seasoning plate and coat both sides evenly.

4.  Place the fish into the skillet and cook for about 2-3 minutes and then flip and cook for about 1-2 minutes, until the fish is flaky and opaque.

Serve over some brown rice or quinoa and add some vegetables on the side and you have a great and filling dinner!  You can obviously make more than one piece of fish if you are serving more than one person.  Just up your egg count to 2 or 3 and make enough seasoning to cover each piece.  I hope you enjoy and I will try to include more variety of recipes like this for you guys. Have a great weekend!

Polenta: A Quick Tutorial

Polenta is one of my favorite things because it is so versatile and super tasty.  Maybe you have heard of it or you’re scratching your head right now going, “Po-whatta?”  Polenta is a fairly simple dish made of cornmeal that has been boiled into a porridge like consistency.  After it has been boiled, polenta can be served in a variety of ways.  You can eat it as is, or you can let it set and bake, fry, saute, or even grill it.  It pairs well with so many things; one of my favorite ways to eat it is to top it with a mushroom gravy. Because it is so easy to make, polenta makes a really great side dish, but it can easily be made into the main course.  I have a few different recipes that utilize polenta that I plan on sharing soon, but I thought that I would just give you the basic steps to making polenta as well as a few easy ways to “fancy” it up.


Basic Polenta

Polenta topped with my favorite mushroom gravy

Polenta topped with my favorite mushroom gravy

  • 1 cup yellow cornmeal
  • 3-4 cups water/milk/non-dairy milk*
  • 1 tsp salt

*If you are going to be eating the polenta in it’s porridge like form, use 4 cups of your choice of liquid.  If you want to let it set and then use it, use 3 cups.  I like doing a mix of water and either almond or coconut milk.  Using milk makes it a little creamier than just plain water, but water works just as well.


1.  In a medium saucepan bring your water/milk and 1 tsp salt to a rolling boil.  Once at a boil, grab a whisk in one hand and your one cup of cornmeal in the other.  Slowly add the cornmeal to the water while constantly whisking with your other hand.  This helps to make sure there are no lumps.

2.  Turn the heat down to low and cook until the cornmeal is nice and thick and starting to pull away from the sides of the pot.  Stir often and watch out for polenta splatters!

3.  You can eat it as is at this point or you can let the polenta set so you can slice it and bake or grill it.  Grease or line any pan that has an edge with parchment paper and pour the polenta out.  Spread the polenta evenly and place it in the fridge for at least an hour or in the freezer for 20 to 30 minutes.  Once the polenta is set you can cut it up and prepare it however you would like!


That is seriously it when it comes to making polenta.  I told you it was really easy!  Now there are a few things that you can do to jazz it up and make it even tastier.  You could:

  • Add in shredded cheese or butter to make it even creamier.
  • Try out different seasonings. I like adding in garlic and Italian seasonings as well as taco seasonings
  • Top with gravy, vegetables, meat, or any kind of sauce
  • Use it as the base for a casserole (I have a recipe for this coming soon!)

Experiment with a few different things and find out what you like best.  Polenta is a very neutral canvas when it comes to food, so it is really easy to pair with many different creations.  Go pick up a bag of cornmeal (if you can find it in bulk, it is really cheap!) and get your polenta on!

Chickpea Casserole

I had the hardest time thinking up a name for this dish.  I had the idea of making a lasagna type dinner, but without the noodles.  I toyed with the idea of naming it noodleless lasagna, but that just sounded weird.  I finally settled on chickpea casserole, even though it’s not exactly what it is.  I know, first world problems right?  Oh well, regardless of what this meal is called, it is delicious.  We devoured it all and quickly wanted more.  It makes fabulous leftovers and it is a great prepare ahead meal so that come dinnertime all you have to do is heat it up in the oven.  Simple and delicious, what more could you want?


Chickpea Casserole

photo 2 (4)

For the chickpea layer:

  • 3 cups chickpeas, soaked/rinsed/cooked (you could also use 2 cans of chickpeas, but I liked dried better)
  • 3/4 cup raw cashews, soaked overnight
  • 1/3 to 1/2 cup nutritional yeast, depending on how “cheesy” you want it to taste
  • 2 tbsp lemon juice
  • 1 tsp italian seasonings
  • salt and pepper to taste


For the sauce:

  • 1 onion, diced
  • 3 cloves garlic, minced
  • 4 tsp oregano
  • 2 tsp basil
  • 1 to 2 tsp fennel seeds
  • 1 can fire roasted tomatoes
  • 1 can diced tomatoes
  • 1/2 cup vegetable broth or water
  • salt to taste


  1. Make your sauce first.  In a medium saucepan, heat a little olive oil over medium heat.  Saute the onion and garlic for about 5 to 7 minutes.  Once the onion is soft add in the oregano, basil, and fennel seeds.  Stir to combine everything and then add in the tomatoes.  Depending on how thick or thin you want your sauce, add in a little bit of the broth at a time.  Bring the sauce to a boil and then lower to a simmer.  Cover the pan halfway with a lid and simmer while you make the chickpea layer.
  2. Preheat the oven to 400 and put the chickpeas into a food processor or blender and pulse a few times to break them up.  Add in the rest of the ingredients and process until it is all combined and creamy.  If it is too dry you can add in a few tablespoons of water or broth.
  3. Lightly oil a casserole pan and spread the chickpea mixture into the bottom.  Press the chickpeas down and make sure that there are no cracks.  Then pour the sauce over the top and cover the chickpeas.  Cover with foil and cook in the oven for 20 minutes.  Remove the foil and cook for another 5 minutes, until the sauce is bubbly.  Take out of the oven and let sit for 5 minutes and then cut and serve.


After you assemble the casserole, you can keep it covered in the fridge until you’re ready to cook it.  Then simply heat up the oven and pop the casserole in.  This would be a really good meal to take to a potluck or share with a big group of people.  You can easily double it and feed a crowd.  And I’m pretty sure they will gobble it up and ask for seconds!  Or maybe that’s just me…. Enjoy!