I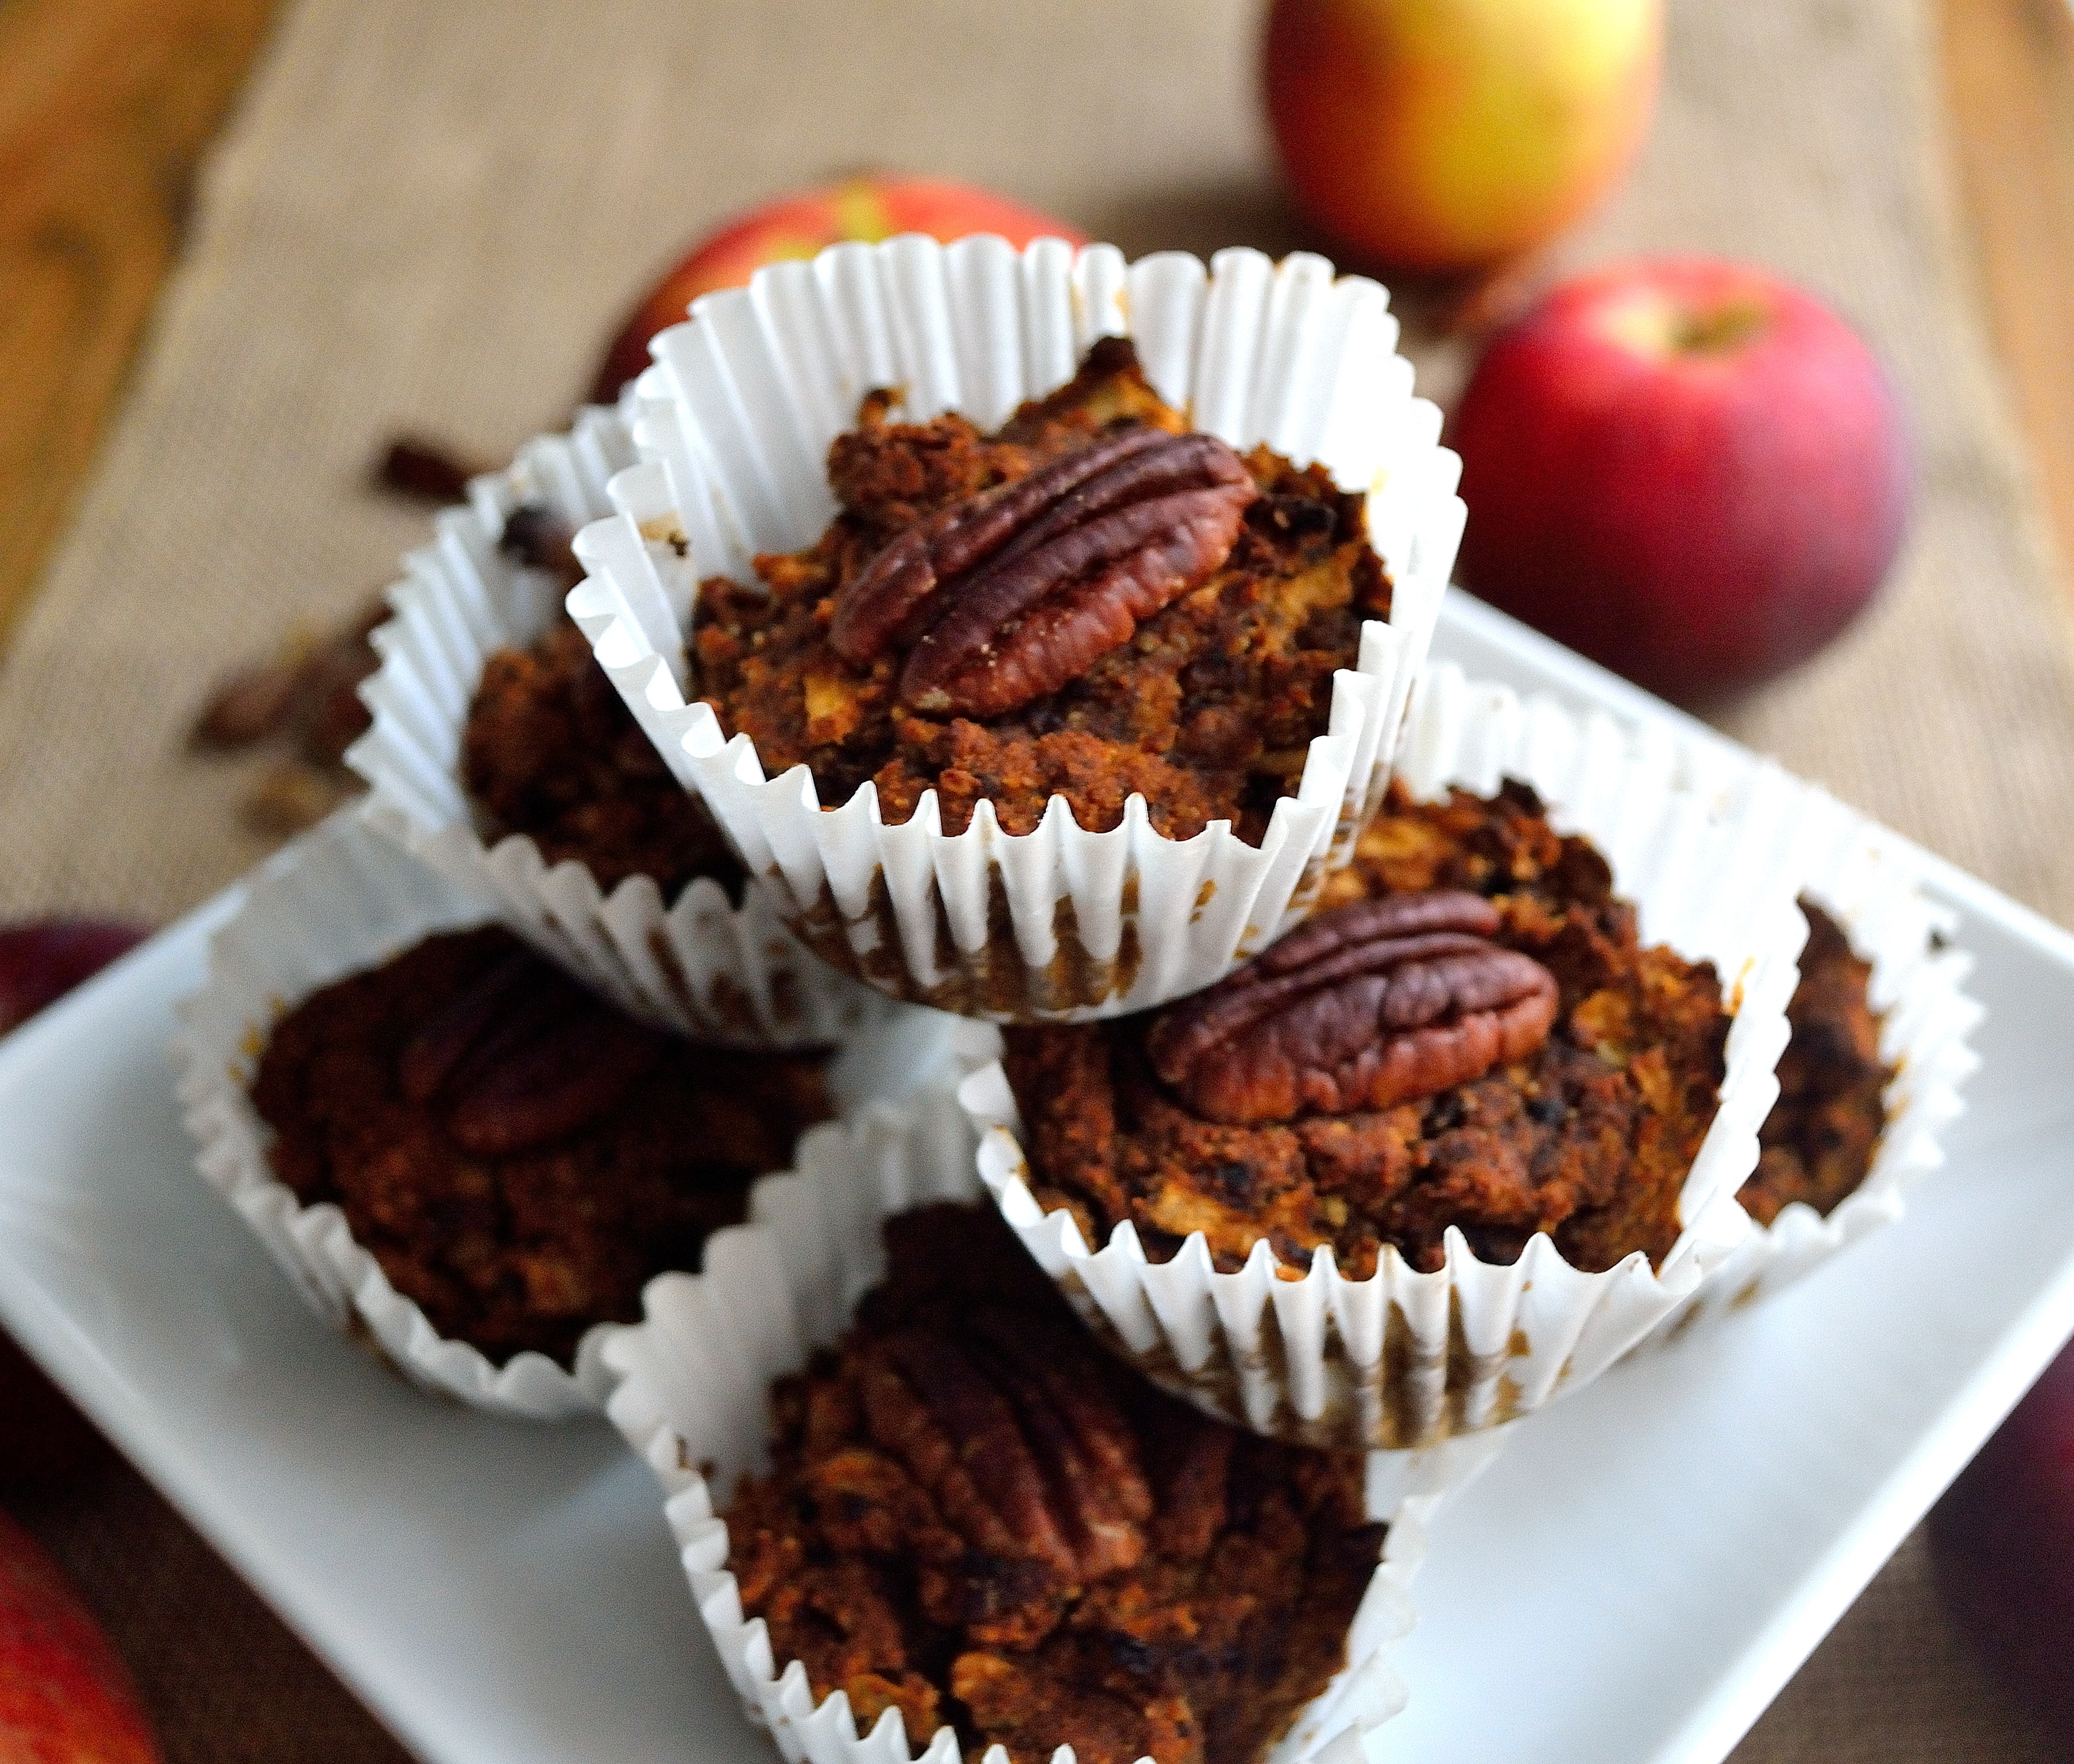 like to eat, eat, eat, eeples and baneenees.
If you have no clue what I am talking about, you need to spend more time in pre-school.
Last week I went to the apple orchard with my dad and came home with a whole peck of apples. I’ve already made a huge batch of my squash apple butter, eaten as many raw as I can, and a tart is in the works.
I also wanted to try making a bread with my apples and I had a few over-ripe bananas sitting on my counter so I thought an apple/banana combo was in order. Two baked goods in a row on the blog… Lucky you!
While my baking is getting better, I still run into a few problems now and then. When I made my first batch of my bread concoction, the flavor and texture were right but it did not hold together very well. My second time around I tweaked a few things and decided to make them into muffins instead of one loaf.
Success!
I ended up with a yummy fall inspired muffin that also happens to be gluten free, dairy free, egg free, and refined sugar-free. Pretty impressive if I do say so myself!
Apple-Banana Muffin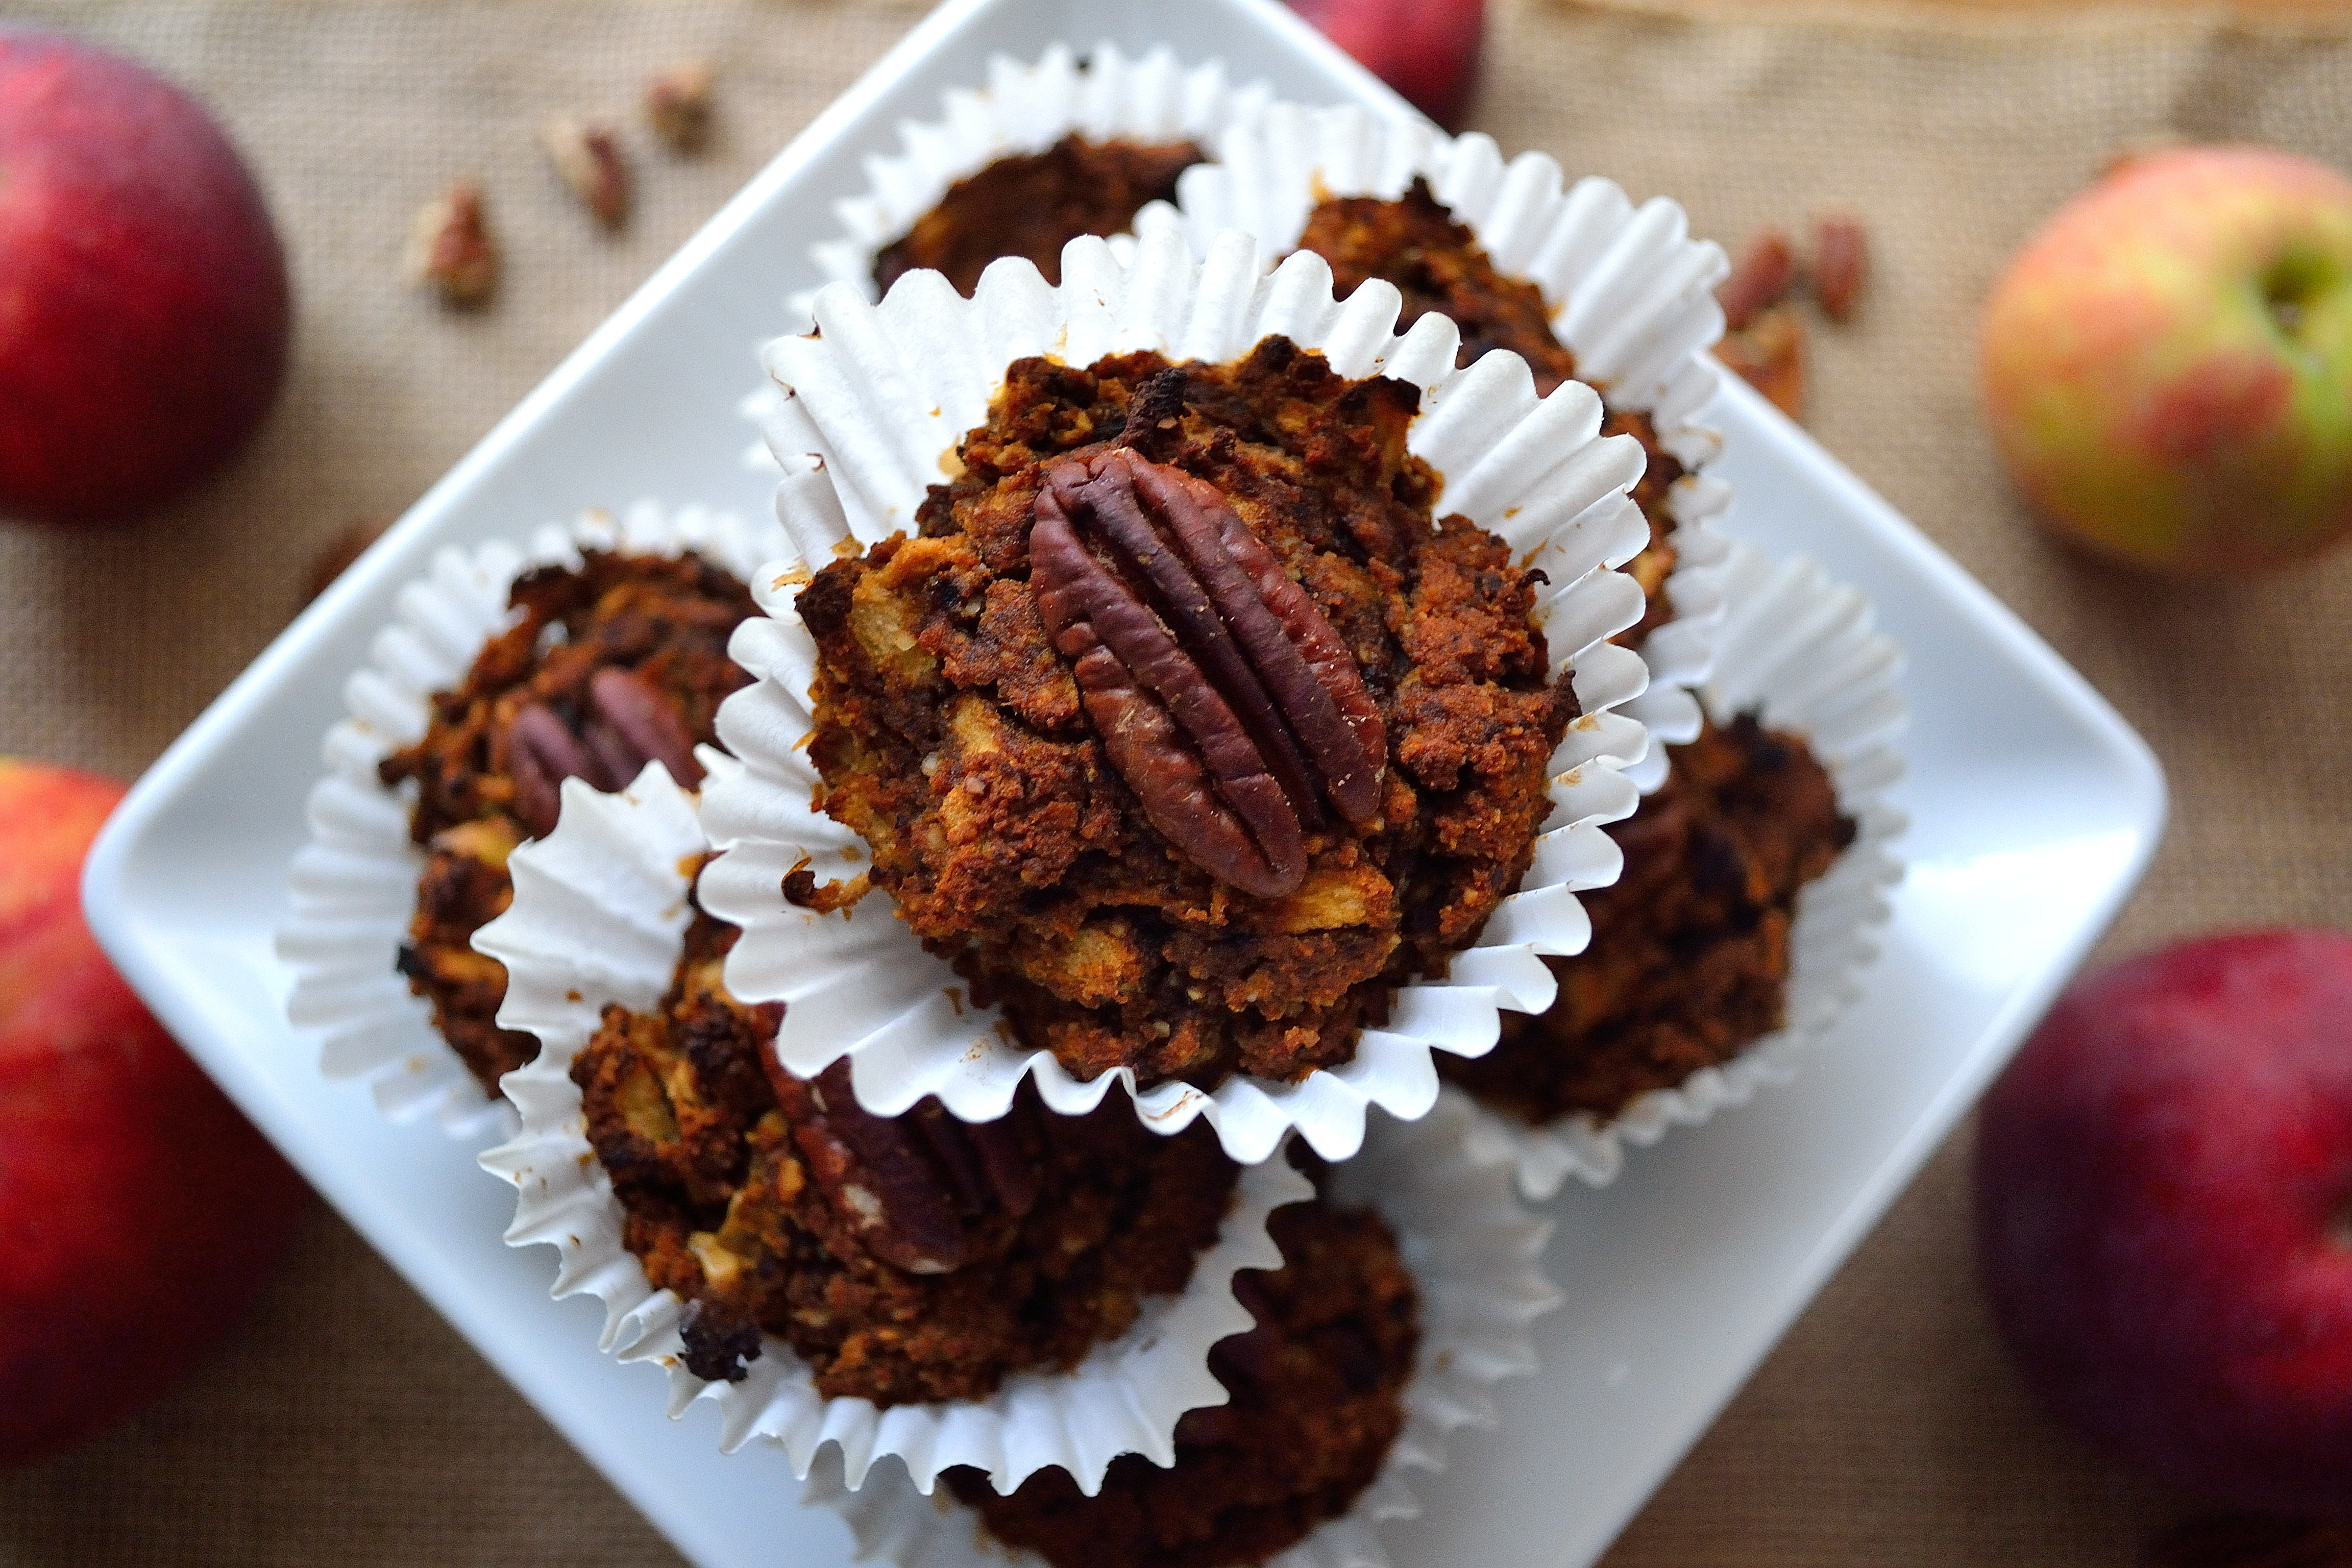
- 1 cup almond meal
- 1/2 cup coconut flour
- 2 tsp baking powder
- 1/4 tsp baking soda
- 1 tsp pumpkin pie spice
- 3 tbsp date sugar or coconut sugar
- 1/2 cup almond milk
- 2 large ripe bananas (the riper they are the sweeter the muffin will be)
- 1 tbsp molasses or maple syrup
- 2 tbsp macadamia nut butter or almond butter
- 1 tsp vanilla extract
- 1 large apple, shredded (more subtle apple flavor) or small diced
- 16-18 whole pecans, optional
- Preheat the oven to 350 and line a muffin tin with paper liners
- Combine all of the wet ingredients and mix well until you have a smooth batter.
- Combine all of the dry ingredients into a large bowl and whisk together. Pour the wet ingredients into the dry and stir to combine. The batter will be a little stiff, that is ok.
- Add in the shredded or diced apple and stir to mix everything together
- Spoon a little over a tablespoon of the batter into each muffin well and press down just a little. Press one pecan onto the top of each muffin.
- Bake the muffins for 20 to 25 minutes, until the top is slightly brown and batter is set.
- Let the muffins cool in the muffin tin for 5 minutes and then move to a wire rack to cool completely.
These are kind of like fall in a muffin wrapper and that isn’t a bad thing. You could also try making this into two mini loaves if you really wanted bread.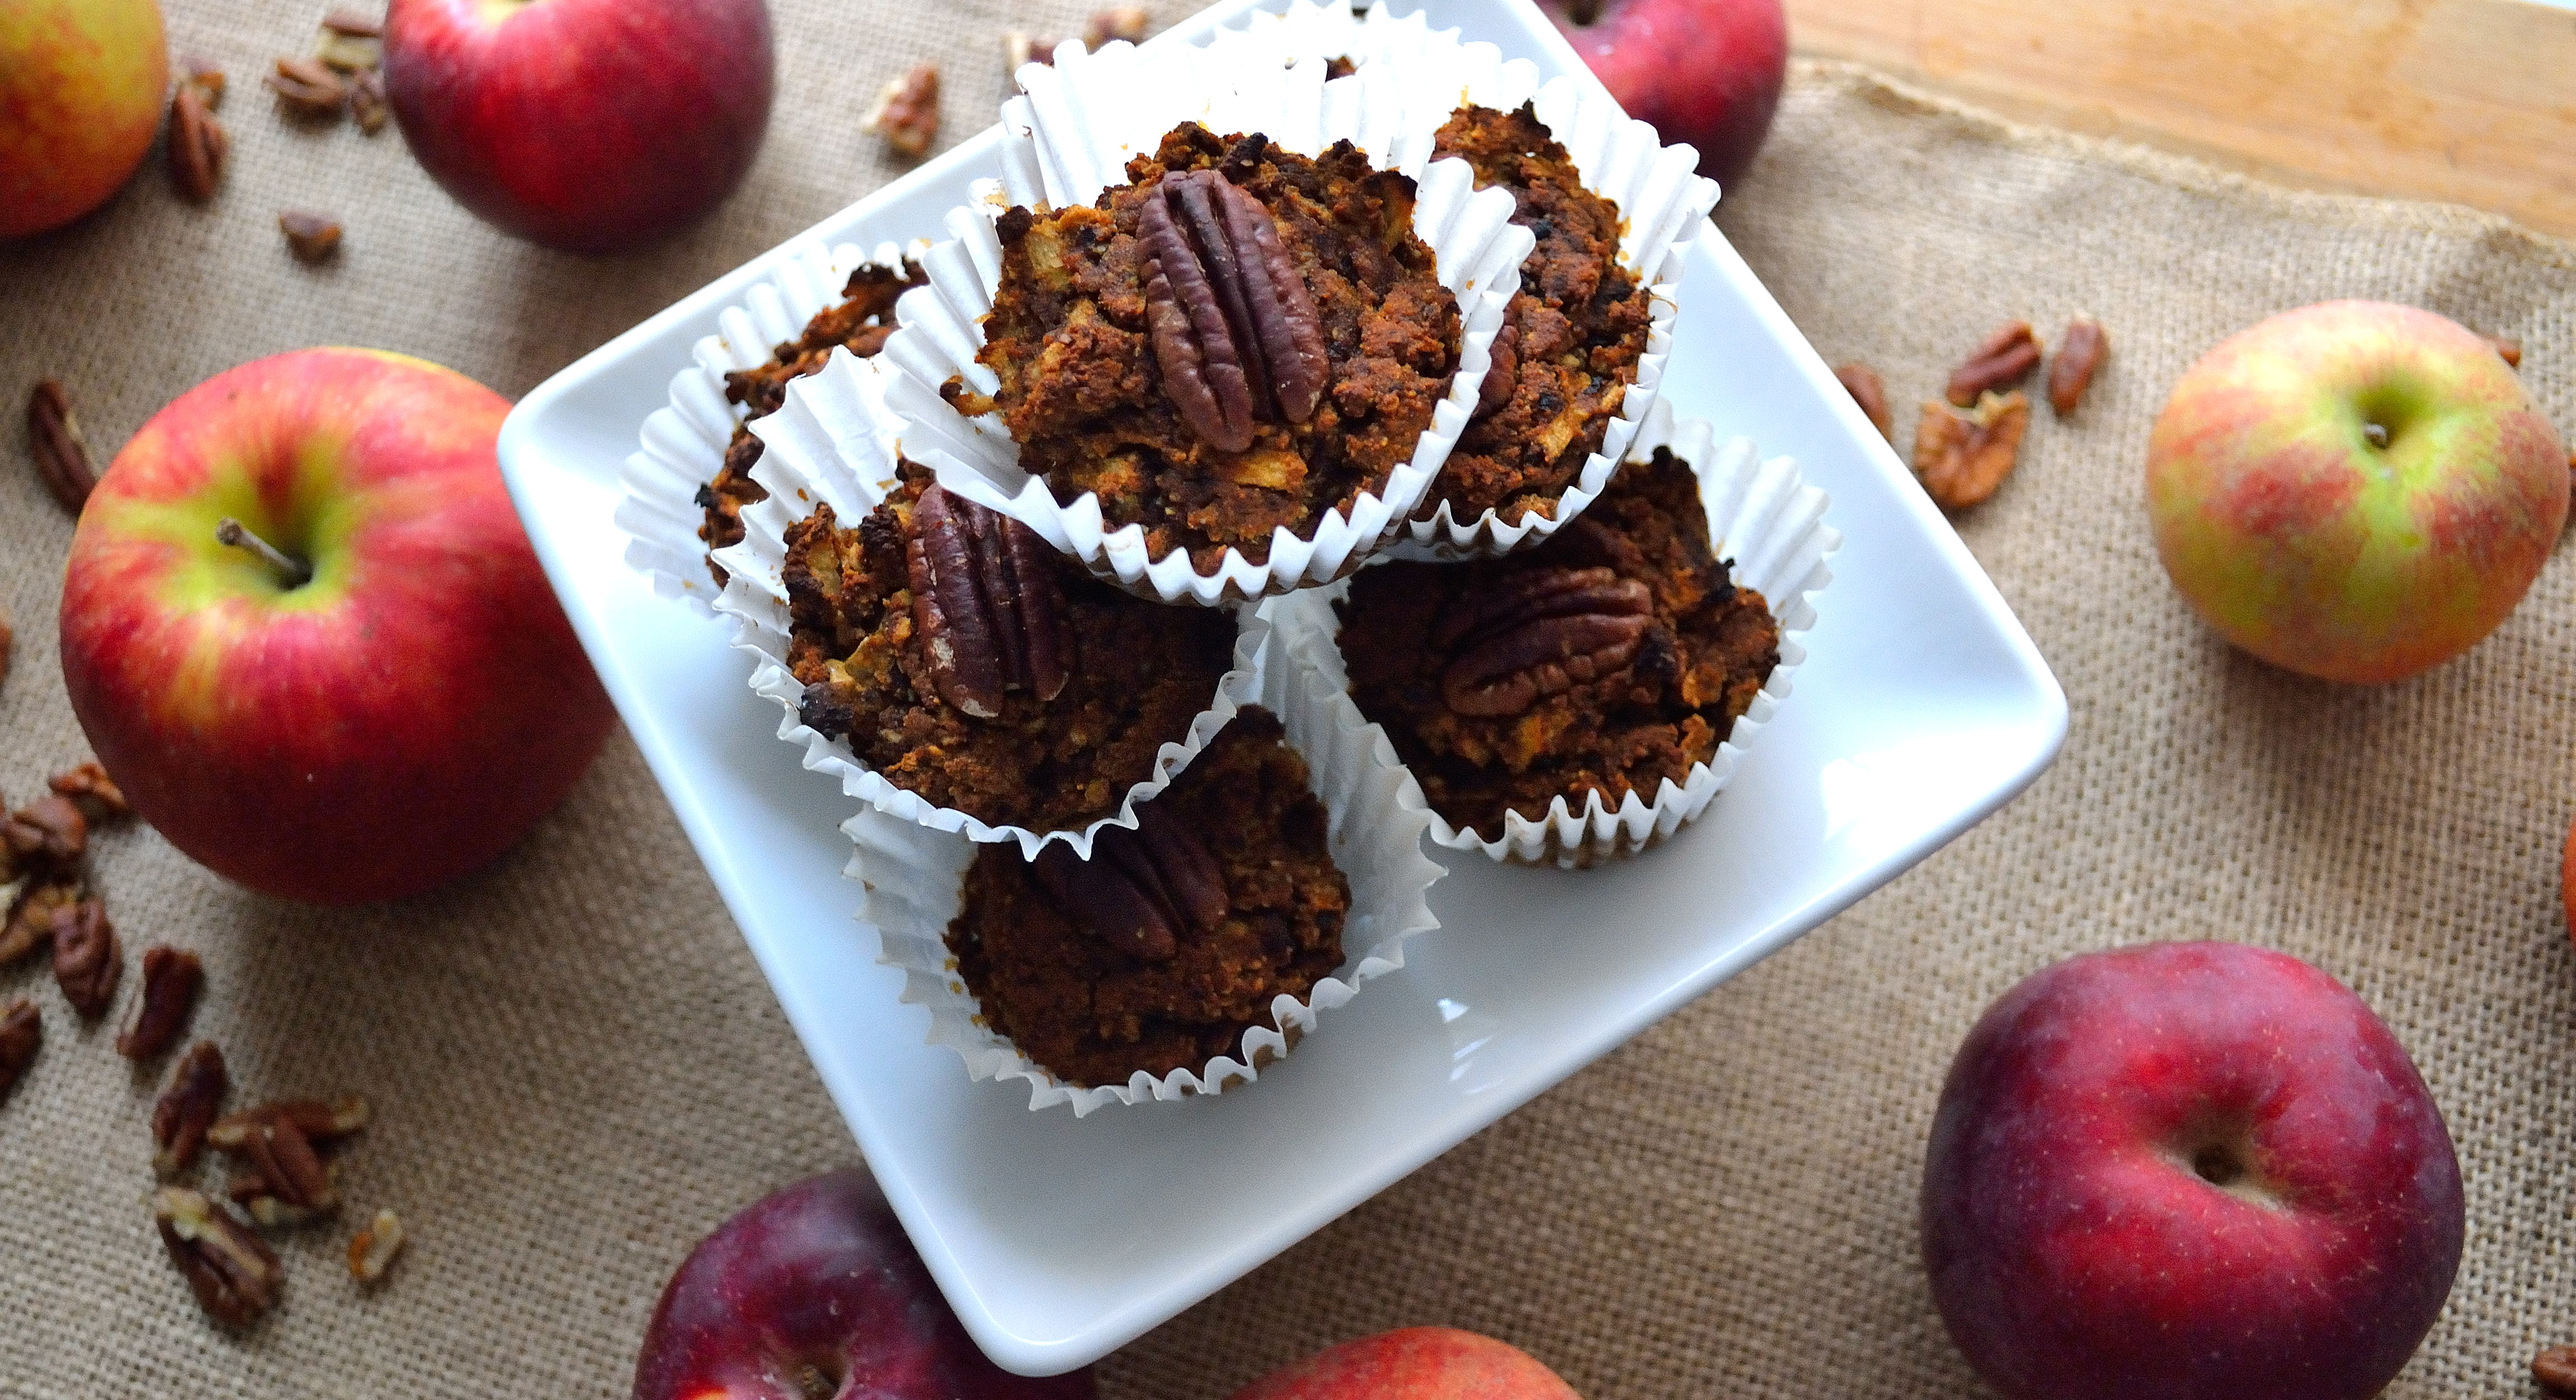
Anyone have fun plans for this weekend? Adam and I are planning on just hanging around our neighborhood and relaxing. Oh and if you’re keeping count, only 8 more days until my birthday. Delicious food presents welcome…
Happy weekend friends!