 Yup. Cauliflower is back. I know you’re probably getting a little tired of seeing it featured in my dishes but you know what? You’re wrong. Cauliflower is the magical unicorn of the vegetable world and I love turning it into all sorts of things from taquitos to sauce to sweet and sour bites to mac n’ cheese. It’s awesome and you’re going to have to deal with it.
Which should be easy if you’re stuffing your face with this tasty meal. Most people tend to shy away from risotto because it takes a really long time to cook and even if you follow all the steps it somehow still tastes like you didn’t do something right. Or is it just me chomping away and still uncooked rice? Just me? Ok. 
Moving on. If you think risotto is too fussy or you’ve never made it before then you need to try this cauliflower risotto because it is the exact opposite of fussy. It doesn’t take long to make and you don’t have to stand over the stove stirring until your arm falls off like with regular risotto. Again, just me? This risotto is still creamy and rich like regular risotto but it’s also nice and light with all the fresh spring-y vegetables.
One other note about this meal, I really think that what gave this dish the depth of flavor I was going for was the Sherry I used to deglaze the pan. I know some people don’t like to use alcohol in their cooking (to each their own) and you can use water or broth instead but I don’t think it will have the same taste. Other than that, this risotto is straight forward and will have you licking your plate clean. Still just me?
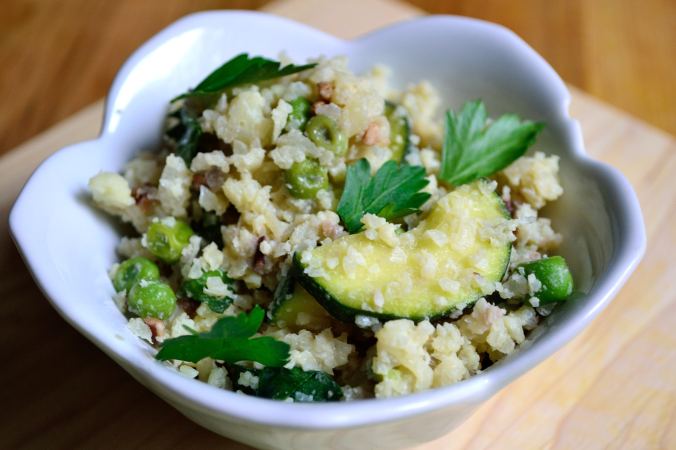
Zucchini and Pea Cauliflower Risotto
- 1 large head of cauliflower, riced (you can grate it for bigger pieces which I did or run it through your food processor for smaller pieces)
- 2 medium zucchini’s, sliced into half moons
- 1 cup peas, if frozen make sure they’re thawed
- 3 cloves garlic, minced
- 3/4 cup onions, diced
- 2-3 tbsp nutritional yeast or parmesan cheese
- 1/4 cup sherry (I used this one) or other dry white wine or water/broth
- 1/2 cup water/broth
- 1/2-2/3 cup full-fat coconut milk
- 1/2 cup toasted slivered almonds (or pine nuts if you can shell out the small fortune a 1 oz bag costs)
- zest from one lemon
- 1/4 cup fresh parsley, chopped
- salt and pepper
- Heat a little olive oil in a large skillet or saucepan over medium-high heat. Saute the onions until they’re soft then add in the garlic. Season this with a little salt and pepper and cook for about 2 minutes.
- Add in the riced cauliflower, adding a little more oil if needed, and season again with salt and pepper. Cook for another five minutes until cauliflower is soft and just starting to get a little brown. Sprinkle the nutritional yeast or parmesan cheese over top.
- Pour in the 1/4 cup sherry and deglaze the pan. Cook and stir everything until most of the liquid as evaporated. Add the zucchini and peas and pour in the water/broth and coconut milk. Stir everything together and cook until the liquid has reduced by about half.
- Remove from the heat and stir in the lemon zest and parsley. Top with the toasted almonds and taste to adjust the salt and pepper.