Homemade Banana Pudding

Homemade Banana Pudding | Life Healthfully LivedOk, so I learned some new things while making this recipe.  First, I have to tell you about my inspiration for this one because it’s weird and who doesn’t like weird stuff? No one.  That’s who.

I was making a loaf of my gluten-free banana bread (which you should make immediately because it’s the bomb.  Side note: I’m bringing back “the bomb”) and as I was blending the banana and avocado together I thought to myself, “Antoinette, (I call myself Antoinette NBD) that kind of looks like pudding.  I wonder if it would be any good as pudding?  I wonder if there is banana pudding?” So I set about to research banana pudding.

This is my life people.Homemade Banana Pudding | Life Healthfully Lived

I remember pudding snack packs used to have a banana flavor but I doubt that there was any actual banana in that pudding.  My google searches told me that banana pudding was indeed a thing.  A southern thing.  Which means it’s delicious because it has all the fat and sugar.  All delicious things have fat and sugar.  Most recipes called for making a vanilla custard type deal and adding sliced bananas, vanilla wafers, and in one case merengue.  While it wasn’t a difficult process, it was more steps than I wanted for my pudding. And by more, I mean this is pretty much just one step.

There are no eggs in this so you don’t have to cook anything but because of the addition of avocado, stick with me, it is creamy and delicious without the eggs.  And depending on how ripe your bananas are, it’s pretty sweet too.  You can add maple syrup if it isn’t sweet enough but mine was totally delicious without it.  See?  Fat and sugar.  Just a better version of fat and sugar.

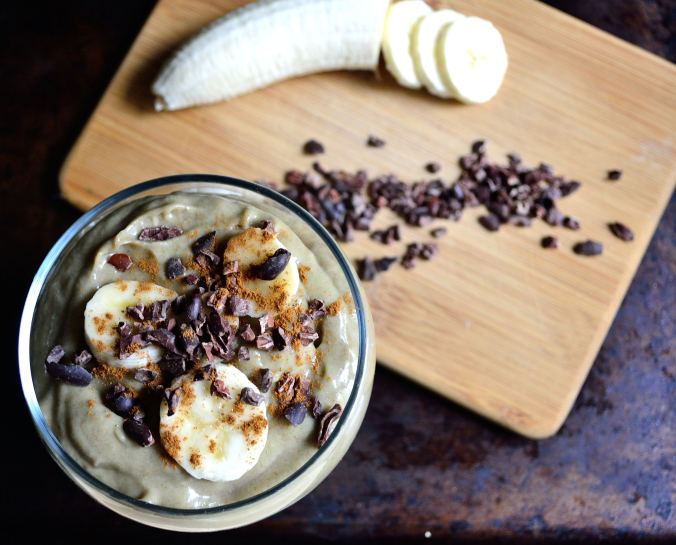
I know you’re probably getting tired of me putting avocado in things but I’m not, so get over it 🙂  It’s delicious and I can’t stop, won’t stop.  You can get creative with toppings like coconut whip cream, pecans or walnuts, crumbled up graham crackers, or in my case cacao nibs because, chocolate.

Banana PuddingHomemade Banana Pudding | Life Healthfully Lived

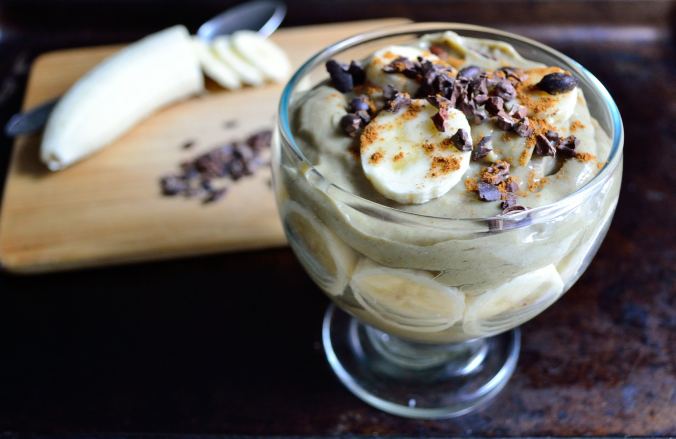
As I was making this I started singing the part about figgy pudding from We Wish You A Merry Christmas.  Adam asked me if I was singing a Christmas song and I said no, I was singing a pudding song because how do you make pudding without singing about it?  So feel free to sing about pudding while making this because I think it enhances the flavor.  

  • 2 very ripe bananas, sliced (about 2 cups)
  • 1/2 avocado, diced (about 1/2 cup)
  • 1/2 cup coconut cream (you can buy coconut cream from Trader Joes or just put a can of full-fat coconut milk in the fridge overnight and scoop off the solid cream)
  • 1 tbsp maple syrup, optional if your bananas aren’t super ripe.  I didn’t need any extra sweetener for mine
  • 2 tsp cinnamon
  • pinch of salt
  • 1 1/2 tsp maca powder, optional but adds a nice caramel-y flavor

Toppings (optional)

  • chocolate chips or cacao nibs
  • pecans or walnuts or almonds
  • sliced banana
  • coconut whip cream
  • graham crackers
  • nilla wafers if you’re rebellious or Southern 😉
  1. Ready for this?  Put all the pudding ingredients into a blender and blend until super smooth.  Dish it out and put on all the toppings.

Told you it was one step 😀 Happy Friday friends! Have a great weekend!Homemade Banana Pudding | Life Healthfully Lived

DIY Wednesday: Cauliflower Pizza Crust

DIY Wednesday: Cauliflower Crust Pizza | Life Healthfully Lived
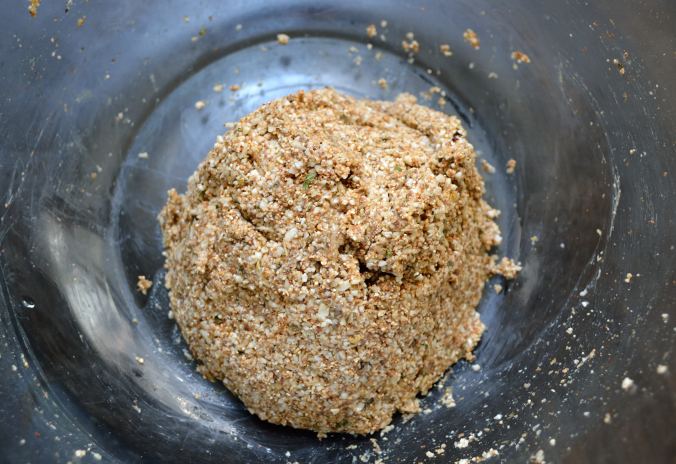
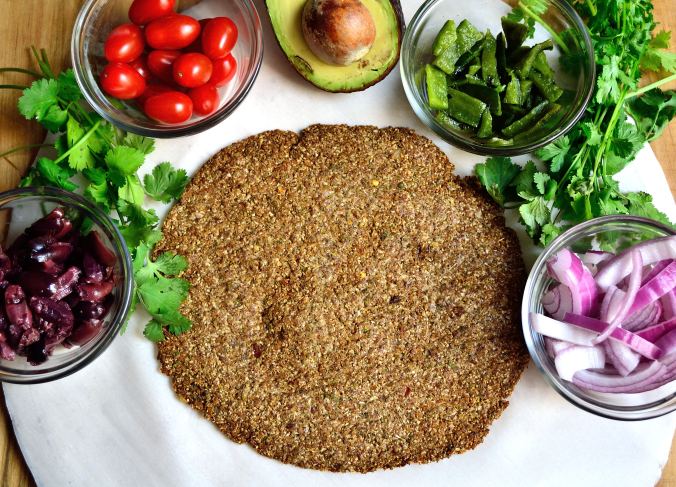
The cauliflower pizza crust.  For many, it is an elusive dream.  You see recipes on Pinterest and they claim that it is the best crust ever (just like real pizza) and that will fulfill all your gluten-free pizza dreams.

And then you make it.

And it turns into a soggy wet pile.

Or it has five pounds of cheese and eggs holding it together.

I’ve tried a lot of cauliflower pizza crusts and while some were good, none were great.  Most of them had to be eaten with a fork and a knife and that’s ok if you’re eating a deep dish pizza but not ok when you want to pick up a slice and feel like you’re eating pizza.  That’s what I wanted.

Then I stumbled across Sprint 2 The Table’s quinoa flour crust pizza and it sounded simple enough and didn’t have the cheese that most crust recipes use to keep everything together.  So I gave it a shot and EUREKA!  It worked.  I could actually pick it up and while I won’t go as far as saying it tastes exactly like real pizza it was the closest I had ever come.

I kept playing with the crust and swapping out a few things and came up with one that doesn’t use eggs or grains as the flour.  If you’re totally fine with eating quinoa flour and eggs then go ahead and try Sprint 2 The Table’s pizza crust.  If you want an eggless and grain-free version try this one below.

I’ll give you a step-by-step tutorial (along with pictures) so you can get the best pizza crust possible then you can go crazy with toppings.  And I may have gone crazy with my toppings aka the whole refrigerator on my pizza.

Cauliflower Crust Pizza- Based on this one by Sprint 2 The TableDIY Wednesday: Cauliflower Crust Pizza | Life Healthfully Lived

  • 1 cup of cauliflower with as much of the stems removed as possible
  • 1/4 cup coconut flour
  • 3 tbsp ground flaxseed
  • 6 tbsp water
  • 1 tsp oregano
  • 1 tsp basil
  • 1/4 tsp red pepper flakes
  • 1/2 tsp salt
  1. Preheat your oven to 425 and get out a pizza stone/pan or regular baking sheet.  Line whatever you’re going to use with parchment paper (I used a pizza stone and cut my parchment paper into circles) and then cut another piece of parchment paper to match the first.
  2. In a small bowl, combine the ground flaxseed and water and let it sit and gel for a few minutes.
  3. In a blender or food processor, pulse the cauliflower a few times until it’s in small rice-like pieces and then dump it into a large bowl.  Add the flour and seasonings and whisk to combine everything.  It’s ok if it’s a little clumpy.
  4. Add in the flaxseed and water mixture and start stirring everything together with a spatula.  It should start to form a big dough ball.  If it’s too dry, add a little water a tablespoon at a time.  Remember that coconut flour likes to soak up water like a sponge so as you add water wait just a few minutes to see if it needs more.

    DIY Wednesday: Cauliflower Crust Pizza | Life Healthfully Lived

    Nice dough ball. Not too dry or too soggy.

  5. Once you have your dough ball place it on your stone or pan that’s lined with parchment paper.  Slightly flatten the dough with your hand and then using a rubber spatula start pressing the dough out into a pizza shape.

    DIY Wednesday: Cauliflower Crust Pizza | Life Healthfully Lived

    Spreading out the dough. It takes awhile so don’t rush it

  6. Work from the middle pressing out and keep going until you have about a 10 to 12-inch circle.  You want it to be fairly thin so the crust will cook all the way through and not end up soggy.  As you press the dough out the edges might crack a little but that’s ok just press them back together.

    DIY Wednesday: Cauliflower Crust Pizza | Life Healthfully Lived

    About how thick you want your crust. You could even go a little thinner for a crispier crust.

  7. Place the other piece of parchment paper on top of the crust and bake for about 20 to 25 minutes.  Remove it from the oven.
  8. Ok, this is the slightly tricky part.  You’re going to flip the whole crust over.  What worked for me was putting on an oven mitt and then using the parchment paper to slide the middle part of the crust onto my hand and then flipping it over in a quick motion.  The crust should be mostly cooked at this point and if you rolled it out thin enough won’t break apart on you.  Don’t freak out, I’ve made this crust a dozen times and even if I totally botched the flip it hasn’t broken or ruined the crust.
  9. Once it’s flipped remove the parchment paper from the top of the crust and top with your favorite pizza toppings! Bake for another 5 minutes and enjoy!

    DIY Wednesday: Cauliflower Crust Pizza | Life Healthfully Lived

    Ready for toppings!

A few other tips:

  • Don’t use a crazy amount of sauce because that is just going to turn the pizza to mush.  Trust me.  My favorite sauce so far has been a light layer of my spinach or cilantro pesto.
  • If you put on a lot of heavy toppings your pizza may fall a little bit as you pick it up.  If you don’t care and want all of the toppings go for it!
  • You can make this crust in advance and keep it in the fridge or freezer until you’re ready to use it.  I’ve only done it a few hours in advance so I can’t vouch for the quality after it’s been frozen and thawed but I will update this if I try it.
  • If you put onions or peppers on your pizza and you want them cooked a little more than the five minutes at the end, saute them before you top your pizza.  If not, they might be a little less done than some would prefer.

Simple Gifts For The Healthy Cook

Simple Gifts For The Healthy Cook | Life Healthfully LivedIt’s the most wonderful time of the year!!  I am approaching Buddy the Elf levels of holiday cheer over here in Chicago and it’s awesome.  I spent all yesterday putting up our Christmas decorations while of course watching Christmas movies and listening to Christmas music.  Can I fit one more Christmas in this paragraph?  Yup!

I was thinking about writing a post on how to stay healthy during the holiday season, but I feel like that gets written over and over every year.  Yes, it’s hard to stay on track during this time of year when there are a thousand opportunities to eat cookies and stuff yourself with a large dinner, but it isn’t entirely impossible.  And you know what?  It’s ok if you go a little overboard every now and then.  I like Kathy’s approach to healthy eating over at Kath Eats Real Food.  Healthy is a squiggly line.  Sometimes it will be up and sometimes it will be down, but overall it’s about a healthy balance.

So in lieu of the tips and tricks to eat well during your Christmas and New Year’s celebrations, I am going to tell you to buy presents.  Not for me (although if you’re feeling it, I am in desperate need of this Vitamix.  Yes, desperate need), but for the cook/cooks in your life.  You don’t need a ton of fancy utensils to eat well, but there are a few basics that I use over and over again that can really make a difference in the kitchen.  So here is a gift list for some simple tools that can make healthy eating easy and even a little fun!

Silicone SpatulasSimple Gifts For The Healthy Cook | Life Healthfully Lived

I use a spatula pretty much every day.  From scraping things out of the food processor or a bowl to making scrambled eggs, a spatula is a must in my kitchen.  Plus you can find some cute ones over at Target for less than $5.  These would make a great stocking stuffer!

SilpatSimple Gifts For The Healthy Cook | Life Healthfully Lived

I’ve raved about these over and over again, but that’s because they are awesome.  A Silpat is pretty much reusable parchment paper.  Nothing sticks to these things so you can roast vegetables, bake cookies, roll out bread dough, and even make chocolate bark without working about half the food sticking to the pan.  I have two that get used regularly and they have lasted me a long time.

Spice grindersSimple Gifts For The Healthy Cook | Life Healthfully Lived

Not a flashy or exciting gift perhaps, but a very useful one.  You can use these for more than grinding fresh pepper, which you should be doing.  No one needs to use pre-ground pepper when it’s so easy to do fresh.  Just ask Alton.  You can use it to grind coarse sea salt into a finer powder, seeds like cumin, fennel, or grains of paradise, and you can use it to make your own spice blends.  This is a super versatile gift and one that is sure to be used over and over.

Pyrex Glass DishesSimple Gifts For The Healthy Cook | Life Healthfully Lived

If you are a leftover junkie like me (and you should be after I gave you all of these wonderful ideas!) then these will be a must.  No more plastic containers that always lose their lid, get stained or smell, and that will inevitably melt at some point.  These dishes are great for leftovers, can go in the freezer, and are perfect portions to stick into your lunchbox for a healthy lunch at work or school.

Food ProcessorSimple Gifts For The Healthy Cook | Life Healthfully Lived

Ok, so this might be the one splurge item on this list, but it is worth it.  Actually, you don’t have to spend a ton on a food processor because I made do with a secondhand Black & Decker for many years before Adam decided to upgrade mine for our anniversary.  Food processors are great for nut butters, chopping a ton of vegetables, making dough, and pretty much anything else you can think of.  Even though this is pricier than the other things on the list, you will use it enough to justify the cost.

Hopefully you can find a few gifts on this list that will work for you or your favorite cook.  Only 17 more days until Christmas!! Simple Gifts For The Healthy Cook | Life Healthfully Lived

What are some of your favorite cooking tools?

Back To Normal

Almost… I’m actually coming to you from Sycamore this week.  I’m house/dog sitting and get to do a bit of “country” livin’ in my old neighborhood.  I actually do miss Sycamore sometimes.  It’s slower pace out here, quieter, calmer, and really quite beautiful.  While I love my Chicago neighborhood, it’s nice to come back and slow things down.

Back To Normal | Life Healthfully Lived

I love how these two are already in cahoots and love being brothers

It’s also nice because I get to work in a huge kitchen and take food pictures with all the natural light.  This house is a bloggers dream.  Or at least this galley kitchen, two-window, interior apartment-dwelling blogger’s dream.  So be on the lookout for some good food pics in the coming weeks…

I’m working on a few new recipes and I was thinking of a few ideas.  I honestly put recipes on the blog that I cook for me and Adam.  I don’t usually go out and create something that he or I wouldn’t eat or make regularly.  While that sometimes limits what I put on here, I think it also shows how a real home cook prepares meals.  I’m not a trained chef or even a professional recipe developer.  I just put things together that sound good in my head and I think would taste good.

Back To Normal | Life Healthfully Lived

Grandma and the grandkids

With that in mind, I was thinking of reworking one of my favorite childhood meals.  My mom’s leftover casserole.  She would make this a few days after Thanksgiving and it was almost better than the Thanksgiving feast itself.  I just have to figure out if I can gear it towards the healthier side of things…

I know I’ve said this before, but I am going to work on putting more meals that have meat in them up here.  I don’t personally eat meat, but Adam does and I do prepare a few dishes for him that he really likes and would make good weeknight meals.  I want this to be a place that anyone can come to and find at least one recipe that will fit their lifestyle, tastes delicious, and is healthy.

Back To Normal | Life Healthfully Lived

After feast Tripoly playing… I think Adam and I win the expression game

I hope that you are getting back to your regular routine without too much fatigue.  That first Monday after a holiday can be a rough one.  At least it’s cyber Monday and there are awesome presents that you can buy while still in your  PJ’s!

Back To Normal | Life Healthfully Lived

Happy Thanksgiving from the Buchanan/Meyers/Dawson/ Bullard Family!


Do you guys have any requests or suggestions on recipes?  The more feedback I get, the better I can serve you guys! Just let me know in the comments below!

DIY Wednesday: Coconut Chips

I’mDIY Wednesday: Coconut Chips | Life Healthfully Lived not a huge snacker, but every now and then the snacking bug will bite and I can’t seem to stop grazing.  Luckily I try to only keep healthy snacks around the house so I’m not binging on cookies and chips, but store bought healthy snacks can be full of unnecessary ingredients.

While some people might crave sweet snacks or salty snacks, I usually crave a combo.  I love the mix of sweet and salty.  Kettle corn is a weakness and Garrett’s Chicago Mix (it will never be anything else to me)?  Forget about it.

I have seen coconut chips in the stores and online for awhile now and they always sound really good.  A nice mix of sweet and salty, healthy fats from the coconut, and the satisfying crunch of the baked chips.  A snacker’s dream.  Not so dream like?  The cost.  A tiny bag of coconut chips at the store can cost almost $15.  Ain’t nobody got time for that.DIY Wednesday: Coconut Chips | Life Healthfully Lived

Good for you and me that it’s really easy to make your own at home!  A few things, don’t worry if you don’t like the flavor of coconut these do not have a very coconutty taste.  You will also want to make sure that you get the coconut flakes and not shreds otherwise you’ll end up with a pile of shriveled and burnt coconut shreds.

These come together fast and don’t require many ingredients, so if you feel a snack attack coming on you’re only a few minutes away from these sweet and savory coconut chips!

Coconut ChipsDIY Wednesday: Coconut Chips | Life Healthfully Lived

  • 2 cups unsweetened coconut flakes, not shreds
  • 2 tbsp coconut aminos, you can also use liquid aminos, soy sauce, or tamari
  • 1 tbsp maple syrup, honey could also work
  • 1/4 tsp sea salt
  • 1/4 tsp garlic powder
  • 1/4 tsp smoked paprika
  1. Preheat the oven to 350
  2. Dump the coconut shreds into a large bowl.  Add in the rest of the ingredients and stir to coat everything.
  3. Place some parchment paper or Silpat onto a large baking sheet and spread the chips in an even layer.
  4. Bake for 5 minutes and stir the chips.  Bake for another 2 minutes, watching carefully so the chips don’t burn.
  5. Remove from oven and let cool…. or dig right in if you can’t wait!

Make sure to keep an eye on the coconut chips in the last few minutes because these can go from golden and delicious to charred very quickly.  Store them in an airtight container for up to a week…. if they last that long! DIY Wednesday: Coconut Chips | Life Healthfully Lived