Tahini BBQ Summer Vegetable Bake

ITahini BBQ Summer Vegetable Bake | Life Healthfully Lived have been all about the tahini lately.  I have been finding ways to put it on everything and I have not been disappointed.  Most of us only know tahini as an ingredient in hummus.  It helps give it that nice creamy, earthy flavor.  While hummus is delicious, tahini deserves to be more than just an ingredient in a popular dip.

It is awesome in baked goods, drizzled over pancakes or roasted plantains, and it turns any homemade dressing into creamy delicious lick the bottom of the bowl good.  The fact that it turns things creamy is one of my favorite things.

I like creamy, creamy is good, but sadly people only associate creamy with cheese or other dairy products.    I’m going to change your mind one tahini filled recipe at a time. Tahini BBQ Summer Vegetable Bake | Life Healthfully Lived

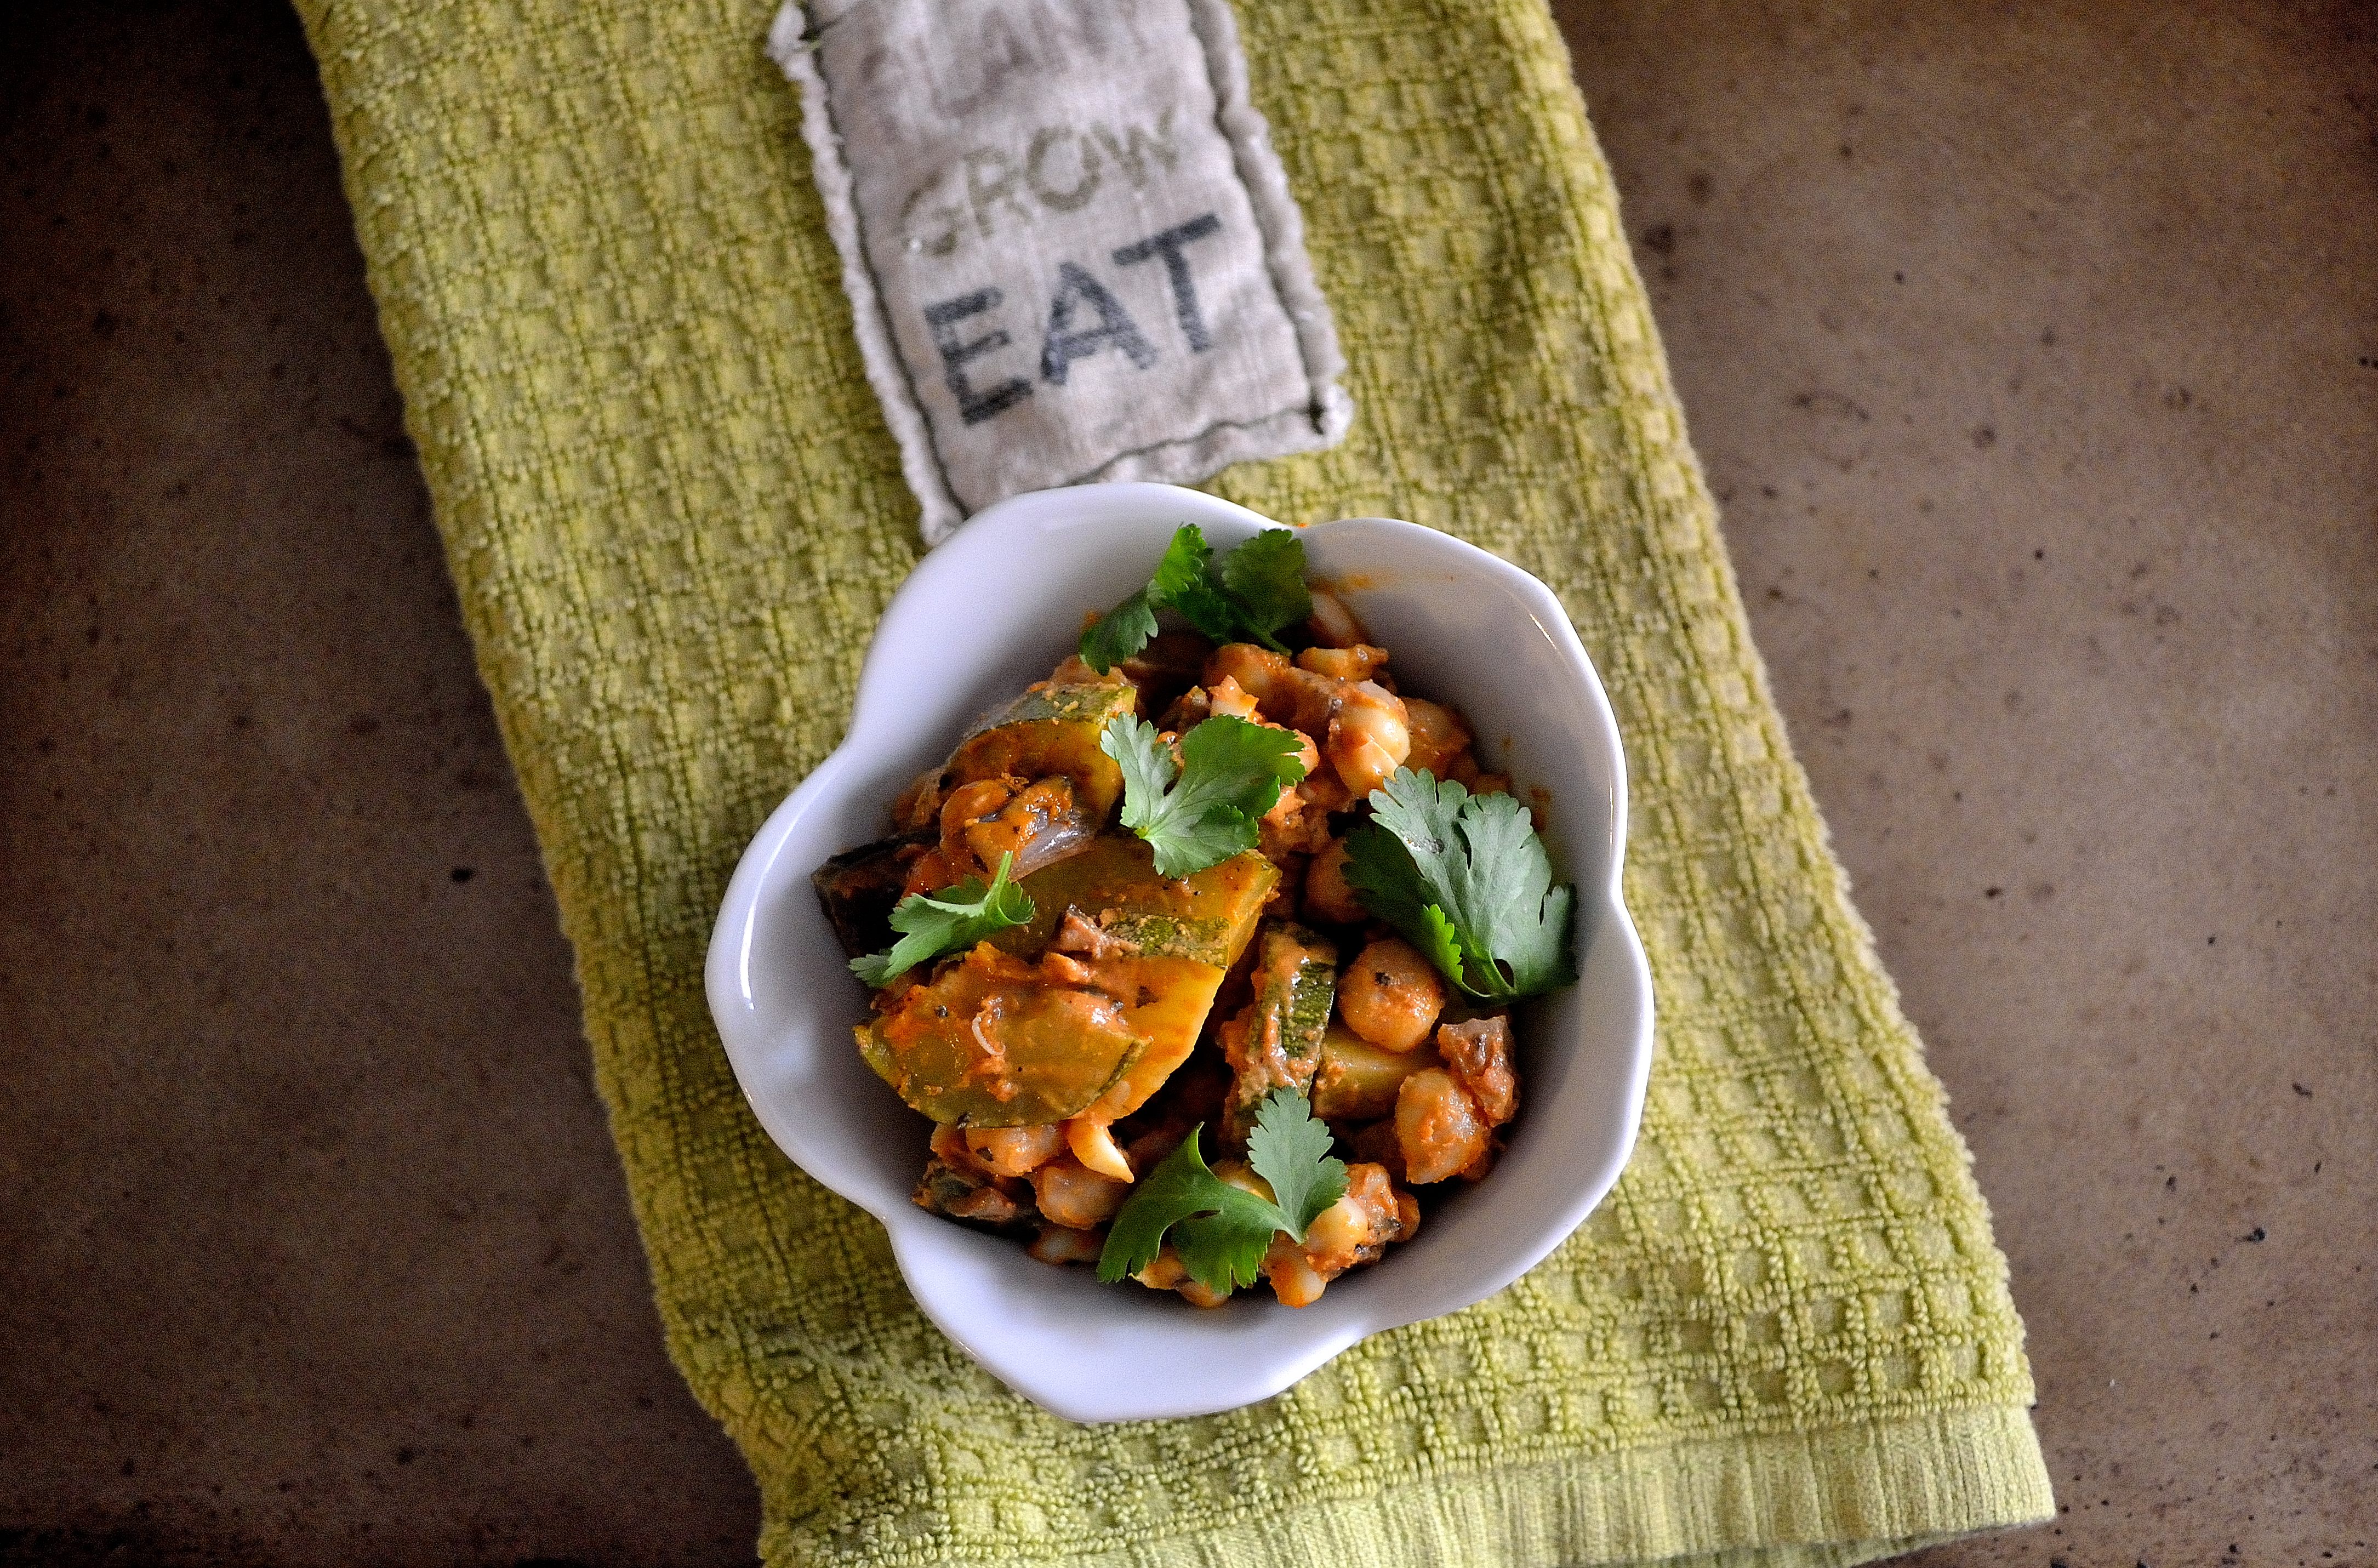
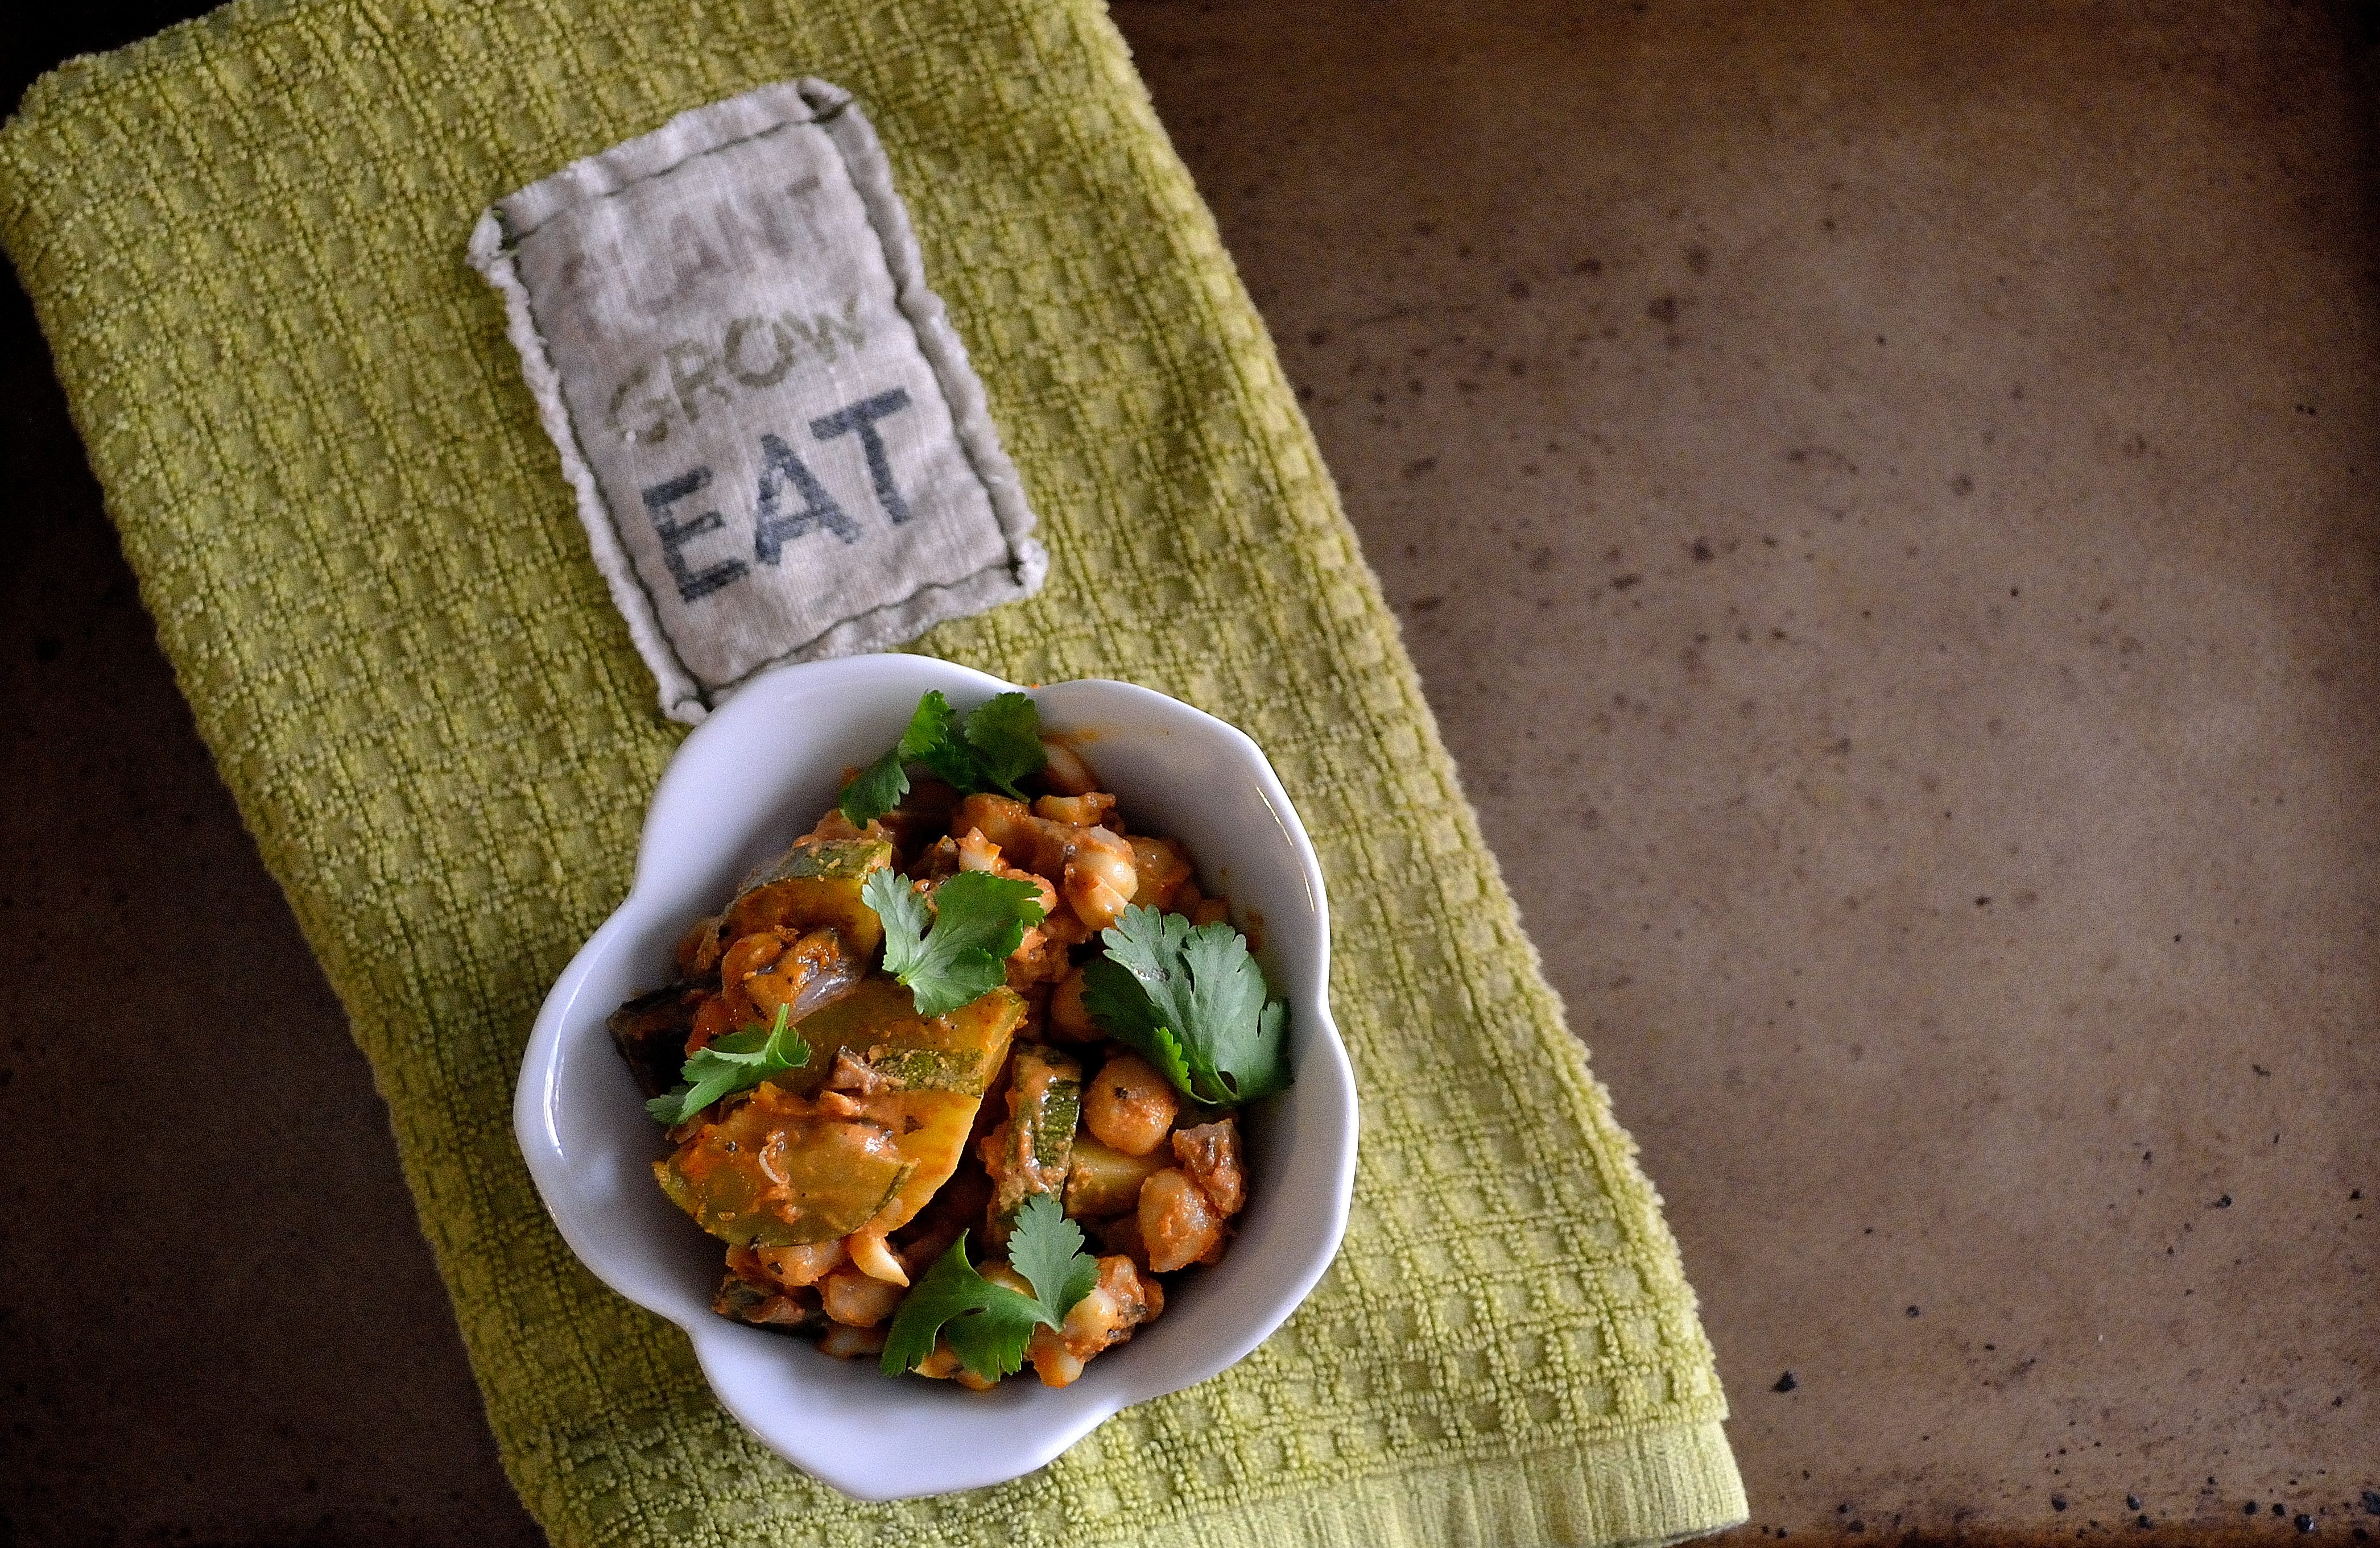
This one is really easy to make and is a great way to use up the surplus of zucchini and other summer vegetables I’m sure are crowding your fridge.  I also like this one because it can be made the night before and then just popped into the oven and it’s done.  That’s actually what I did when I made this last weekend and it worked beautifully.

The sauce I made for this vegetable bake would also be awesome as a dip or slathered on wings or ribs or burgers or a spoon…. You get the idea.  Go grab all the summer vegetables you have, whip up this sauce, and throw together this yummy dish!

Tahini BBQ Summer Vegetable Bake

Tahini BBQ Summer Vegetable Bake | Life Healthfully Lived

Tahini BBQ Sauce-

  • 1/4 cup tahini
  • 2 tbsp homemade ketchup (or the best you can find/afford at the store)
  • 1 tsp molasses
  • 2 tsp apple cider vinegar
  • 1 tsp garlic powder
  • 2 tsp smoked paprika (make sure it’s smoked)
  • 1/2 tsp chili powder
  • 1/2 tsp salt
  1. Blend all ingredients together until smooth and well combined

Vegetable Bake-

  • 1 batch of tahini BBQ sauce
  • 1 zucchini, sliced and diced
  • 1 summer squash, sliced and diced
  • 1 cup corn kernels, fresh or frozen
  • 1 cup red onion, diced
  • 1 1/2 cup cooked garbanzo beans (or whatever bean you have on hand)
  • 2 tsp Italian seasoning
  • salt and pepper
  1. If you want/have the time, roast the zucchini and summer squash.  You don’t have to, but it adds a nice flavor to the dish.  Drizzle with a little olive oil and salt and pepper and roast at 400 for 15 minutes.
  2. Remove the zucchini and squash, turn the oven to 375 and place the roasted vegetables into a large bowl.
  3. Add the corn, onion, garbanzo beans, and stir everything to combine.  Sprinkle with Italian seasoning and salt and pepper and stir again.
  4. Add in all the tahini BBQ sauce and stir everything making sure the sauce is coating all of the vegetables and beans.
  5. Transfer everything to a large casserole dish.  Cover with aluminum foil and bake for 20 minutes.  Take off the aluminum foil and bake for another 5 minutes.
  6. Remove from oven and let it cool for at least 5 minutes before serving. Tahini BBQ Summer Vegetable Bake | Life Healthfully Lived

Soft Taco Shells and Aquafaba

Gluten and Egg Free Soft Shell Tacos

I will get to the Aquafaba in just a second, but let’s talk about these taco shells.

I have always liked tacos but ever since going gluten-free a few years ago I have missed the texture and fold-ability (totally a real word, trust me) of regular flour tacos.  I usually use corn tortillas, which are good but they just aren’t the same as flour tortillas.

Gluten and Egg Free Soft Shell Tacos

There are plenty of recipes out there for Paleo versions of taco shells and I have tried a few of them and they are really good.  Pretty much all of them though use eggs and while that’s not a bad thing if you eat eggs, it poses a problem if you don’t.  Sure, it is really easy to find egg free taco shells at the store or online, but they more often than not have some weird ingredients that I would rather not consume.

Gluten and Egg Free Tacos

Then I read about aquafaba.

Yes that’s a real word and it isn’t as exotic or strange as it sounds.  Technically it’s just the liquid that beans are cooked in.  So bean juice to be precise.  Bean juice apparently doesn’t sound appealing so people have started calling it aquafaba.  Whatever floats their boat.  The important thing to me is that aquafaba acts like eggs in most recipes, plus it’s fairly easy and cheap to get.  You can either buy canned chickpeas and reserve the liquid they are sitting in or cook your own chickpeas and save that liquid.

Gluten and Egg Free Tacos

Armed with this new “fancy” ingredient, I decided to take a stab at making egg free, gluten free, soft taco shells.  Luckily I struck success with my first batch and now I have a simple go-to soft taco shell! Now just a few quick notes:

  • These don’t have the same taste as regular flour shells, but that isn’t a huge problem for me.  I actually really like the taste
  • You can use canned chickpea liquid if you don’t want to cook your own beans and save that liquid like I did.
  • You want your plantains to be slightly yellow.  Not super green and not brown. The really green ones won’t blend as well and the brown ones will give you a sweet taco shell and that might not be what you’re looking for.

Ok enough talking about bean juice, let’s make some tacos!

Soft Shell Tacos

Gluten and Egg Free Taco Shells

  • 1 large plantain, slightly yellow (you can also get a few small plantains, you want about a pound once it’s peeled)
  • 6 tbsp aquafaba (either from a can of chickpeas, or cook your own beans and reserve the liquid)
  • 3 tbsp melted coconut oil
  • juice of one lime
  • a pinch or two of salt (based on your salt preference)
  1. Preheat oven to 350. Peel and cut your plantain into bite size chunks. Add everything into your blender or food processor and blend until everything is smooth.  You want it to look sort of like pancake batter.Scoop out about 1 tbsp of batter. Soft Shell Tacos
  2. Line a large baking sheet with a Silpat or parchment paper.  Scoop about 1 tbsp of batter out onto the baking sheet.  With the back of a spoon, spread out the batter into a fairly thin circle.  Don’t leave it too thick or it won’t cook through and don’t spread it too thin because it will just burn.  You have to be like Goldilocks and get it jusssttttt right 🙂Spread out into shell shapes. Soft Shell Tacos not too thin. Soft Shell Tacos
  3. Do this a few more times, you will have to work in batches because you will only be able to fit 4 to 5 shells on the pan at once. Bake for 8 minutes.
  4. Remove from oven and let them cool for at least five minutes.  Now this is the slightly tricky part, but just have patience at it will all be just fine.  Slowly peel the shells off the baking sheet and move to a wire rack to cool.  If you notice the shell starting to stick just use a spatula to help loosen it from the pan.  As long as you let the shells cool a bit before you lift them up you shouldn’t have too much of a problem.Let cool on pan for 5 minutes. Soft Shell Tacos
  5. Repeat until you have used all the batter.

I used two baking sheets when I made these so I could make more at once, but you can work in batches too.  Once the shells are totally cool fill them with your favorite taco filling and enjoy!

Gluten and Egg Free Taco Shells

Have a great Friday and an awesome weekend!  Don’t forget to wish your mom a Happy Mothers Day on Sunday!

Chickpea Pizza Bites

I don’t know about where you live, but today we are enjoying some GORGEOUS weather!  The sun is shining, it’s warm, there is a light breeze, and I am one happy camper.  I am going to try and soak in as much as possible because living in Chicago on the lakefront you never know when the weather will turn.

DSC_0965

Today’s recipe was kind of a spur of the moment idea.  I was trying to think of something different to do with my chickpea tofu and somehow pizza popped into my head.  It was easy to put together and makes a really great snack or appetizer.  I made some with regular cheese for Adam and used nutritional yeast for mine.  We devoured these as we watched the season premier of Game of Thrones.  Because I was still housesitting at that point, we were able to watch on a big screen with surround sound and it was amazing.  It was also the first time that we were able to watch the season premier on the actual day that it premiered.  It was quite the night and these little bites made it even better.

DSC_0978

So put some of these for your next get together or make some for your next movie/netflix binge.  You won’t be sorry!

Chickpea Pizza Bites

DSC_0963

  • 1 batch of chickpea tofu, poured into a bread loaf pan instead of a casserole dish or brownie pan.
  • 1 8 oz can of plain tomato sauce
  • 2-3 tsp pizza seasoning OR
  • 1 tsp each of basil, oregano, garlic powder, and marjoram
  • 1/2 tsp salt
  • handful of shredded cheese (cheddar or mozzarella) OR nutritional yeast to keep it vegan

DSC_0975

1. Preheat oven to 375.  Make the chickpea tofu and pour it into a bread loaf pan to set.

2.  Line a baking sheet with parchment paper or a Silpat.  Once the tofu has completely cooled, remove from pan and cut into bite size pieces.  Place on the baking sheet and bake in the oven for 20 minutes.

3. In a small bowl mix together the tomato sauce, pizza seasonings, and salt.  Taste to see if you need to adjust the flavor.

4.  Remove the tofu from the oven and top each slice with tomato sauce and either a sprinkle of cheese or nutritional yeast. Put the pan back in the oven and bake for another 5 minutes or until cheese is melted.

DSC_0973

If you have any extra tomato sauce you can use that to dunk your bites into!  I’m working on making some more snack/appetizer type foods that are simple to put together, taste delicious, and are of course healthy!  Are there any of your favorite appetizers or snacks that you would like to see made healthier?

Giveaway-Banner

Oh and quick sidenote I have started a Facebook page, Life Healthfully Lived.  You can find all my posts, pictures that I take, and other articles/recipes that I find and think you would enjoy.  If you haven’t seen it, go check it out and click like.  If I get to 100 likes by the end of the month, two of my followers will win a $10 gift card of their choice!

Have a great Friday and enjoy your weekend everyone!

DSC_0962

My Favorite Hummus

Hummus has almost a cult like following.  People can’t get enough of the stuff and will put it on any and everything.  I am one of those people.  I love the creamy texture and garlicky, smokey taste.  I like dipping things into it, spreading it on anything, and adding it to any meal that I can.  It’s pretty much amazing.

But there is one problem.  I have had a really hard time recreating the texture at home.  Store bought hummus is so smooth and creamy and that’s what makes it so addicting.  I really like making my own though because it’s cheaper and I control the ingredients.  It seemed every time that I made my own the taste would be just fine but I would end up with a dense and thick paste instead of smooth and creamy.  Not so good.

After a lot of testing out a ton of recipes and techniques I think I finally found the best method to make the perfect hummus.  It’s actually a combination of a few techniques out there to help make that perfect texture.  This is a little labor intensive, but I promise it’s worth it.  You can make a really big batch so it will last longer and you will always have hummus on hand.  Now onto the hummus!

Perfectly Creamy Hummus

You will need at least 24 hours to soak the chickpeas. Don’t skip this step!!

DSC_0640

  • 1 cup dried chickpeas
  • 1/2 tsp baking soda
  • 4 whole cloves garlic
  • 3 tbsp lemon juice
  • 1/2 cup tahini
  • 1/2 tsp cumin (freshly ground if possible)
  • 1/2 tsp smoked paprika
  • 1 tsp salt
  • 1/2 cup water, reserved from cooking the chickpeas

1.  24 hours before you want hummus, place chickpeas into a large bowl and cover with water.  Stir in the 1/2 tsp of baking soda.  Cover and place the bowl into fridge.

2.  After 24 hours, drain and rinse chickpeas and place into a large pot.  Cover with at least 5 to 6 cups of water.  Add in the 4 whole garlic cloves and bring the water to a boil.  With a slotted spoon, skim off any foam/skins that floats to the top.  Lower to a simmer, cover, and cook for 3 hours.  The chickpeas should be super soft at this point.

3.  Drain the chickpeas and garlic, reserving at least 1/2 cup of the water.  Now at this point you can remove some of the skins off the chickpeas if you want.  I have tried it both ways and haven’t noticed a huge difference.  Place chickpeas and garlic into a food processor or blender.  Add in the rest of the ingredients except the water.  Pulse a few times to start to combine everything.

4.  Turn the processor on and slowly add in water.  This will turn the hummus into that wonderfully creamy texture.  You might need less water, but I have found the full 1/2 cup makes the creamiest version.

DSC_0641

Yes, it seems like a lot to make hummus when you can just go to the store and buy some and be on your merry way.  But it is really hard to find hummus that doesn’t have weird ingredients or preservatives, and it can get expensive to support a serious hummus addiction with store bought.  Take the time to make this and you will be rewarded with a delicious hummus that is half the cost and ready to be used in any way you want!

Have a great Friday and wonderful weekend!

Roasted Chickpeas

Hello everyone!  I hope that you have had a great week and that you are starting to emerge from the caves of winter into the warmth (sort of) of spring!  I know that I haven’t done a regular post that doesn’t include a recipe in a while, but I have a few coming your way soon and once this move is over they will be coming more often!  Today I have a quick and healthy snack recipe for you.  I have been having a love affair with chickpeas lately, I can’t seem to get enough of them!  I eat them any way I can, in hummus, in salads, sauteed with greens, and roasted.  Roasted chickpeas are a great crunchy snack that you can season any way you like.  If you want a sweeter snack you can use cinnamon or nutmeg and if you are craving salty you can try garlic and pepper.  The options are endless!


Roasted Chickpeas

photo (66)

  • 1 cup dried chickpeas, soaked overnight and rinsed (you could use canned, but the texture isn’t quite the same)
  • 2-3 tbsp olive oil
  • seasonings of your choice (I like garlic, garam masala, cumin, or italian seasonings)
  • silpat or parchment paper (aluminum foil doesn’t work well with these)
  • large baking sheet


1. Cook your soaked and rinsed chickpeas in a large pot.  Bring to a boil, then lower the heat to a simmer and cook for about 20-30  minutes.  You want a firm texture, not too mushy.

2. Preheat oven to 425.  Place your silpat or parchment paper on to a large baking sheet.  You want the baking sheet to be big enough that the chickpeas will have enough room to spread out, otherwise you’ll get chewy not crunchy chickpeas

3.  Pat the chickpeas dry and place into a large mixing bowl.  Add in the olive oil (enough to cover the chickpeas, but don’t drown them in it) and whichever seasonings you’re going to use.  Mix well so everything is coated.

4.  Spread the chickpeas out in a single layer on the baking sheet, making sure they have a enough room between each and place in the oven.  Cook for about 15 minutes, then rotate the pan and cook for about 5 more minutes.  Keep an eye on them for the last 5 minutes so they don’t burn.


That’s it!  Remove them from the oven and let them cool a bit before you dig in.  I promise I have never burnt my fingers or tongue trying to eat these right out of the oven… Enjoy your tasty and healthy snack!  Have a great weekend and see you all on Monday!