Arepas with Chipotle Sausage Crumbles & Cilantro Sauce

TheArepas with Chipotle Sausage Crumbles & Cilantro Sauce | Life Healthfully Lived day is here my friends.  I’m finally putting up the recipe for the delicious arepas that I have been making.  Don’t know what an arepa is?  Think of it as the Colombian version of a sandwich, kind of like a pita.  It’s a bun made out of pre-cooked corn meal and then sliced halfway through and stuffed with tasty fillings.  Arepas are eaten for any meal depending on what you fill them with.  The filling can be as simple as cheese to as elaborate as what I created because I love all the things.

I started obsessing over arepas after I saw them on some Food Network show, I can’t remember which one.  They looked delicious and I was intrigued by how simple it looked to make them.  Then Juli over at PaleOMG started posting pictures of the arepas she would get from a food truck in her city.   They looked amazing and I was so jealous that she could get these delicacies out of a truck.Arepas with Chipotle Sausage Crumbles & Cilantro Sauce | Life Healthfully Lived

Finally after mooning over arepas for months, I decided to see what it would take to actually make them.  There are plenty of recipes for them and they really are easy to make.  You just need the right flour.  It has to be pre-cooked corn flour or these won’t turn out.  If you have a large Latin section at your grocery store or better yet an actual Latin grocery store, you can probably find this flour pretty easy.  If you can’t you can get it from Amazon and it is fairly inexpensive.

For the filling, I decided to make sausage crumbles out of oatmeal.  Hang with me on this one.  I saw this idea on a blog awhile ago and while I was skeptical, I gave it a try.  It totally had the taste and texture of sausage crumbles.  It’s the spices you use that really make a difference.   I used the same method from the blog and just changed up the seasonings.  I also included a cilantro sauce that I made by just switching the basil with cilantro from my dressing recipe.Arepas with Chipotle Sausage Crumbles & Cilantro Sauce | Life Healthfully Lived

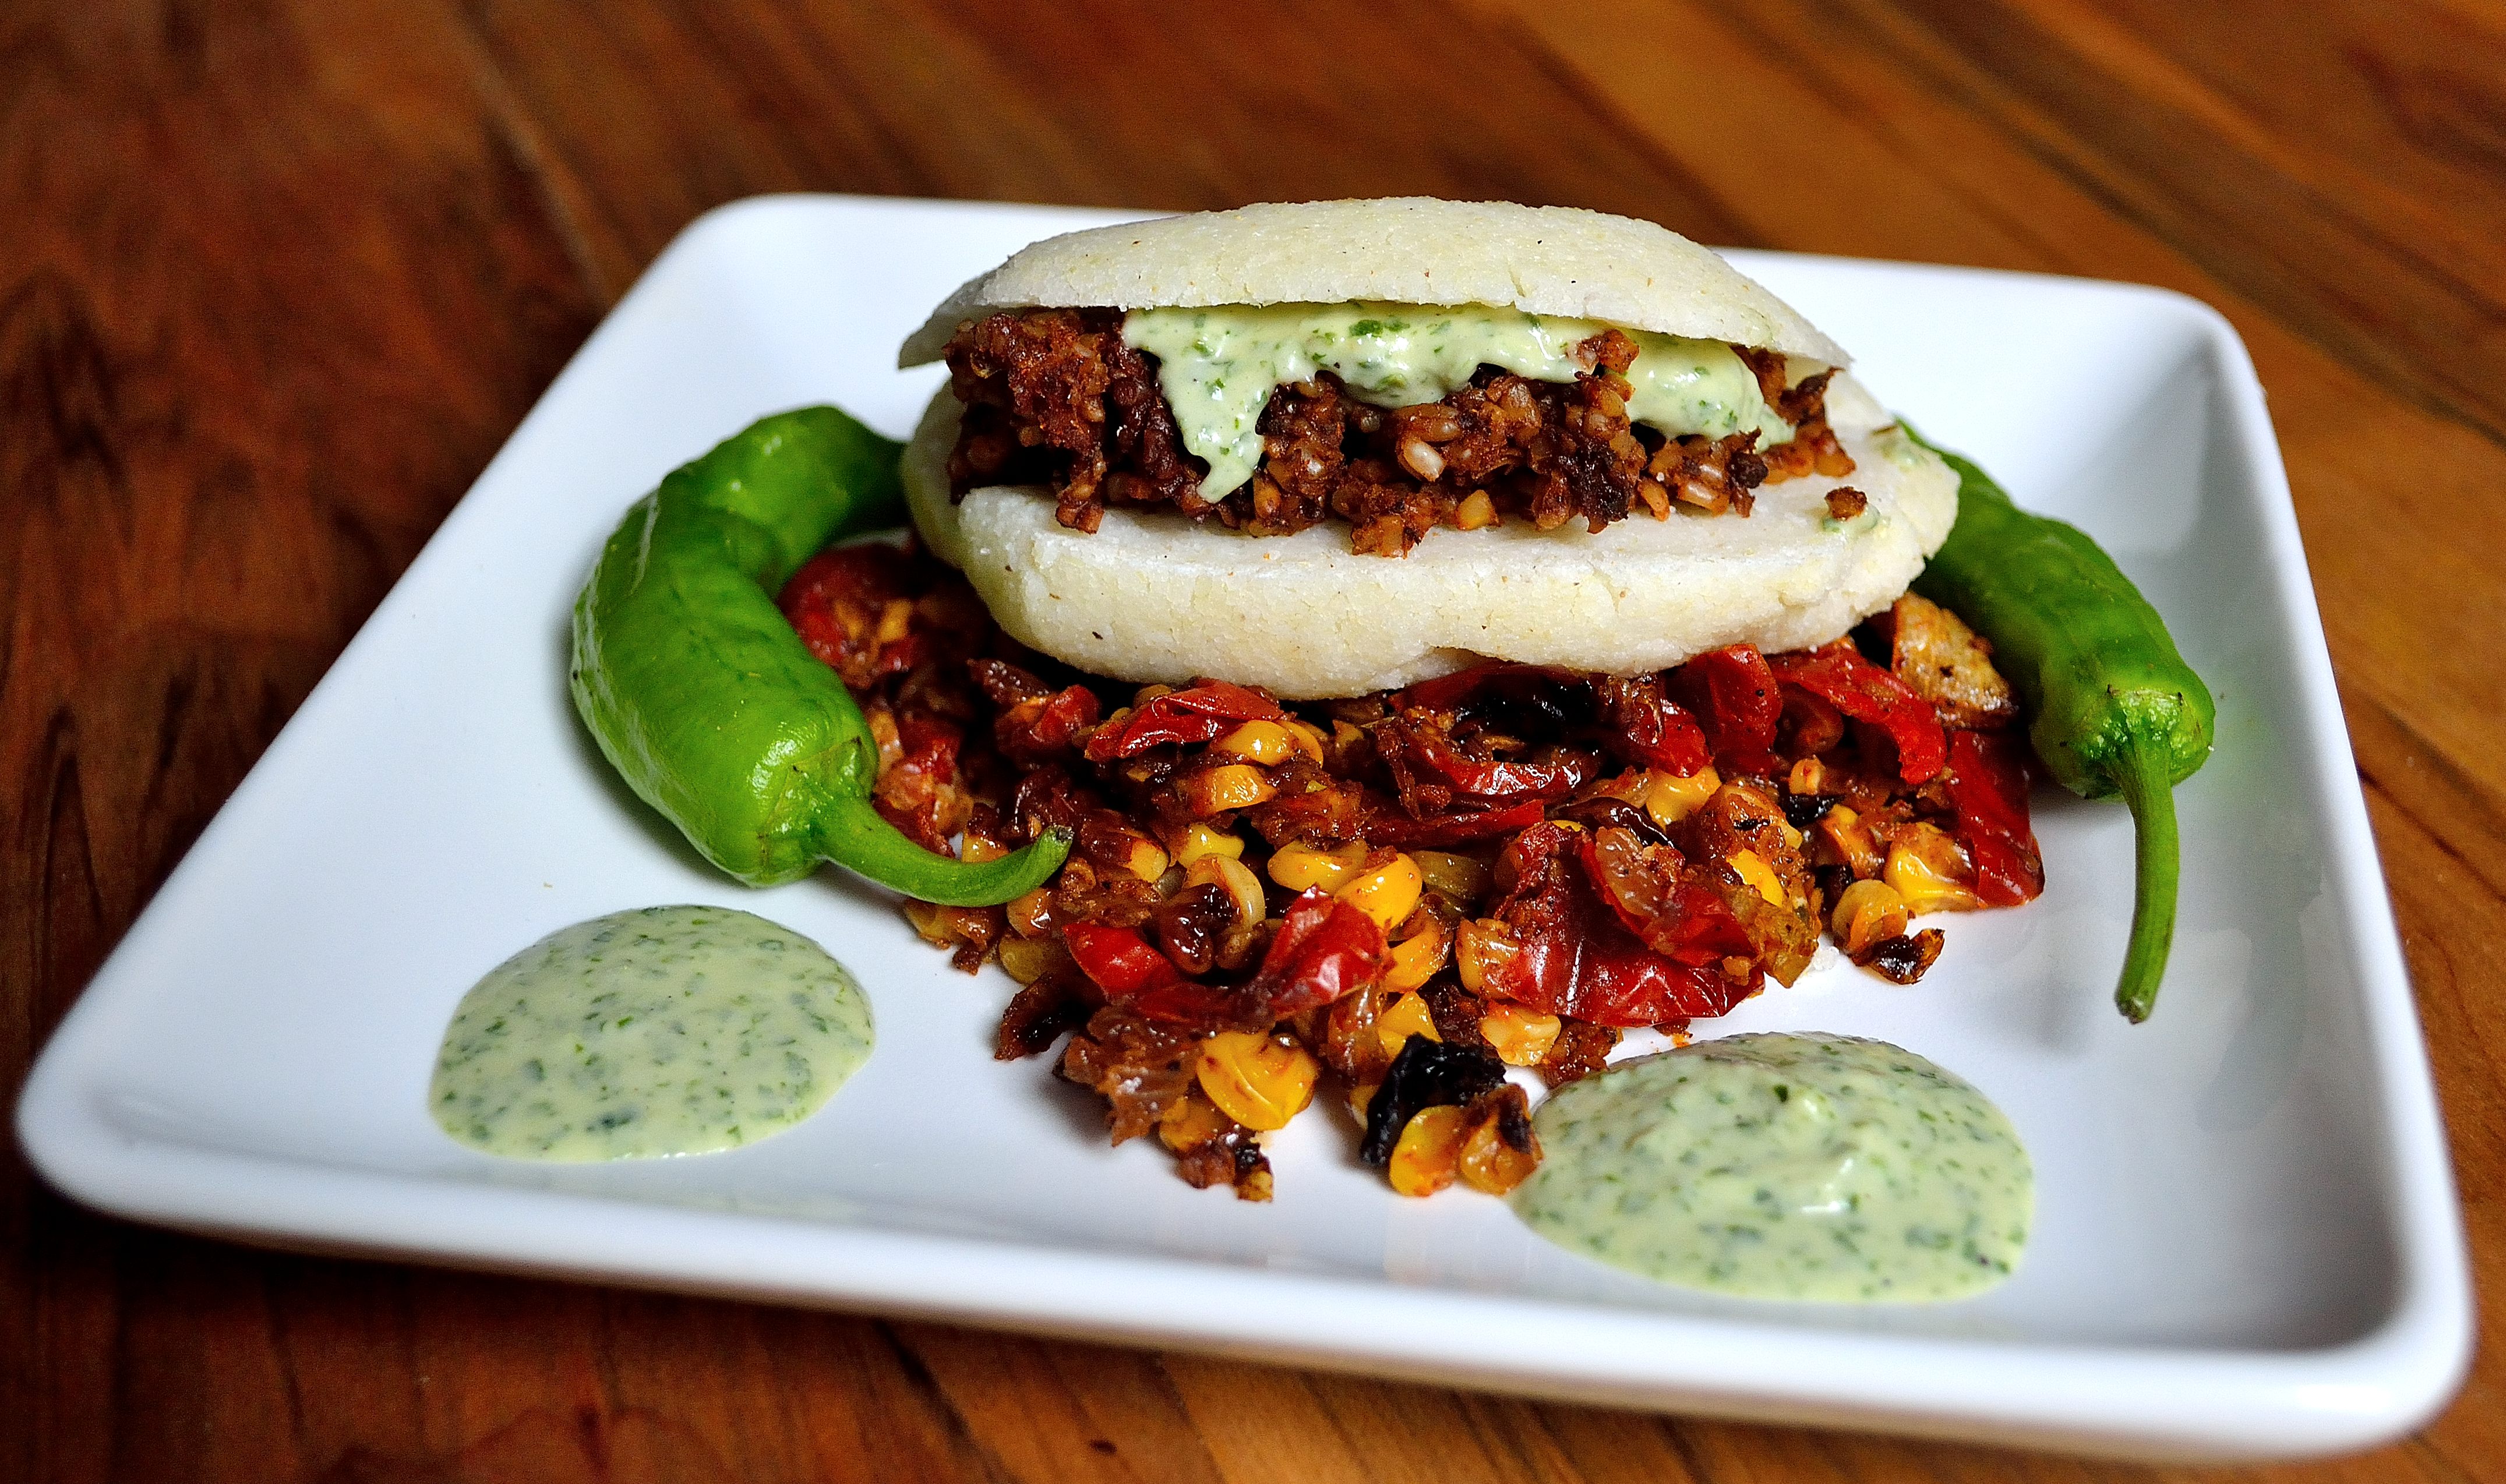
It might look like this will take forever to make, but it all comes together pretty easily.  So if you want to get in on the awesomeness that is arepas, try out my version!

For the Arepas: 

  • 2 cups pre-cooked corn meal sometimes called harina de maiz (I used this brand)
  • 2 1/2 cups water
  • 1 tbsp coconut oil
  • 1 tsp salt
  1. Measure out the water and pour into a large bowl with the coconut oil.  Set aside.  Mix together the cornmeal and salt.
  2. Slowly add the cornmeal and salt to the water, using your hand to combine the two and keep lumps from forming.  Once all the cornmeal is in the water, keep using your hands and mix everything together well.  It will seem like you have too much water and that the dough is too runny.  Don’t worry it will thicken up.
  3. Place a damp paper towel over the dough and let it rest for 10 minutes.  Preheat the oven to 350 and line a large baking sheet with parchment paper or Silpat.
  4. After the 10 minutes is up, remove the paper towel and portion out the dough into about 6 to 8 balls.  Roll each portion into a ball and then slightly flatten it out so it roughly resembles a hockey puck.  You don’t want them too small and thick because you will be cutting these and stuffing them.
  5. Heat a large skillet, no oil, over medium heat and cook each side of the arepas for about 2 minutes to seal the dough.  Place them back on the baking sheet after you’re done.  Once you have sealed all the arepas, place them in the oven and bake for 10 to 15 minutes.  They are done when you can tap them and it sounds hollow inside.
  6. Remove from the oven and let cool for about 10 minutes before you slice them.  When you’re ready to fill them, slice only halfway through so it forms a little pocket.  Stuff them and then your face!

For the Chipotle Sausage Crumbles: 

  • 1/2 cup steel cut oats
  • 1 cup water
  • 2 tbsp tomato paste
  • 1 to 2 tsp chipotle powder
  • 1/2 tsp onion powder
  • 1/2 tsp garlic powder
  • 1 tsp smoked paprika
  • 1/2 tsp salt
  • 1/2 tsp cumin
  • 1/2 tsp oregano
  • juice of half a lime
  1. Add oats, water, and tomato paste in a medium saucepan and bring to a boil.  Cover the pot, lower to a simmer and cook for 10 minutes.
  2. Uncover the oats and add in all the seasonings and lime juice.  Mix to combine and cook for another 5 minutes.  You want most of the water to cook out so you are left with a very thick mixture that resembles cooked ground meat.
  3. Alternatively, if you want to use ground beef, turkey, or chicken you can cook it as usual and just use the seasonings listed here to flavor it.

For the Cilantro Sauce:

  1. I just used my basil dressing and substituted cilantro in for the basil.

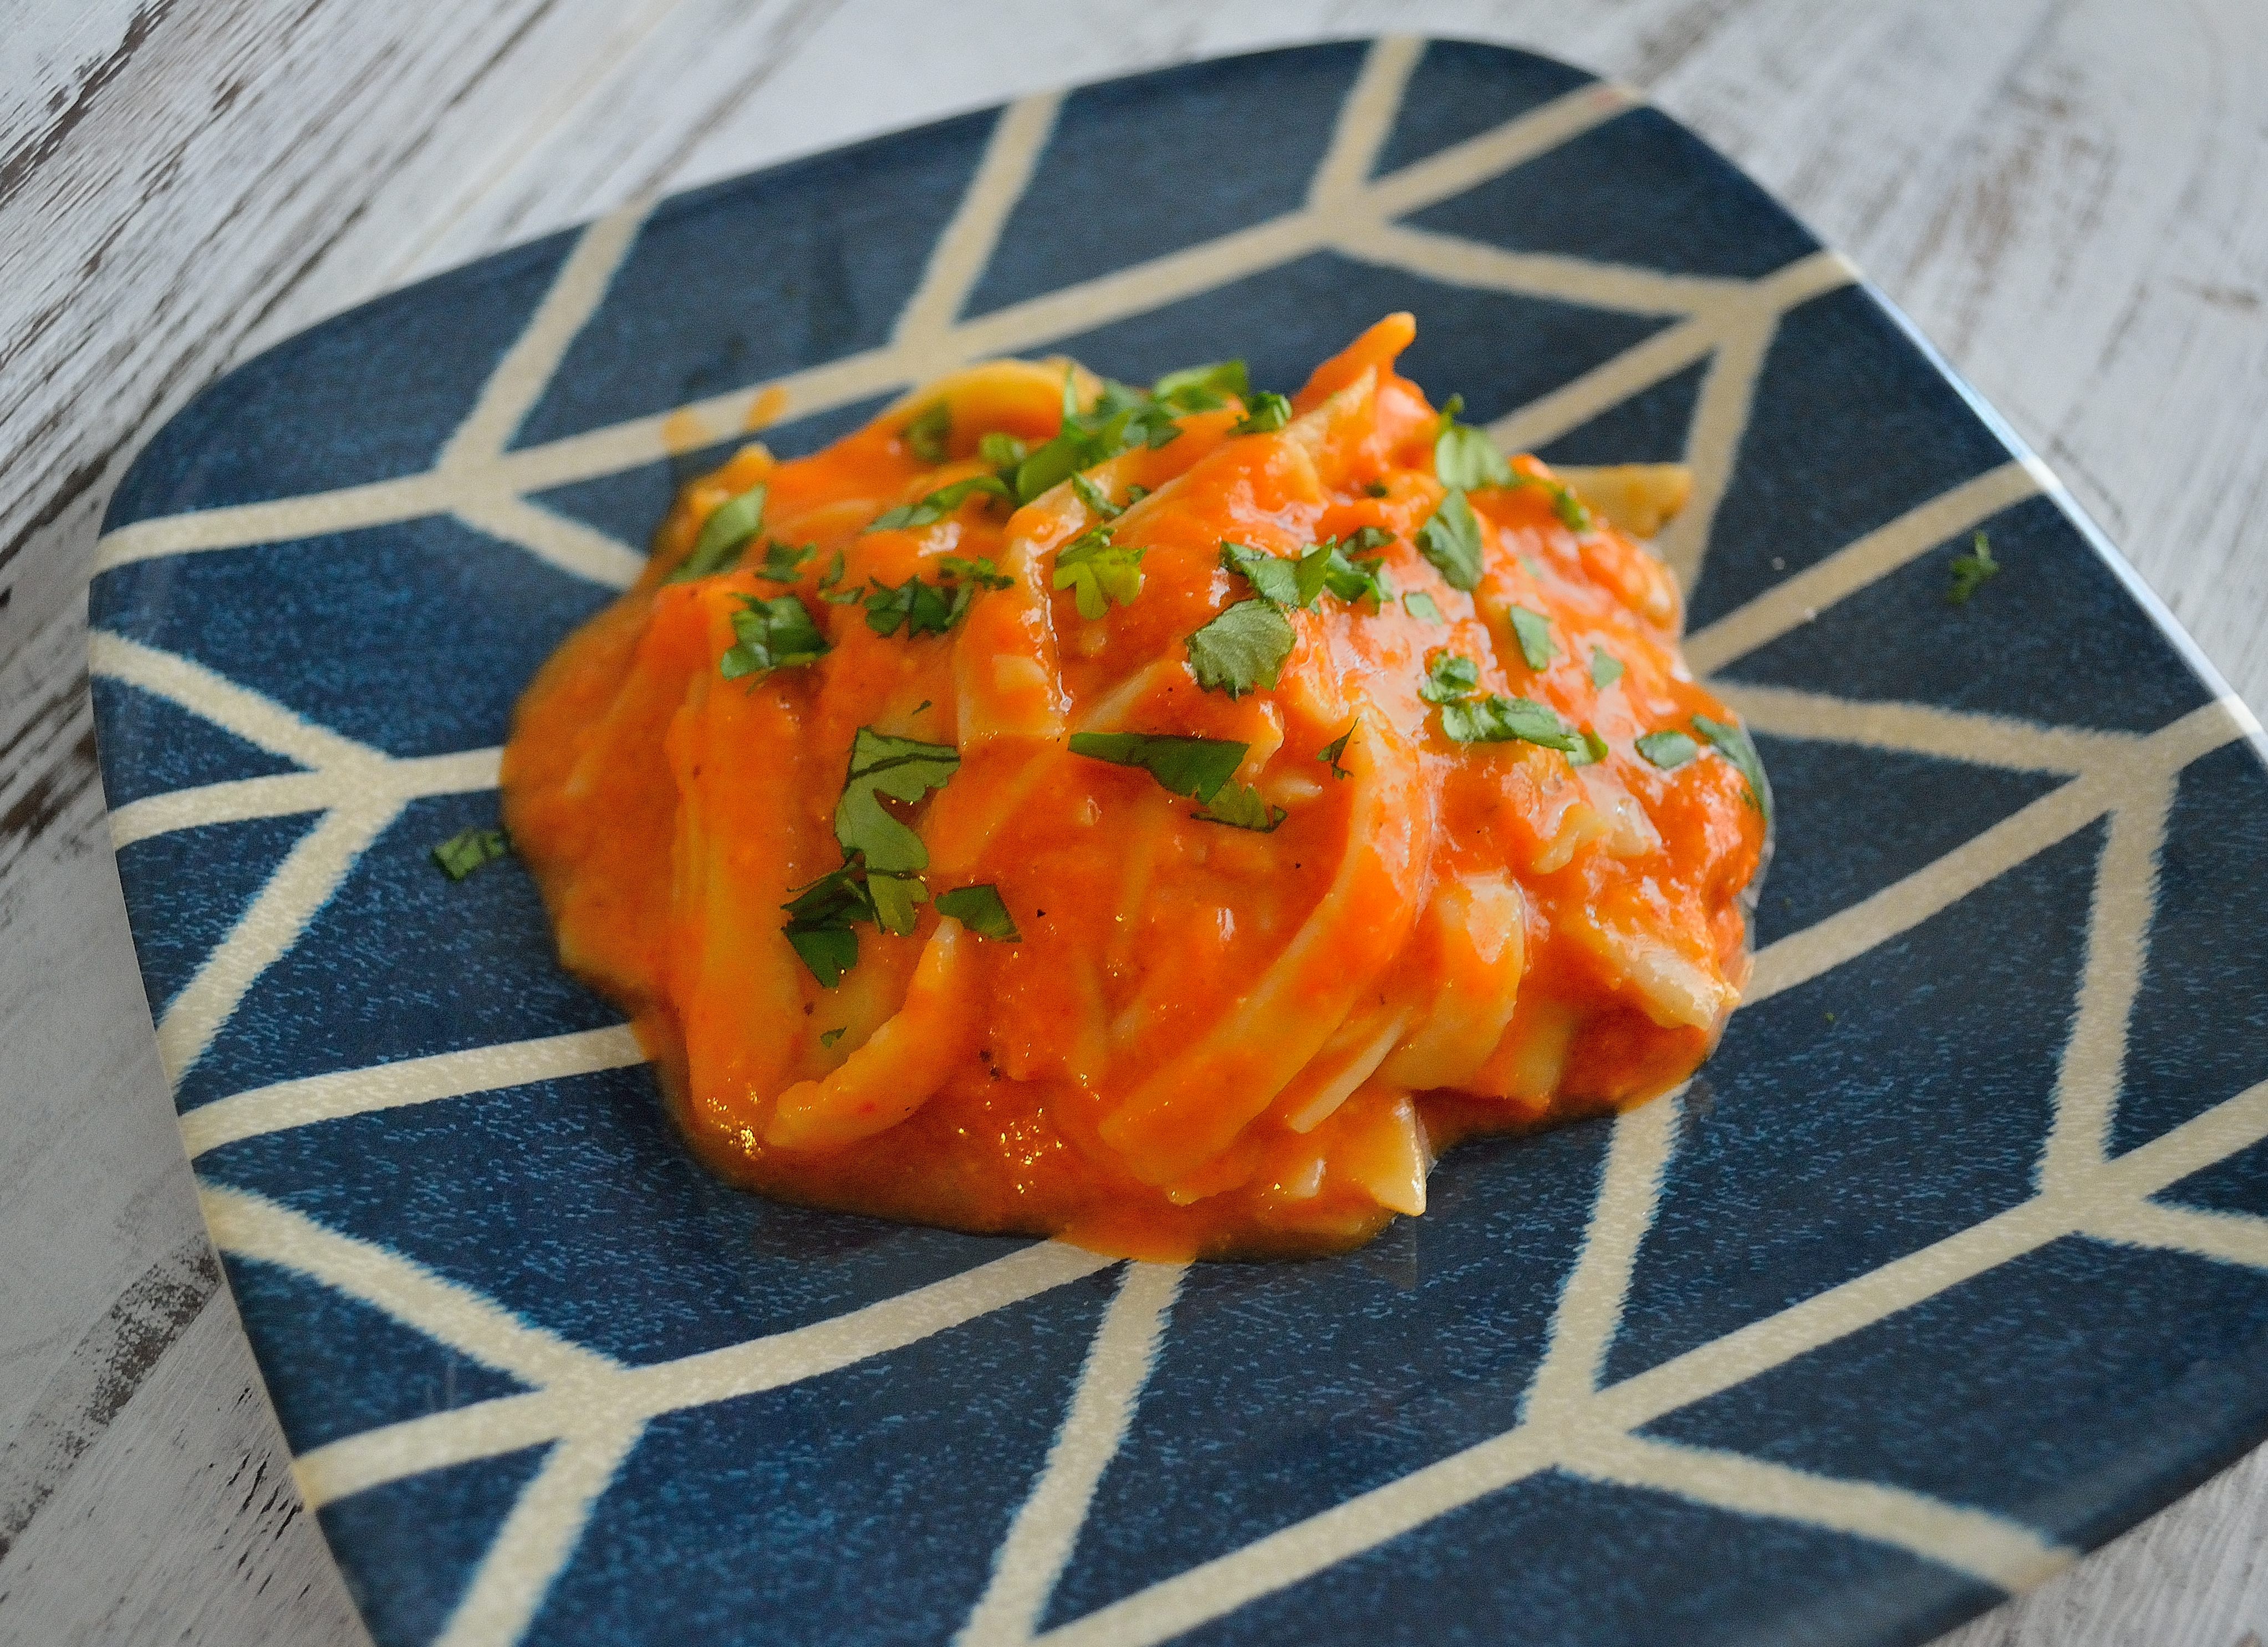
Yes, it looks like a lot for one meal but once you get the hang of it, it gets a lot easier.  You can fill the arepas with whatever you want.  Along with the chipotle sausage crumbles, I spread some guacamole on the arepas and made a corn and tomato salsa.  You can also try shredded pork, refried beans, rice, or sauteed vegetables.  Seriously, give this recipe a try and I promise you won’t regret it!Arepas with Chipotle Sausage Crumbles & Cilantro Sauce | Life Healthfully Lived

Have a great weekend everyone and see you on Monday!

Ever had arepas?  Tell me where and what you filled it with in the comments!

The Last Summer Pasta Salad

SummerThe Last Summer Salad with Herb Sauce | Life Healthfully Lived is having its last hurrah.  Half of this week has been ridiculously hot and humid.  I’m talking two showers-a-day hot and humid.  But that humidity finally broke a few days ago and now you can feel a touch of fall in the air.

While I absolutely love fall, I’m not quite ready to give up my summer just yet.  My farmer’s market still has plenty of end of the summer vegetables like corn and tomatoes and there are still a few 80 degree days in the forecast.  Warm days like that beg for a meal that doesn’t require you to turn on the oven. The Last Summer Salad with Herb Sauce | Life Healthfully Lived

I came up with this pasta salad last Sunday when even thinking about turning on the oven made me sweat, and I was already sweating buckets.  This meal comes together fast and tastes amazing served up cold.  It also packs in a lot of vegetables and herbs and can be customized to whatever produce you have lying around.

So if you’re like me and aren’t ready to say goodbye to summer, whip up this salad and enjoy these last few days.

The Last Summer Pasta Salad with Herb SauceThe Last Summer Salad with Herb Sauce | Life Healthfully Lived

  • 2 cups cooked pasta, I used brown rice rotini
  • 1 cup cooked quinoa
  • 2 ears of corn, kernels removed (you can also use frozen kernels, thawed)
  • 1 cup cherry tomatoes, sliced in half
  • 1 cup bell peppers, I used a mix of yellow, green, and red
  • 1 cup zucchini, diced
  • 1/2 cup onion, diced
  • 3-4 cloves garlic minced

Herb Sauce

  • 1 small bunch of basil leaves, about 1/2 cup tightly packed
  • 1 small bunch of cilantro
  • 2 cloves garlic
  • 1/3 cup full-fat coconut milk
  • juice of half a lime
  • salt and pepper to tasteThe Last Summer Salad with Herb Sauce | Life Healthfully Lived
  1. Combine all sauce ingredients in a blender and set aside.
  2. Heat a little olive oil in a large skillet over medium-high heat.  Saute the onions until softened and then add in the peppers, tomatoes, zucchini, and corn.  Cook until the edges are slightly brown.  Add in the garlic at the very end and saute for one more minute.
  3. Remove the vegetables from heat and let them cool.  In a large bowl combine the pasta and quinoa and the cooled vegetables.  Mix everything well.
  4. Pour the herb sauce over everything and stir to combine so everything is coated.  Taste and adjust the seasonings.  You can serve it right away or put it in the fridge to cool completely.

Roasted Red Pepper Sauce

IRoasted Red Pepper Sauce | Life Healthfully Lived am the queen of roasted things.  It’s pretty much my answer to everything.  Broccoli? Roast it.  Zucchini?  Roast it.  Almonds/cashews/hazelnuts? Roast it. Sweet potatoes.  Roast it.  Annoying relatives that randomly drop in for the weekend without calling?  Roast it.

Ok, maybe not the last one but still.  Whenever I have food that can be roasted, I’m gonna roast it.  So I was shocked that I had never roasted peppers before.  It’s not like it’s a hard process.  It couldn’t be simpler.  I just never looked at a pepper and felt the need to roast it.  Well, that time is over because roasted peppers are delicious.  They add a wonderfully smoky flavor to whatever you use them for and smoky is always good.

I put this sauce over gluten free linguine and it was fantastic.  You could use this over zoodles, in lasagna, over vegetables (roasted of course), or you know just eat it straight out of the pot.  I won’t judge.

Roasted Red Pepper Sauce- slightly adapted from Minimalist Baker’s Vegan Roasted Red Pepper PastaRoasted Red Pepper Sauce | Life Healthfully Lived

  • 2 large red bell peppers
  • 1/2 cup caramelized onions (or regular onion), diced
  • 4 cloves garlic, minced
  • 1/2 to 1 cup coconut milk
  • 3 tbsp nutritional yeast
  • salt and pepper to taste
  1. Preheat oven to 400.  Line a baking sheet with aluminum foil and place the peppers on the sheet.  Roast the peppers for 20 minutes and then flip them over and roast for another 20 minutes.  The pepper should have a little char on it once it’s done.
  2. Remove the peppers from the oven and place a glass bowl over them to allow the steam to loosen the skins.  Let them sit for about 15 minutes.
  3. While the peppers are steaming, heat a little oil in a medium pan over medium-high heat.  Saute the onions and garlic until soft and translucent, about 5 to 7 minutes.  Remove from heat and place in a blender.
  4. Take the peppers out from under the bowl and remove the skins.  The skins should slip off pretty easily.  You can leave a little bit of the char on for a more intense smoky flavor.
  5. Add the peppers, nutritional yeast, salt, and pepper to the blender.  Pulse a few times to break everything up and then add in 1/2 cup of the coconut milk.  Blend until smooth.  If the sauce is still really thick add in more coconut milk, up to 1 cup.
  6. Pour the sauce into a saucepan and heat through, about 5 minutes.  Serve over pasta, vegetables, or even rice.

At first glance, it looks like there are a lot of complicated steps but you’re really just roasting peppers and then blending everything together.  You could even roast the peppers ahead of time and then when you’re ready for dinner you can just throw everything into the blender and you have dinner in no time!  You can also roast the peppers in a few different ways, I just like the oven because it doesn’t take a lot of effort.  Roasted Red Pepper Sauce | Life Healthfully Lived

Anyone have any fun weekend plans besides making this awesome and simple dinner?  I’m looking forward to spending some time with Adam since we haven’t been able to do that for over two weeks!  Have a great weekend everyone!

Chickpea Pizza Bites

I don’t know about where you live, but today we are enjoying some GORGEOUS weather!  The sun is shining, it’s warm, there is a light breeze, and I am one happy camper.  I am going to try and soak in as much as possible because living in Chicago on the lakefront you never know when the weather will turn.

DSC_0965

Today’s recipe was kind of a spur of the moment idea.  I was trying to think of something different to do with my chickpea tofu and somehow pizza popped into my head.  It was easy to put together and makes a really great snack or appetizer.  I made some with regular cheese for Adam and used nutritional yeast for mine.  We devoured these as we watched the season premier of Game of Thrones.  Because I was still housesitting at that point, we were able to watch on a big screen with surround sound and it was amazing.  It was also the first time that we were able to watch the season premier on the actual day that it premiered.  It was quite the night and these little bites made it even better.

DSC_0978

So put some of these for your next get together or make some for your next movie/netflix binge.  You won’t be sorry!

Chickpea Pizza Bites

DSC_0963

  • 1 batch of chickpea tofu, poured into a bread loaf pan instead of a casserole dish or brownie pan.
  • 1 8 oz can of plain tomato sauce
  • 2-3 tsp pizza seasoning OR
  • 1 tsp each of basil, oregano, garlic powder, and marjoram
  • 1/2 tsp salt
  • handful of shredded cheese (cheddar or mozzarella) OR nutritional yeast to keep it vegan

DSC_0975

1. Preheat oven to 375.  Make the chickpea tofu and pour it into a bread loaf pan to set.

2.  Line a baking sheet with parchment paper or a Silpat.  Once the tofu has completely cooled, remove from pan and cut into bite size pieces.  Place on the baking sheet and bake in the oven for 20 minutes.

3. In a small bowl mix together the tomato sauce, pizza seasonings, and salt.  Taste to see if you need to adjust the flavor.

4.  Remove the tofu from the oven and top each slice with tomato sauce and either a sprinkle of cheese or nutritional yeast. Put the pan back in the oven and bake for another 5 minutes or until cheese is melted.

DSC_0973

If you have any extra tomato sauce you can use that to dunk your bites into!  I’m working on making some more snack/appetizer type foods that are simple to put together, taste delicious, and are of course healthy!  Are there any of your favorite appetizers or snacks that you would like to see made healthier?

Giveaway-Banner

Oh and quick sidenote I have started a Facebook page, Life Healthfully Lived.  You can find all my posts, pictures that I take, and other articles/recipes that I find and think you would enjoy.  If you haven’t seen it, go check it out and click like.  If I get to 100 likes by the end of the month, two of my followers will win a $10 gift card of their choice!

Have a great Friday and enjoy your weekend everyone!

DSC_0962