Weather & My Favorite Spring Vegetables

From the title you can probably gather, I don’t have a recipe for you today.  That isn’t to say I don’t have recipes, oh do I have recipes, they just aren’t quite ready for you yet.

But I didn’t want to leave you with nothing this fine Friday so I thought I would highlight some of my favorite spring vegetables that are starting to make their way to the produce section.  First, can we just talk about the weather?

Good.

In the span of about oh… an hour and a half, there has been rain, snow, rain/snow (or wintry mix if you like that better) and full on sun.  Now don’t get me wrong, I understand it’s spring in Chicago so I fully expect bi-polar weather but this is getting a little ridiculous.  I would like to wear my cute spring clothes now.  I would like to put my boots away for good.  I would like to not need five different coats for the weather in ONE DAY.Weather & My Favorite Spring Vegetables | Life Healthfully Lived

I mean, come on!  I married a meteorologist!  Shouldn’t he be able to fix this stuff?  But noooooo.  He gets all technical and scientific and tells me, “That’s not how this works Katie.”  Whatever.  I think he’s just being lazy.  With all his fancy degrees he should be able to make spring weather be better.  Especially for his loving and adoring wife who cooks him delicious meals and tries to make dessert for him most nights… I’m just sayin’

Ok, weather rant over on to my favorite veggies!Weather & My Favorite Spring Vegetables | Life Healthfully Lived

I know that most produce is available year-round so we’ve kind of lost the touch for eating seasonally.  But just because something is available year-round doesn’t mean we should eat it year-round.  Fruit and vegetables just taste so much better when they’re in season and they’re also cheaper.  Cheap tasty food is always going to be better than expensive bland food in my book.
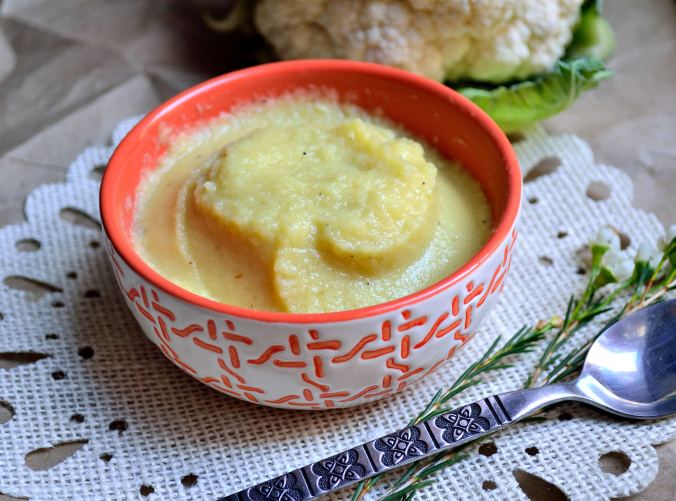
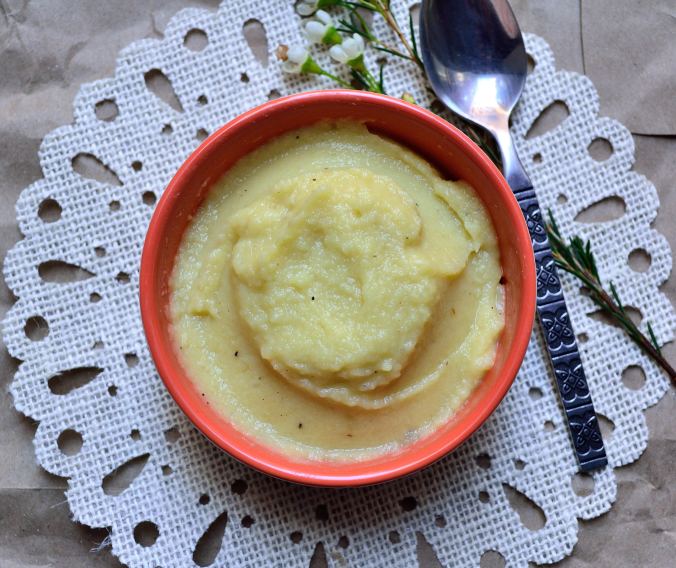
CauliflowerWeather & My Favorite Spring Vegetables | Life Healthfully Lived

If you haven’t noticed lately, I’ve been kind of having a thing with cauliflower.  I turn it into rice, stuff taquitos with it, make mac n’ cheese with it, roast it, turn it into a creamy sauce…. It’s like a magic vegetable that can be anything and do anything.  It’s in peak season now, so pick up a few heads and make whatever you want.  Seriously.

Parsnips

These are technically in season from fall to the beginning of spring but during the winter months, they can be kind of puny and woody tasting.  I like spring parsnips cause they’re sweet and they taste amazing roasted.  You can also puree them and make a delicious mash or soup.  If you like carrots you’ll probably love parsnips.
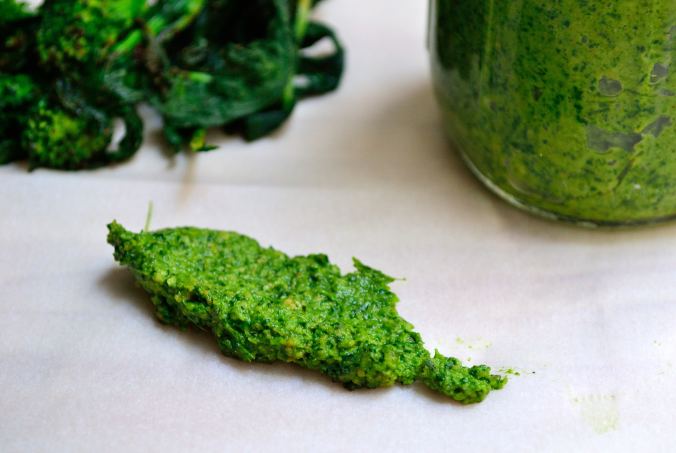
SpinachWeather & My Favorite Spring Vegetables | Life Healthfully Lived

Give me green things!!! After winter, I’m always grabbing the greenest fresh produce I can.  Spinach (the ones in bunches that are covered with dirt, not in the plastic bags) start hitting the shelves and I can’t help but always grab a bunch.  I eat them raw in salads or wilt them a bit for soup or turn them into pesto or make lasagna with them.  No matter how you prepare them, a little salt, pepper, and lemon juice go a long way.

Leeks and OnionsWeather & My Favorite Spring Vegetables | Life Healthfully Lived

While I might not take a big bite out of a raw leek or onion, they enhance pretty much the flavor of anything you make.  Leeks are great in soup or stews and onions go in everything.  The spring varieties are a little sweeter and they are great caramelized.

Asparagus

Yes, your pee might smell funny but it’s worth it when you have roasted asparagus with a lemony cream sauce and pasta.  Even just roasted asparagus on its own is delicious.  And if you’re a meat-eater, my mom wraps two or three asparagus stalks with some prosciutto and roasts it and everyone goes nuts for it.

Watercress

Ok, so I have never tried watercress (that I know of) but it is like one of the top healthiest foods out there and it starts showing up in the spring.  I haven’t seen it on the shelves just yet, but I’m going to try some when I do find it.  It’s always good to try new fruits or vegetables that way you never get bored of your food!

So those are some of my top picks for spring plus one newbie that I want to try.  What are some of your favorite spring vegetables?

I hope you have an awesome weekend and that the weather by you isn’t as crazy as it is here!


DIY Wednesday: Baba Ganoush

Ok, before making this recipe I had never had baba ganoush.  In fact, I didn’t even really know what baba ganoush was and the only reason I thought about it was because of the movie Wedding Crashers.  Yes, the movie with Vince Vaughn and Owen Wilson.  It’s one of my sister’s and my favorite movies and it’s awesome and if you’ve never seen do it now.

Well, in the movie Owen Wilson’s character affectionately calls Vince Vaughn’s character “Baba Ganoush”.  So the other day I was randomly thinking about the movies and I decided to figure out what baba ganoush meant and when I saw that it was an eggplant and tahini spread I decided I needed to make it for myself.DIY Wednesday: Baba Ganoush | Life Healthfully Lived

Yes, this is how my brain works.

I really love how light and simple this dip is and it’s amazing on chips (particularly pita), cut up vegetables, and while I haven’t tried it yet I bet it would be good spread on fish or chicken.  You could buy baba ganoush at the store but the kind I found had odd ingredients and was way more expensive and why buy it when you can easily make it?DIY Wednesday: Baba Ganoush | Life Healthfully Lived

While this dip won’t replace hummus (hummus love forever yo) it is a new fun dip!

Baba GanoushDIY Wednesday: Baba Ganoush | Life Healthfully Lived

  • 1 medium sized eggplant
  • half a lemon
  • 1 clove garlic minced
  • 4 cloves garlic, roasted
  • 2 tbsp tahini*
  • 1/2 tsp cumin
  • 1/2 tsp smoked paprika
  • 2 tsp fresh parsley, chopped or 1 tsp dried parsley
  • roasted sesame seeds for garnish, optional
  1. Preheat oven to 400 and prepare a large baking sheet with a Silpat or parchment paper.
  2. Wash and rinse the eggplant really well and poke it all over with a fork.  Place it on the baking sheet.  Take 4 cloves of peeled garlic and wrap them in a little foil pouch with a little olive oil and salt and place the pouch on the pan with the eggplant.
  3. Roast the eggplant until it’s soft and starting to collapse rotating it halfway through. About 30 to 35 minutes.  Roast the garlic for about 15 to 20 minutes or until golden brown.
  4. Once the eggplant and garlic are done roasting, let them cool until you can easily handle the eggplant.  Slice in half and scoop out the flesh and place it into the food processor along with the rest of the ingredients, except the sesame seeds.
  5. Process until it’s smooth.  Scoop into a bowl and if you’re serving right away top with toasted sesame seeds and a drizzle of olive oil.

* I also tried this with almond butter and it worked just fine but I like the flavor tahini adds. Use whatever you like and have on hand.DIY Wednesday: Baba Ganoush | Life Healthfully Lived

Meyer Lemon Poppy Seed Muffins with Blueberry Bottoms

Told you this week was all about the Meyer lemons and poppy seeds.Meyer Lemon Poppy Seed Muffins with Blueberry Bottoms | Life Healthfully Lived

Of course, I had to make some lemon poppyseed muffins because who gets lemons and poppy seeds and DOESN’T make muffins?  Psychos, that’s who.  I might be crazy but I’m no psycho.  Anyways….

I was a little worried that these wouldn’t turn out after I made my first batch and they were…. well, bland.  They tasted like nothing and that’s not what you want from a muffin.  So I switched a few things around and the second batch turned out much better.  They even got the approval of my family at Easter, so that’s an even bigger plus!DSC_4509_00004DSC_4507_00003

I used frozen blueberries because that’s what I had at the time but if you want to use fresh that’s good too.  You might have to adjust your cook time, so keep an eye on them.  Other than that this recipe is pretty straightforward and fairly simple to make!

After the recipe, you’ll find a quick poll.  It will only take a few seconds and it will help me make this blog even better for you.  Thank you in advance and have an awesome weekend!

Meyer Lemon Poppy Seed Muffins with Blueberry BottomsMeyer Lemon Poppy Seed Muffins with Blueberry Bottoms | Life Healthfully Lived

  • 1 cup almond flour
  • 6 tbsp tapioca starch
  • 1/2 tsp baking powder
  • 1/4 tsp baking soda
  • 1/4 tsp salt
  • 1/2 cup freshly squeezed Meyer lemon juice
  • 3 tbsp Meyer lemon zest
  • 1 flax egg (3 tbsp flax meal mixed with 6 tbsp water. Let sit for 10 minutes to gel)
  • scant 1/4 cup maple syrup
  • 1/4 cup coconut oil, melted
  • 2 tbsp coconut sugar
  • 2 tbsp poppy seeds
  • 1 cup blueberries, fresh or frozen
  1. Preheat the oven to 350 and line a muffin tin with paper liners or lightly oil each well.
  2. Combine all of the dry ingredients, except for the lemon zest, into a medium bowl and whisk together so it’s light and fluffy.
  3. In a smaller bowl, whisk together the wet ingredients and make sure everything is completely incorporated.
  4. Make a well in the dry ingredients and pour the wet ingredients into the well.  With a spatula, fold everything together.  Once mixed together, add the zest and stir a few times to combine.
  5. Place 3 to 4 blueberries in the bottom of each muffin well and then spoon in about 2 tablespoons of batter.  These won’t rise a ton, so you can fill them about 3/4 of the way up.
  6. Bake the muffins for about 22 minutes (a little less if using fresh blueberries).  Remove them from the oven and see if the middle is set.  If not bake for another 2 minutes.
  7. Remove the muffins from the oven and let them cool in the pan for about 5 minutes and then move them to a wire rack to cool completely.


Broccoli Rabe Pesto

I have another recipe for you today that uses up leftover vegetables and still tastes delicious.  Broccoli rabe has been one of my favorite things lately.  It’s a little bitter and earthy, but if you prepare it right and use all the garlic it turns into this amazing dish that I have been putting in my veggie noodle bowls every weekend.

It’s a vegetable-palooza up in here.

Well, last week I was not digging the greens and ended up with a pile of cooked broccoli that was just about to go bad.  I was so tempted to throw it away because what can you do with almost mushy vegetable? Broccoli Rabe Pesto | Life Healthfully Lived

Turn it into pesto!  Yes, you can use anything to make pesto and I will use any excuse in the book to make and use pesto because as Phoebe would say, pesto is the besto.

I kind of threw stuff together and hoped that everything would turn out and I got pretty lucky.  I thought I was so revolutionary but then a quick internet search proved me wrong BUT my version is dairy-free so I think that counts for something.  You can also make this pesto with regular broccoli if you haven’t jumped on the broccoli rabe bandwagon or can’t find it.  Just make sure whatever you use is already cooked because raw broccoli rabe pesto would definitely not be the besto.

Broccoli Rabe PestoBroccoli Rabe Pesto | Life Healthfully Lived

  • 1 1/2 cup cooked broccoli rabe or plain broccoli
  • 1/3 cup slivered almonds (you could use slices too)
  • 3 tbsp nutritional yeast (if you do dairy you could use parmesan)
  • 2 cloves garlic
  • 1/3 cup olive oil
  • salt and pepper to taste
  1. Preheat oven to 325 and spread the almonds onto a baking sheet and toast for about 5 minutes.  Check often to make sure you don’t end up with burnt almonds.  Remove from oven and let cool.
  2. While the almonds are toasting, check your broccoli rabe and remove any pieces that are too brown or mushy (a little mushy is ok as everything will be blended up)
  3. Put the garlic cloves into a blender or food processor and pulse a few times until it’s fairly minced.  Add the almonds and nutritional yeast or cheese and pulse until you have a crumbly mixture.
  4. Add the broccoli rabe and pulse again and then add the olive oil.  Blend until you have a smooth and creamy sauce.  Taste and add salt or pepper if needed. Broccoli Rabe Pesto | Life Healthfully Lived

You can use this pesto anywhere that you would use regular pesto.  Pasta, bread, vegetables, vegetable noodles, spoons, fingers… You know, the usual.  It would be a great spring-like dish to bring to your Easter feast on Sunday and a great way to get in extra vegetables.

I hope you have a great Easter weekend and I’ll see you on Monday!

DIY Wednesday: Cauliflower Stem Cream Sauce

Ok, so if you read my post on Monday then you know that last week I was fighting off a stomach bug/virus.  It really knocked me on my butt and I’m still trying to get back to completely normal.  Because I couldn’t eat anything more than baby carrots and brown rice cakes (totally weird combo I know, but it’s the only thing that didn’t make me want to run to the bathroom) I ended up with a lot of vegetables that were just about to go bad.

Instead of throw them away, because I hate wasting food, I decided to come up with new interesting ways to use them.  One of my biggest missions is to reduce the amount of food waste we create each year.  There are so many things that we can do with food rather than throw it away but sometimes you have to get creative.  If you want a few other ways to cut down on food waste, you can check out this postDIY Wednesday: Cauliflower Steam Cream Sauce | Life Healthfully Lived

So today we have a recipe that uses a part of the vegetable that most of us throw away, cauliflower stems.  Yup, you can eat the stem but because gnawing on a big old stem doesn’t sound too appealing, we’re going to make a creamy sauce that can go on pasta, vegetables, meat, or even used as dressing.  The best part is it only requires a few ingredients and minimal effort.

Stop throwing away food that you think you can’t eat because I bet you can use it in a unique and delicious way!

Cauliflower Stem Cream SauceDIY Wednesday: Cauliflower Steam Cream Sauce | Life Healthfully Lived

  • 1 1/2 cauliflower stems, cut into chunks
  • 1 tsp roasted garlic (or 1/2 tsp garlic powder)
  • 1 tsp dried parsley
  • 1/2 tsp salt
  • 1/4 tsp black pepper
  • 1 to 2 tbsp nutritional yeast (or 1/4 cup parmesan cheese if you do dairy)
  • 1/2 to 1 cup reserved steaming water
  1. Save the large main cauliflower stem from your bunch along with any other trimmed pieces you aren’t using with the cauliflower florets.  Trim off the green leaves and the tough woody bottom of the large stem and then cut everything into bites size chunks.
  2. Fill a medium pot with about 2 cups water and set up a steamer basket if you have one.  If not, you can just boil the cauliflower right in the pot.  Steam the cauliflower until very soft and easily pierced with a fork.
  3. Transfer the cauliflower to a blender or food processor and save the steaming water.  Add the rest of the ingredients to the blender and blend until you have a thick paste.  Add the reserved water a few tablespoons at a time until you reach the consistency you would like.  Thinner for things like dressing and pasta sauce, a little thicker for meat and vegetables. DIY Wednesday: Cauliflower Steam Cream Sauce | Life Healthfully Lived