DIY Wednesday: Dairy-Free Ranch Dressing

IDSC_3095 have lived in Illinois my entire life, so I am a Midwest girl through and through.  I think a big stretch of farmland is beautiful, I can drive in most snowy conditions, and I know malls are the best way to shop for everything.  The other thing that my Midwestern upbringing has taught me?

Ranch dressing belongs on everything.

Raw vegetables?  Instantly better doused in ranch.  That boring old salad? Drench it in the white stuff.  Chicken fingers and nuggets were made for dunking into the nectar of the Midwest gods.  I’ve even dipped french fries, meatloaf, and sausage into ranch.  Don’t judge until you try it.

DSC_3089

Unfortunately, the combination of ranch dressing on all the food and frying everything possible has made the people of this part of the country just a little less healthy.  When I changed the way I ate, I begrudgingly quit my ranch habit.  After a short (read: longer than I thought) adjustment period, I actually started to enjoy the flavor of my food without the aid of ranch dressing.

But there was still that fat Midwestern kid inside that wanted to swim in a vat of ranch.  I decided to fix it.

I made this dressing with full-fat coconut milk and my DIY ranch seasoning and was shocked with how much it tasted like traditional ranch.  It was a little runny at first, but after a few hours in the fridge it thickened up nicely.  I tend to like a more watery ranch, so I let it sit out a few minutes before I use it.

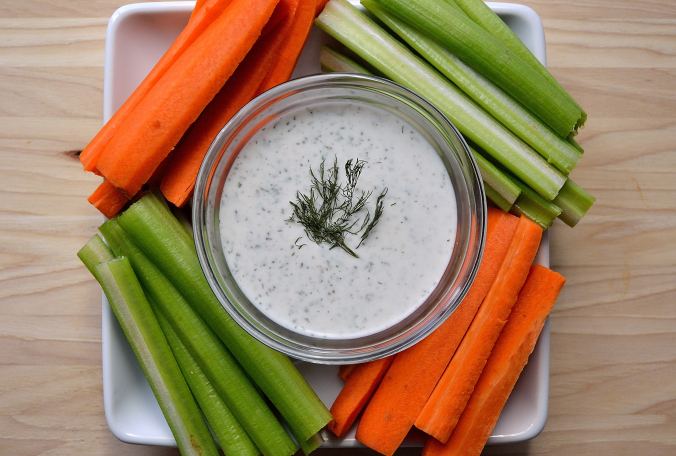
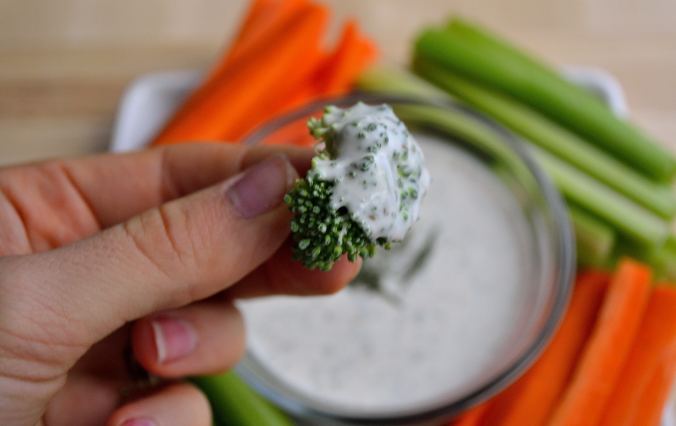
The fact that it’s so easy to make this dressing and the fact that I love it on everything have made it a weekly staple.  Try it on roasted sweet potatoes or mixed into mashed potatoes.  It is amazing with carrots and celery sticks and is wonderful whisked into a frittata.  I even made a topping with mashed potatoes and this ranch and spread it on top of my lentil loaf.

So if you have been missing ranch dressing in your healthier lifestyle, try this dairy-free version.  I promise you won’t be disappointed!

Dairy-Free Ranch Dressing

DSC_3116

  • 1 cup full-fat coconut milk, unsweetened
  • 2-3 tsp ranch dressing seasoning, add more or less to your taste
  • 1/2 tsp celery salt (sea salt will also work)
  • 1 tsp roasted garlic (you could also use garlic powder)
  1. Put all the ingredients into a blender and blend for a few minutes until everything is combined.
  2. Pour into an airtight container (like a mason jar) and put in the fridge to thicken.  Keep it stored in the fridge for up to a week.

That’s it. Easy Peasy, time to put ranch on all the things and not feel like the fat Midwestern kid you might just be at heart! DSC_3120

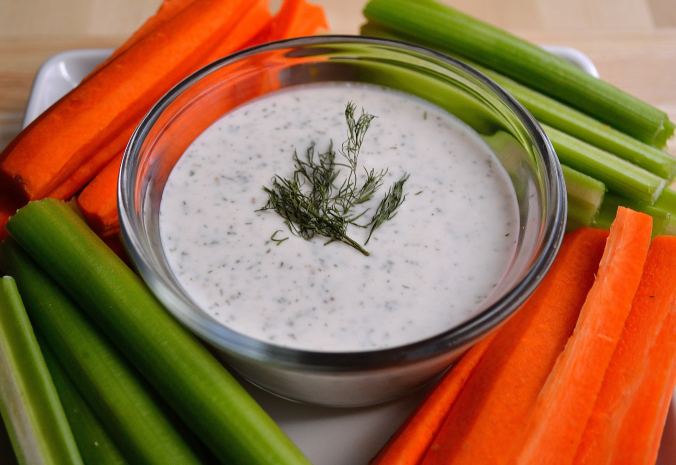
Have a great day everyone!

Gluten-Free Apple Ring Pancakes

SundaysGluten-Free Apple Ring Pancakes | Life Healthfully Lived are meant for a slightly fancier breakfast.  You aren’t rushing off to work or school and you can take the time to put a little extra effort into your morning meal.  I usually make Adam a huge plate of hash browns, eggs, and then pancakes or waffles depending on what I have on hand.

Lately, I have been craving his pancakes.  I usually make his with whole wheat flour and that is a no go for me.  So I decided to combine a few ideas and came up with this pancake.

I had seen apple ring pancakes online and always thought they looked delicious, so I thought that these pancakes would be good with a little taste of apple in them.  The actual pancake part is gluten free and dairy free, plus they can be made vegan if you use a flax or chia egg instead of regular eggs.Gluten-Free Apple Ring Pancakes | Life Healthfully Lived

I also left the pancake a little less sweet than normal because the apple adds enough sweetness for me.  Other than that, these pancakes are a fun breakfast to make and serve, plus they look extra fancy without being that difficult to put together.  So if you want to serve up a tasty twist on pancakes, try these ones out!  Oh and if you need an idea of what to top it with, try my peanut-apple butter sauce.

Gluten-Free Apple Ring PancakesGluten-Free Apple Ring Pancakes | Life Healthfully Lived

  • 1 large yellow plantain
  • 2 eggs or 2 tbsp ground flax seeds mixed with 6 tbsp water
  • 1/2 cup unsweetened almond milk
  • 2 tbsp pureed pumpkin
  • 2 tbsp maple syrup
  • 2 tbsp peanut or coconut flour
  • 1/4 tsp salt
  • 1/2 tsp cinnamon
  • 1 medium granny smith apple
  • chopped pecans, optional
  1. Wash and dry the apple.  Cut out the core and cut the apple into thin rings.  Make sure you keep them thin or the pancake won’t cook right.
  2. Place the plantain, eggs, almond milk, pumpkin, and maple syrup into a blender.  Blend until you have a smooth mixture.
  3. Add all the dry ingredients (not the pecans) into the blender and blend until combined.
  4. Heat a little coconut oil in a skillet over medium heat.  Once the oil is hot, place one apple ring into the skillet and then pour a little batter over the ring making sure it is completely covered.  If you’re using the pecans, sprinkle a little onto the pancake.
  5. Cook for about 3 minutes and then carefully flip the pancake.  It’s ok if the pancake breaks a little, it took me a few tries to get the pancake to flip perfectly.
  6. Keep cooking until all the apple rings and batter is gone, keeping the finished pancakes on a plate in a warm oven.
  7. Top with maple syrup, your favorite nut butter, or the peanut apple butter sauce below!

Peanut-Apple Butter Sauce

  • 2 tbsp apple butter or apple sauce
  • 1 tbsp peanut flour or peanut butter (could sub almond butter too)
  • 1 tsp maple syrup
  • 1/4 tsp salt
  1. Mix everything together until you have a smooth sauce and spread onto your pancakes! Gluten-Free Apple Ring Pancakes | Life Healthfully Lived

Other than making these pancakes, what other plans do you have for this weekend?  Adam and I are going to see Elf the musical to celebrate our anniversary and I’m very excited!  Elf is one of my absolute favorite movies and I can’t wait to see the musical version.

Happy weekend everyone!

DIY Wednesday: Hot Sauce

ThisDIY Wednesday: Hot Sauce | Life Healthfully Lived post is compliments of my dad.  On Monday, we spent the whole day together apple picking at Royal Oaks Farm.  I love apple picking, it’s the perfect fall time activity.  Plus you get to eat delicious apples while you pick them.  It’s the best!

While we were getting lunch, I told him I needed to come up with a DIY post for today.  He gave me some good ideas, but hot sauce was the one that won for today.

DIY Wednesday: Hot Sauce | Life Healthfully Lived

I’m surprised I didn’t think of this one sooner.  A lot of people buy hot sauce and there are a ton of varieties at the store.  When I took a look at the ingredients on most hot sauces, I saw that it was really a simple product.  There are  of course different variations and levels of heat, but the basic ingredient list is short and sweet.  Which makes it a perfect product to make at home.

While I love making things at home to save money and know exactly what is going into my food, I also like playing around with flavors and ingredients.  Putting my little twist on common staples is fun and is a great way to learn how different ingredients go together or don’t.

This hot sauce came together quickly and I love how fresh it tastes.  Just a little will go a long way in your recipes and it will last you a long time.  Just a few tips for you while making this:

  • If you have any cuts or scrapes on your hands, WEAR GLOVES!  Trust me you do not want to be getting hot pepper juice in your wounds.
  • Do NOT rub your eyes/nose/mouth while making this unless you enjoy feeling like your face is on fire.
  • If you choose not to wear gloves, wash your hands REALLY well after you’re done.  Again, avoid the eye/nose/mouth region with your hands.

Long story short, protect your skin from the hot peppers or else you will feel the burn.  And not in a good way.

Hot SauceDIY Wednesday: Hot Sauce | Life Healthfully Lived

  • 10-15 habanero peppers
  • 2-3 jalapeno peppers
  • 3 tsp roasted garlic or 3 cloves fresh garlic, roughly chopped
  • 2 large carrots, shredded
  • 2 cups water
  • juice of one lime
  • 2-3 tbsp white vinegar
  • salt to taste
  1. Take off the stems from the peppers and roughly chop.  If you like super spicy hot sauce, you can leave in the seeds.
  2. Heat a little oil in a medium saucepan over medium-high heat, if you’re using fresh garlic add that in and saute for a few minutes.  Then add the carrot shreds and saute for 2 to 3 more minutes.
  3. Add the two cups of water and bring everything to a boil.  Cover and lower to a simmer and cook for 5 minutes.
  4. Remove the lid and take the pot off of the heat.  Add the peppers to the mixture and then stir in the vinegar and lime juice.  Add a little salt and stir again.
  5. Pour the whole mixture into a blender and puree until smooth.  Taste and add more salt if needed.
  6. Let the sauce cool and then store in an airtight container in the fridge.  DIY Wednesday: Hot Sauce | Life Healthfully Lived

That’s it.  I can’t stress enough about protecting your hands and then not touching your face while making this.  Or any other sensitive areas…. OUCH!  But afterward you will get an awesome hot sauce that you made with your own, possibly slightly burned, hands!

DIY Wednesday: Squash Apple Butter

IDIY Wednesday: Squash Apple Butter | Life Healthfully Lived certainly did not invent apple butter, although that would be pretty awesome if I did.  I’m also certainly not the first to put a recipe for apple butter on their blog.  But I’m putting a little spin on the typical apple butter today for your DIY post of the week.

I actually had never really tried apple butter until I met Adam.  His grandma sent us home from a visit once with some apple butter and it was delicious.  It was smoother and creamier than applesauce and that was what I loved about it.  It’s funny that Adam was technically the one to introduce me to apple butter since the man doesn’t like cooked apples!  I know, he’s weird.DIY Wednesday: Squash Apple Butter | Life Healthfully Lived

Anyway, most apple butter is made with a TON of sugar.   Besides adding sweetness, it helps preserve the apple butter.  That’s fine for some, but since I don’t do refined or much added sugar, I wanted to try an apple butter that didn’t use sugar.  To me, cooked apples are already fairly sweet.  Plus if you add in spices like cinnamon it ups the sweet factor.  I also wanted to do something to make my apple butter even smoother.  Pureed squash is really smooth and creamy plus it tends to lean toward the sweet side.  And squash is just awesome in general so I thought why not add it into my apple butter.

Luckily it worked out and I ended up with a fall hybrid butter that is perfect on toast, in oatmeal, on pancakes, or on a peanut butter sandwich.  It is so easy to make your own apple butter and it will cost a lot less than buying it from the apple orchard or specialty shops.  So if you have a plethora of apples hanging around and want to try something a little different than your typical apple butter, give this squash apple butter a try!

Squash Apple ButterDIY Wednesday: Squash Apple Butter | Life Healthfully Lived

  • 5 to 6 large apples of different varieties, I used a mix of sweet and tart like granny smith and gala.
  • 2 cups diced butternut squash, you could also try pumpkin or delicata
  • 2 tsp lemon juice
  • 2 to 3 cinnamon sticks, optional
  • 2 tsp freshly grated nutmeg, optional
  • 1 tsp ground cloves, optional
  • 1 tsp ground cinnamon, optional
  1. Place sliced apples, cubed squash, and cinnamon sticks if you are using them into a slow cooker.  You want to make sure you fill the cooker almost to the top leaving just a little space.
  2. Cook on high for 4 hours.  If your apples and squash start sticking, you can use a little water.  Don’t use too much because you don’t want a watery butter.
  3. After 4 hours, the apples and squash should be fairly soft.  Remove the cinnamon sticks and smash everything else with a potato masher or fork and transfer the whole thing to a blender.  You could also use an immersion blender.  Puree the apples and squash until super smooth.  This is important to make sure you have a smooth and creamy butter.
  4. Return the puree to the slow cooker and cook on high for another hour.  At the end stir in the lemon juice and any spices you want.
  5. Allow the whole mixture to cool before you transfer to jars or other airtight containers.  Store in the fridge.DIY Wednesday: Squash Apple Butter | Life Healthfully Lived

I have really liked swirling this into my oatmeal in the morning.  The whole thing just reminds me of fall and that makes me happy!

In other news, my little sister is getting married this weekend ( 😀 😀 😀 😀 ) and I am just a tad busy helping her with that!  While I have plenty of new recipes to share with you, my Friday post will be a round-up of my favorite fall recipes around the blog world.  I hope you have a great Wednesday and see you soon!

Arepas with Chipotle Sausage Crumbles & Cilantro Sauce

TheArepas with Chipotle Sausage Crumbles & Cilantro Sauce | Life Healthfully Lived day is here my friends.  I’m finally putting up the recipe for the delicious arepas that I have been making.  Don’t know what an arepa is?  Think of it as the Colombian version of a sandwich, kind of like a pita.  It’s a bun made out of pre-cooked corn meal and then sliced halfway through and stuffed with tasty fillings.  Arepas are eaten for any meal depending on what you fill them with.  The filling can be as simple as cheese to as elaborate as what I created because I love all the things.

I started obsessing over arepas after I saw them on some Food Network show, I can’t remember which one.  They looked delicious and I was intrigued by how simple it looked to make them.  Then Juli over at PaleOMG started posting pictures of the arepas she would get from a food truck in her city.   They looked amazing and I was so jealous that she could get these delicacies out of a truck.Arepas with Chipotle Sausage Crumbles & Cilantro Sauce | Life Healthfully Lived

Finally after mooning over arepas for months, I decided to see what it would take to actually make them.  There are plenty of recipes for them and they really are easy to make.  You just need the right flour.  It has to be pre-cooked corn flour or these won’t turn out.  If you have a large Latin section at your grocery store or better yet an actual Latin grocery store, you can probably find this flour pretty easy.  If you can’t you can get it from Amazon and it is fairly inexpensive.

For the filling, I decided to make sausage crumbles out of oatmeal.  Hang with me on this one.  I saw this idea on a blog awhile ago and while I was skeptical, I gave it a try.  It totally had the taste and texture of sausage crumbles.  It’s the spices you use that really make a difference.   I used the same method from the blog and just changed up the seasonings.  I also included a cilantro sauce that I made by just switching the basil with cilantro from my dressing recipe.Arepas with Chipotle Sausage Crumbles & Cilantro Sauce | Life Healthfully Lived

It might look like this will take forever to make, but it all comes together pretty easily.  So if you want to get in on the awesomeness that is arepas, try out my version!

For the Arepas: 

  • 2 cups pre-cooked corn meal sometimes called harina de maiz (I used this brand)
  • 2 1/2 cups water
  • 1 tbsp coconut oil
  • 1 tsp salt
  1. Measure out the water and pour into a large bowl with the coconut oil.  Set aside.  Mix together the cornmeal and salt.
  2. Slowly add the cornmeal and salt to the water, using your hand to combine the two and keep lumps from forming.  Once all the cornmeal is in the water, keep using your hands and mix everything together well.  It will seem like you have too much water and that the dough is too runny.  Don’t worry it will thicken up.
  3. Place a damp paper towel over the dough and let it rest for 10 minutes.  Preheat the oven to 350 and line a large baking sheet with parchment paper or Silpat.
  4. After the 10 minutes is up, remove the paper towel and portion out the dough into about 6 to 8 balls.  Roll each portion into a ball and then slightly flatten it out so it roughly resembles a hockey puck.  You don’t want them too small and thick because you will be cutting these and stuffing them.
  5. Heat a large skillet, no oil, over medium heat and cook each side of the arepas for about 2 minutes to seal the dough.  Place them back on the baking sheet after you’re done.  Once you have sealed all the arepas, place them in the oven and bake for 10 to 15 minutes.  They are done when you can tap them and it sounds hollow inside.
  6. Remove from the oven and let cool for about 10 minutes before you slice them.  When you’re ready to fill them, slice only halfway through so it forms a little pocket.  Stuff them and then your face!

For the Chipotle Sausage Crumbles: 

  • 1/2 cup steel cut oats
  • 1 cup water
  • 2 tbsp tomato paste
  • 1 to 2 tsp chipotle powder
  • 1/2 tsp onion powder
  • 1/2 tsp garlic powder
  • 1 tsp smoked paprika
  • 1/2 tsp salt
  • 1/2 tsp cumin
  • 1/2 tsp oregano
  • juice of half a lime
  1. Add oats, water, and tomato paste in a medium saucepan and bring to a boil.  Cover the pot, lower to a simmer and cook for 10 minutes.
  2. Uncover the oats and add in all the seasonings and lime juice.  Mix to combine and cook for another 5 minutes.  You want most of the water to cook out so you are left with a very thick mixture that resembles cooked ground meat.
  3. Alternatively, if you want to use ground beef, turkey, or chicken you can cook it as usual and just use the seasonings listed here to flavor it.

For the Cilantro Sauce:

  1. I just used my basil dressing and substituted cilantro in for the basil.

Yes, it looks like a lot for one meal but once you get the hang of it, it gets a lot easier.  You can fill the arepas with whatever you want.  Along with the chipotle sausage crumbles, I spread some guacamole on the arepas and made a corn and tomato salsa.  You can also try shredded pork, refried beans, rice, or sauteed vegetables.  Seriously, give this recipe a try and I promise you won’t regret it!Arepas with Chipotle Sausage Crumbles & Cilantro Sauce | Life Healthfully Lived

Have a great weekend everyone and see you on Monday!

Ever had arepas?  Tell me where and what you filled it with in the comments!