Ready for another quick mid-week meal?
Of course you are and this one has quickly become one of my favorites because it checks off three of my important things:
- Quick to make
- Simple ingredients
- Delicious to eat

Ready for another quick mid-week meal?
Of course you are and this one has quickly become one of my favorites because it checks off three of my important things:
I feel like I can’t get enough basil lately. Every time I think about what flavor I want in my food, I want basil. That’s what made me come up with this basil hummus dressing and that’s also what made me make this pesto quinoa salad. The other reason I made this salad? 
It was ridiculously hot. Continue reading
 The cauliflower pizza crust. For many, it is an elusive dream. You see recipes on Pinterest and they claim that it is the best crust ever (just like real pizza) and that will fulfill all your gluten-free pizza dreams.
And then you make it.
And it turns into a soggy wet pile.
Or it has five pounds of cheese and eggs holding it together.
I’ve tried a lot of cauliflower pizza crusts and while some were good, none were great. Most of them had to be eaten with a fork and a knife and that’s ok if you’re eating a deep dish pizza but not ok when you want to pick up a slice and feel like you’re eating pizza. That’s what I wanted.
Then I stumbled across Sprint 2 The Table’s quinoa flour crust pizza and it sounded simple enough and didn’t have the cheese that most crust recipes use to keep everything together. So I gave it a shot and EUREKA! It worked. I could actually pick it up and while I won’t go as far as saying it tastes exactly like real pizza it was the closest I had ever come.
I kept playing with the crust and swapping out a few things and came up with one that doesn’t use eggs or grains as the flour. If you’re totally fine with eating quinoa flour and eggs then go ahead and try Sprint 2 The Table’s pizza crust. If you want an eggless and grain-free version try this one below.
I’ll give you a step-by-step tutorial (along with pictures) so you can get the best pizza crust possible then you can go crazy with toppings. And I may have gone crazy with my toppings aka the whole refrigerator on my pizza.
Cauliflower Crust Pizza- Based on this one by Sprint 2 The Table
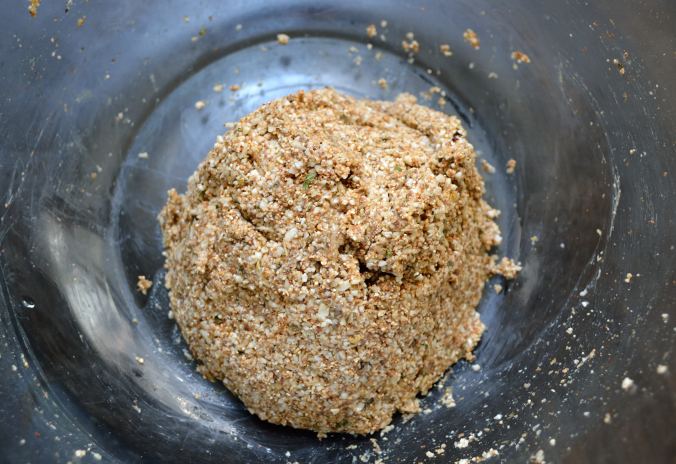
Nice dough ball. Not too dry or too soggy.

Spreading out the dough. It takes awhile so don’t rush it

About how thick you want your crust. You could even go a little thinner for a crispier crust.
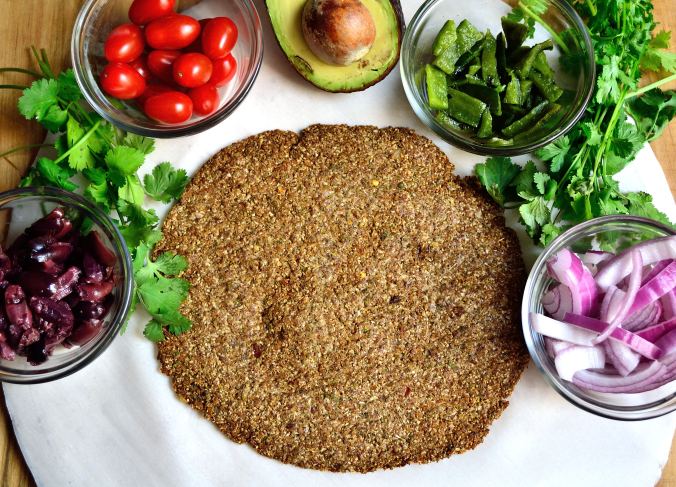
Ready for toppings!
A few other tips:
One of the things I hope this blog proves is just because you have a certain dietary restriction/need/preference doesn’t mean you have to sacrifice flavor or some of your favorite things. There is usually always a way to meet your cravings based on your food needs. Now, that being said, that doesn’t mean I’m magic and can fix all your dietary woes with a healthy substitution. Some things just cannot be recreated and more often than not it’s better that we can’t turn all junk food into healthy food. Who wants to eat a healthy Twinkie anyway? Or a real one for that matter….
I digress. Today’s recipe was created because of two things. 1. While I love fat, it’s super easy to go overboard with it especially when it comes to liquid oil like olive oil, avocado oil, or coconut oil. Unless you’re measuring everything out, oil can add up pretty quick. I started to realize I was buying big jugs of olive oil more and more frequently and running out of them fast. Which leads me to my second reason… 2. I was out of olive oil and I wanted pesto.
I want to stress I don’t think good fats are bad. In fact, they’re awesome and I try to get them in at every meal. But too much of a good thing can be bad and when you use an entire 1.5-liter bottle of olive oil in less than a week and a half, you might need to evaluate your food situation. I’ll still use olive oil to make my spinach pesto, broccoli rabe pesto, and all other delicious things that require olive oil but it’s nice to have an option that is oil-free and just as delicious.
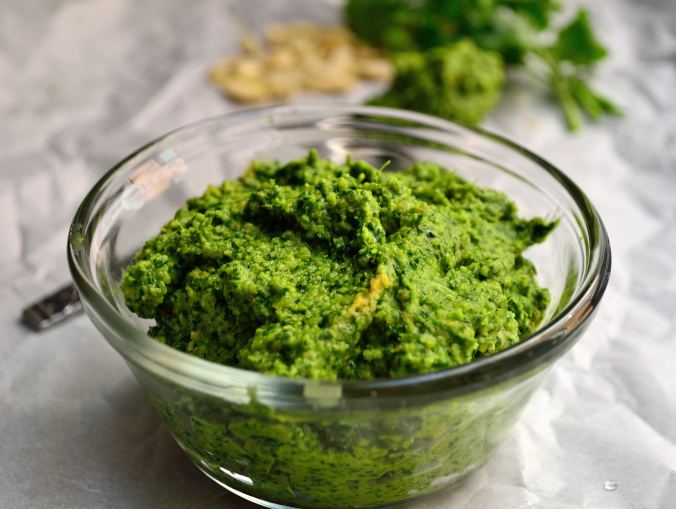
I used this last night on Adam’s fish and he deemed it “pretty tasty”, which is husband speak for good. It has a nice light flavor from the cilantro and even though there is no oil, it’s still creamy. You can use any green herb or vegetable you would like, I just happened to have a bunch of cilantro I needed to use so that’s what I went with. This would also be great on pasta or zoodles or panini’s or chicken/pork or crackers or your finger….
Oil-Free Cilantro Lime Pesto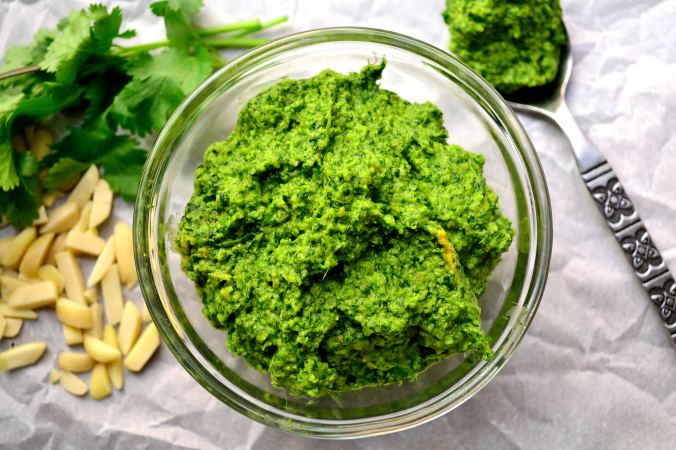
I have another recipe for you today that uses up leftover vegetables and still tastes delicious. Broccoli rabe has been one of my favorite things lately. It’s a little bitter and earthy, but if you prepare it right and use all the garlic it turns into this amazing dish that I have been putting in my veggie noodle bowls every weekend.
It’s a vegetable-palooza up in here.
Well, last week I was not digging the greens and ended up with a pile of cooked broccoli that was just about to go bad. I was so tempted to throw it away because what can you do with almost mushy vegetable? 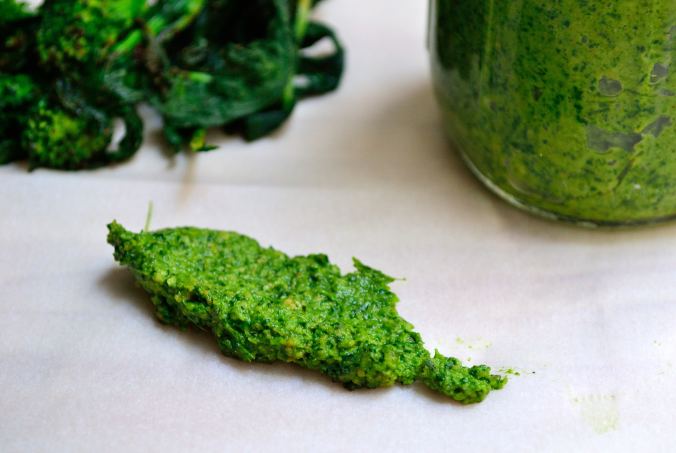
Turn it into pesto! Yes, you can use anything to make pesto and I will use any excuse in the book to make and use pesto because as Phoebe would say, pesto is the besto.
I kind of threw stuff together and hoped that everything would turn out and I got pretty lucky. I thought I was so revolutionary but then a quick internet search proved me wrong BUT my version is dairy-free so I think that counts for something. You can also make this pesto with regular broccoli if you haven’t jumped on the broccoli rabe bandwagon or can’t find it. Just make sure whatever you use is already cooked because raw broccoli rabe pesto would definitely not be the besto.
Broccoli Rabe Pesto

You can use this pesto anywhere that you would use regular pesto. Pasta, bread, vegetables, vegetable noodles, spoons, fingers… You know, the usual. It would be a great spring-like dish to bring to your Easter feast on Sunday and a great way to get in extra vegetables.
I hope you have a great Easter weekend and I’ll see you on Monday!
