Asian-Style Green Beans

Are Chinese buffets still a big thing?  I haven’t been to one in many years, but for a while when I was younger my family and I would go often.  It was just easier because everyone could get what they wanted and it was good for my notoriously picky sister because there were always a few things like pizza and chicken nuggets.  Which of course are Chinese.  Asian-Style Green Beans | Life Healthfully Lived

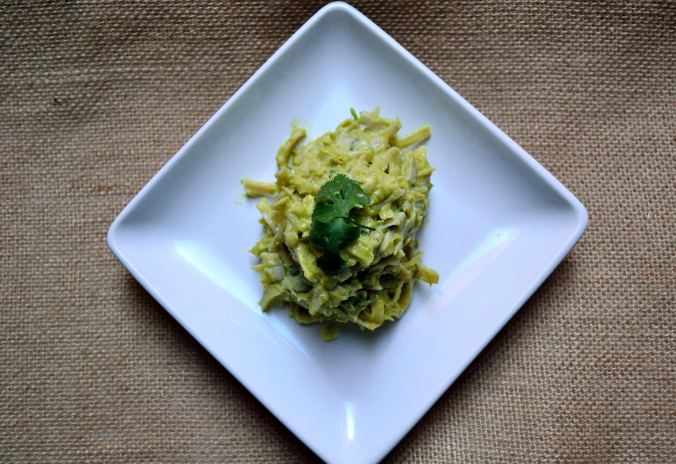
One of my favorite things at the buffet were the green beans.  They were crispy, crunchy, green, sweet, and salty.  They had those huge granules of salt and garlic and they balanced so well with the other flavors.  I would always get numerous helpings and could have easily made a meal of them.

Of course, they were probably SUPER high in sodium and flavorings that might not have been the best but when compared to the other offerings at the buffet (I’m looking at you General Tso’s chicken and crab rangoon) they were a pretty good choice.  The other day I had a hankering for those green beans and decided to make my own healthier version and I’m pleased to say I think I got pretty close!Asian-Style Green Beans | Life Healthfully Lived

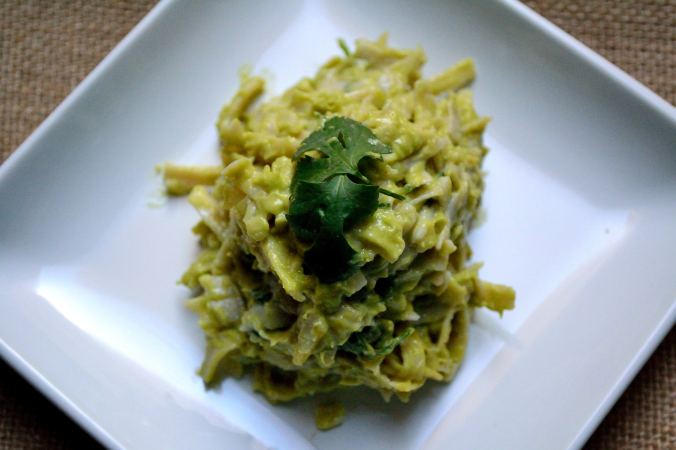
Fresh green beans are making their way back into grocery stores so you should be able to find them pretty easily.  But if you can’t don’t worry, you can use frozen green beans too.  Give these green beans a try at your next meal and I guarantee your family will polish them off.  At least, my husband did….

Asian-Style Green BeansAsian-Style Green Beans | Life Healthfully Lived

  • 2 cups fresh green beans, ends trimmed (if using frozen make sure to thaw them first)
  • 3 cloves garlic, minced
  • 2 tsp dried onion flakes
  • 1 tsp powdered ginger
  • 1 to 2 tsp coarse sea salt (if you don’t have coarse that’s fine just adjust the amount so it’s not too salty)
  • 2 tbsp coconut aminos (you can use soy sauce or liquid aminos too)
  1. Heat a little oil in a large saute pan over medium-high heat.  Add the minced garlic and swirl everything around the pan a few times.
  2. Add the green beans to the pan and then add the onion flakes, ginger, and salt.  Stir so everything is mixed together.  Saute for 5 minutes.
  3. Pour the coconut aminos over the green beans, stir everything together, and cover.  Lower the heat to low and cook for another 2 minutes.

Creamy Broccoli Spinach Soup

Creamy Broccoli Spinach Soup | Life Healthfully LivedI have been living off of this soup for the past few weeks, it’s that good.  It’s hearty enough to make a good meal but not so heavy that you feel like taking a nap after you’re done.  I feel like that’s a good judge of a meal.  Do you feel like laying in bed for six hours when you’re done?  Nope?  Then you should eat this meal again or try harder next time.

This winter we haven’t had many days where you just want to wrap your body around a bowl of soup and swim in a giant mug of hot chocolate.  I’m not complaining, but I do enjoy those super cold nights where a warm meal is the only way to feel comfortable.  I’m probably the only weirdo like that.

On the nights that it is frigid out, try this super simple soup.  It’s stuffed full of vegetables and then blended to make it creamy and delicious.  No dairy, no cheese, and yet it’s still smooth and wonderful.  That’s my kind of soup.Creamy Broccoli Spinach Soup | Life Healthfully Lived

What do you guys have planned for your weekend?  I’m on my own this Saturday and I’ll probably end up running a few errands and catching up on some work.  I know, wild and crazy over here.  But that also means that I’ll spend a good portion of my day in the kitchen coming up with yummy things for you.  Any suggestions?

My suggestion to you?  Make a big batch of this soup on Sunday night and have lunches or dinners set for the rest of the week.  Your future self will thank me!

Creamy Broccoli Spinach SoupCreamy Broccoli Spinach Soup | Life Healthfully Lived

  • 1 cup carrots, peeled and sliced
  • 1 cup celery, sliced
  • 2/3 cup onion, diced
  • 3 cups broccoli, cut into florets (you can also use frozen, just make sure it’s completely thawed)
  • 1 cup roasted red or orange bell peppers
  •  4 cloves garlic, minced
  • 3 to 4 cups spinach, tightly packed (I used a whole 8 oz bag for reference)
  • 4 to 5 cups vegetable broth or water
  • 2 tsp smoked paprika
  • 2 tsp chili powder
  • 1 tsp oregano
  • salt and pepper to taste
  1. To roast your bell peppers: Preheat the oven to 400 and cut the tops off of the peppers.  Remove all seeds and place the whole peppers on a baking sheet lined with parchment paper.  Roast for about 30 minutes, turning the peppers over half-way through.  Take the peppers out of the oven and place them on a cutting board and place a large glass bowl over them so the steam will loosen the skins.  After 15 minutes, remove the bowl, slip off the skins, and dice the peppers. FYI: you can do this a few days ahead of time so you don’t have to do it right before you make your soup.
  2. For the soup: Heat a large dutch oven or stockpot over medium-high heat.  Add a little olive oil and add in the carrots, celery, and onion.  Saute them for about 8 minutes until the onion is soft and translucent.
  3. Add the minced garlic, roasted bell peppers, and broccoli florets.  Stir everything together and sprinkle with a little salt.  Saute for a few minutes.
  4. Pour in the vegetable broth or water.  You want the broth to cover all the vegetables and about 1/2 inch above.  Turn your heat to high and bring the soup to a boil.  Add all of the seasonings and stir to combine.
  5. Once the soup is boiling, add the spinach and cover the pot.  Turn the heat to low and simmer the soup for 15 minutes, stirring once.
  6. After 15 minutes, remove the lid and using an immersion blender, blend everything until it is smooth and creamy.  If you don’t have an immersion blender, you can work  in batches with your regular blender.  Just return everything to the pot when you’re done.Creamy Broccoli Spinach Soup | Life Healthfully Lived

The best thing about this soup?  It tastes AMAZING with a healthy dollop (read: massive spoonful) of my cheesy garlic spread. Yum!

DIY Wednesday: Paleo Porridge

DIY Wednesday: Paleo Porridge | Life Healthfully Lived
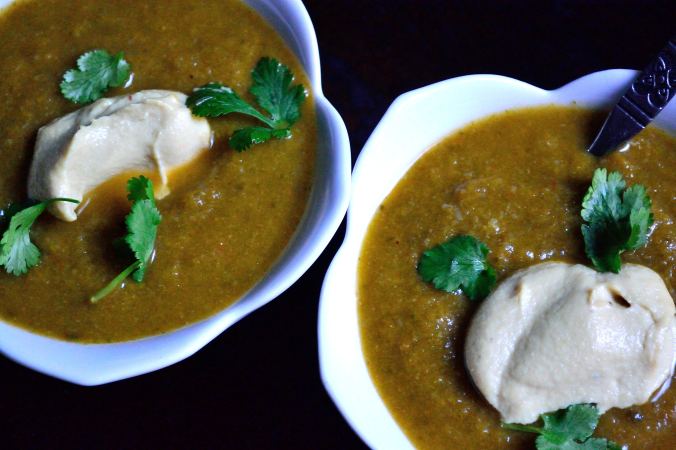
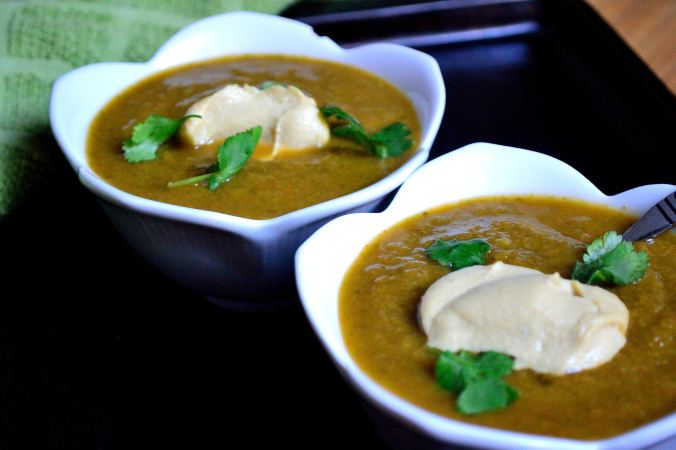
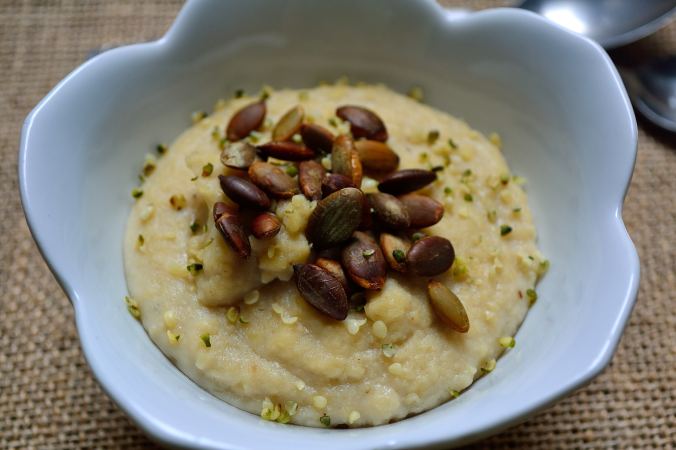
Doesn’t the word porridge always conjure up old-timey meals like in Oliver Twist?  Or at the very least make you think of Goldilocks and the only three bears on the planet that prefer a hot breakfast over raw carcass?

Just me?  Cool.

Porridge is actually any type of oatmeal, grain, or cereal that is cooked with boiling water or milk.  Most people go for oatmeal because it’s the most readily available but you can make porridge out of a lot of different things.  But for the most part it’s usually made out of some kind of grain and if you happen to be following the paleo diet, grains are a no-go.  So does that mean you can never enjoy a warm bowl of porridge on a cold winter morning again?DIY Wednesday: Paleo Porridge | Life Healthfully Lived

Of course not!  Not when you’ve got me around.

Not only can you make porridge out of cereals or grains, you can also make it out of meals (as in ground up stuff) and that includes nut meals.  Finely ground nuts make a great base for porridge and it is entirely paleo-approved!  I decided to go with almond meal because it can be made savory or sweet and it’s what I had on hand.  Also, almond meal is fairly easy to find so you won’t have to hunt through a specialty store to make your own paleo porridge.

I have a recipe for a sweet porridge and a savory porridge, both are essentially same, but the seasonings and liquid choices are a bit different.  If you’ve been missing your morning bowl of warm, cozy porridge try this easy grain-free version!

Paleo Porridge- Makes two servings

Sweet PorridgeDIY Wednesday: Paleo Porridge | Life Healthfully Lived

  • 2/3 + 2 tbsp almond meal (go for meal instead of flour because you don’t want it too finely ground)
  • 1 cup almond milk or any other non-dairy milk you prefer
  • 1 tbsp honey, maple syrup, or coconut nectar
  • 1 tsp cinnamon
  • 1/4 tsp sea salt

Savory PorridgeDIY Wednesday: Paleo Porridge | Life Healthfully Lived

  • 2/3 + 2 tbsp almond meal
  • 1 cup vegetable broth or water
  • 1/4 tsp freshly ground black pepper
  • salt to taste
  1. No matter what version you make, the directions are going to be the same.  In a medium saucepan, bring the liquid to a boil.
  2. Whisk in the almond meal and turn the heat to low.  Keep whisking as the almond meal thickens.  This will take about 5 to 8 minutes.
  3. Add in the sweetener (if making the sweet version) and seasonings as you keep whisking.  Once you’re porridge has reached your desired thickness, pour into a bowl and finish it with your favorite toppings.

If you’re porridge is too thin add more almond meal, one tablespoon at a time.  If it’s too thick add more liquid, one tablespoon at a time. As for topping ideas?  How about:

  • any kind of berry
  • raisins
  • bananas or any fruit
  • cacao nibs
  • pumpkin seeds
  • hemp seeds
  • flax or chia seeds
  • chopped nuts
  • nut or seed butter
  • herbs like parsley or cilantro
  • salsa
  • roasted squash
  • poached egg
  • mushrooms
  • heck, you could even add cooked meat or fish to your savory bowl!DIY Wednesday: Paleo Porridge | Life Healthfully Lived

There you have it!  Porridge two ways for all you grain-free people out there!

Mini BBQ Pizza’s


Mini BBQ Pizza's | Life Healthfully LivedI’m going to tell you a story about pancakes.  Don’t worry it will make sense in the end.

Hopefully.

I can remember one of the first times that I helped my mom make pancakes.  I was very excited because the whole process looked so magical.  We got our mix together, whisked the crap out of it because it was fun, and then started heating up the skillet.  I poured in the right amount and waited until the all-important flip.  After the instructed three minutes, I put the spatula under the pancake and….

Totally destroyed the first pancake.  It stuck to the pan, wasn’t entirely cooked on the bottom, and was just a big mass of half-cooked batter.  I was devastated.  My hopes of being a pancake wizard were dashed.  I started to get a little teary but my mom stepped in and gave some mom advice.Mini BBQ Pizza's | Life Healthfully Lived

“Don’t worry, the first pancake is always like that.  It’s the test pancake.  It lets you test the pan to see if it’s hot enough.  The rest of your pancakes will be better because that first one was messed up.”

And she was right.  The rest of my pancakes turned out just fine.  Now, before you go thinking this was a beautiful teaching moment between mom and daughter, my mom went on to tell me, “Yeah, you’re just like the test pancake.  You were our first baby and we had no clue what we were doing.  We tested everything out on you so when your sister came along we knew what to do.”

I love my mom.

It was all in good fun and it actually was some good advice when it comes to testing out new recipes or new things.  Just because it doesn’t work the very first time doesn’t mean that everything is a total failure.  So what does that have to do with pizza?  I had a bit of trouble making the crust for these tasty treats and my first one (ok, my first like five) turned out like this:

Mini BBQ Pizza's | Life Healthfully Lived

Sad but brave and valiant test pizza crust paving the way for perfection

But I kept at it and was rewarded with this recipe!  I chose to make it with my BBQ sauce and Not Mozzarella, Mozzarella, but you can customize the toppings with what you had on hand!

Thanks mom for teaching me about test pancakes and test babies because without them I couldn’t give the world Mini Pizza’s and that would be a travesty.  Also, you’re welcome for having like the world’s best test baby 😉

Mini BBQ Pizza’sMini BBQ Pizza's | Life Healthfully Lived


  1. Preheat oven to 350 and make sure you have your sauce, cheese, and toppings ready.  Line a large baking sheet or two with a Silpat or parchment paper and set aside.
  2. Place all of the dry ingredients into a large bowl and whisk together.  Pour this into a blender and add the water.  Blend until you have a batter.  It should be more on the thinner side.
  3. Heat up a small skillet with a little olive oil, I used my tiny cast iron skillet, and pour about 1/4 cup batter into the skillet.  Let it cook for a few minutes and then flip it over and cook for another minute before putting it on the prepared baking sheet.  Don’t worry if your first one isn’t perfect 🙂
  4. Keep doing this until all the batter is used up.  Place the baking sheets in the oven and cook for 5 minutes.  Remove and crank the heat up to 400.  While the oven is getting hotter, put the sauce, cheese, and toppings on each pizza.  Pop them back into the oven for another 10 minutes or until the cheese starts to brown.
  5. Remove and let them cool a few minutes before totally devouring!Mini BBQ Pizza's | Life Healthfully Lived


What are your favorite pizza toppings?

Creamy Avocado Fettuccine

I am really into avocados lately.  I buy a big bag at the beginning of the week and add them to my smoothies and soups and anywhere else I can squeeze them in.  They make things creamy and delicious.  Plus they are full of good for you stuff.Creamy Avocado Fettuccine | Life Healthfully Lived

People sometimes shy away from avocados because of the fat content, even though I think most understand it’s good fat.  Fat still scares people because it just makes sense that fat would make you fat.  Don’t worry, I get it.  You want to eat the best food for your body as possible and you don’t want to gain weight.  Don’t fear fat.  Trust me, fat is good and it will help you reach your goals all while being super tasty.

Now, don’t go hog wild on fat.  Too much of anything, even a good thing like fat is a bad thing.  But start including it in your diet and don’t feel guilty or worry.  And if you’re looking for a new way to use avocados other than guacamole, try this creamy avocado fettuccine.

It’s a great weeknight dinner because it comes together in less than 20 minutes.  And it’s good enough that no one will realize that there is no dairy in the sauce.  You can even make it paleo and serve it over vegetable noodles instead of brown rice ones.  It tastes good both ways, trust me, I tried it.

Creamy Avocado FettuccineCreamy Avocado Fettuccine | Life Healthfully Lived

  • 2 Hass avocados
  • 2 tbsp cheesy garlic spread
  •  juice of half a lime
  • 1 tbsp olive oil
  • 1/2 tsp chipotle chili powder OR 3 to 4 fresh chipotle chili’s
  • 1/2 tsp sea salt
  • 1 can full-fat coconut milk
  • 1 package brown rice fettuccine OR spiralized vegetable noodles (butternut squash & sweet potato work really well)
  • 2 to 3 tbsp fresh cilantro
  1. Cook the fettuccine according to the directions on the package, drain, and set aside.  Or if you’re using vegetable noodles, prepare those by cooking on a large baking sheet at 400 for 8 to 10 minutes or sauteing in a large pan with a lid until soft.
  2. Meanwhile, slice the avocados in half and remove the pit.  Scoop out the flesh into a blender.  Add the rest of the ingredients except the coconut milk.  Pulse a few times until everything is pretty mixed together.
  3. Add the coconut milk a few tablespoons at a time until you reach your desired consistency.  I ended up using about 1/3 cup for a fairly thick but still pourable sauce.
  4. Once your sauce is at the right consistency and the noodles are done, add them back to the pot they cooked in and pour all the sauce on top.  Stir everything together until all the noodles are coated.
  5. Sprinkle in the cilantro and stir just to combine.  Serve it up and enjoy!

This recipe is probably going to make it into the regular rotation because it’s quick, healthy, and tastes so darned good! Creamy Avocado Fettuccine | Life Healthfully Lived