Merry Christmas!!

I’m going to keep it short and sweet today because you should be spending time with the ones you love and celebrating this wonderful holiday.

Merry Christmas to you and your family from me and my family.  I hope you have an amazing day and that you may find peace in your life for this Christmas season.

Merry Christmas | Life Healthfully Lived

Last Minute Christmas

Two more sleeps!  Two more sleeps!  We are almost to the big day and I hope you are as excited as I am!

I do have to admit, though, I was a little grinchy earlier.  I know, I know but I was getting bogged down under my Christmas to-do list on top of my regular to-do list and it felt like they were both growing no matter how hard I was working.  Everything was starting to make me grouchy and less than Christmas-y. Last Minute Christmas | Life Healthfully Lived

Then I took these pictures for last minute Christmas recipes, and I started to feel that Christmas spirit again.  I may have also been watching Elf and other Christmas movies to help put me in the mood.  Either way, I’m glad I snapped myself out of it.  I know this time of year can be stressful, especially if you’re the one planning everything.  You want everyone else to feel the cheer of the season while you’re slowly going crazy with baking cookies, planning feasts, wrapping presents, and making hot chocolate.

While I can’t do everything on your list, I can help out with a few last minute recipes.  Both these recipes take minimal effort and can be made beforehand and then brought out when your guests arrive.  One is sweet and one is savory and both are delicious.  So if you need a quick dessert or appetizer, try one of these out.

And remember, Christmas comes without ribbons, it comes without tags.  It comes without packages, boxes or bags.  Christmas doesn’t come from a store.  Christmas means just a little bit more….

Creamy Cranberry DipLast Minute Christmas | Life Healthfully Lived

  1. Make both the cranberry sauce and no mozzarella, mozzarella.  You can do this a few days before you plan on serving the dip.  Just store them in the fridge.
  2. Preheat the oven to 375.  Oil a small glass casserole dish or another oven safe dish with a little olive oil.  Pour in the mozzarella and bake for 10 minutes.
  3. Pull out the mozzarella and pour the cranberry sauce on top.  Place the dish back in the oven and bake for another 5 minutes.
  4. Remove from oven and serve warm with whatever dipping device you have.

Christmas BlondiesLast Minute Christmas | Life Healthfully Lived

  • 1 can chickpeas, drained, rinsed, and skins removed (don’t skip this last step!)
  • 1/4 cup oat bran
  • 2/3 cup date sugar
  • 2 tbsp cinnamon
  • 1/2 tsp baking powder
  • 1/4 tsp baking soda
  • 1/4 tsp sea salt
  • 1/2 cup tahini
  • 1/2 cup molasses
  • 1 tsp vanilla extract Last Minute Christmas | Life Healthfully Lived
  1. Preheat oven to 350 and oil a brownie pan with a little coconut oil.
  2. Place all of the ingredients into a food processor or blender and blend until smooth.
  3. Pour the batter into the dish, scooping out the last bits with a spatula.  Bake in the oven for 20 minutes.  Pull out the pan and check the middle.  If it is still gooey, bake for another 10 minutes.
  4. Let the blondies cool on a rack completely before cutting and serving.  You can also sprinkle a little powdered sugar on top.  It is Christmas after all!

Last Minute Christmas | Life Healthfully Lived

Healthy Holiday Travel Tips

Holiday Travel Tips | Life Healthfully LivedIt’s almost here!  Christmas is almost here!  I am super excited to celebrate Christmas with my family and take some time to just relax and enjoy the season.  While this is the most wonderful time of year, it can quickly become the most stressful time of year.  Baking, buying and wrapping presents, going to concerts/programs/pageants, watching all the Christmas movies, planning the big dinner…. It can all add up to a pretty hectic month.

On top of all that, you’re probably going to be doing some kind of traveling this week.  Whether it’s a few minutes, hours, or a day away, traveling can take a toll.  Plus, being out of your normal routine and in a new place can sometimes put your whole body out of whack.

Traveling and Christmas doesn’t mean you have to throw all of your regular healthy habits out the window.  In fact, this is the best time to keep up with your normal routine so that you can enjoy your holiday without feeling crummy.

Here are a few things that you can do to make sure you have the happiest, and healthiest, Christmas season!

Plan Your Food

Traveling is not the time to just wing it when it comes to your food.  You wouldn’t show up to the airport without a ticket and hope there was a plane with an open seat just happening to go to your destination.  Don’t leave your eating up to chance either!Holiday Travel Tips | Life Healthfully Lived

Plan out a few healthy snacks to bring along with you.  Things like fruit, nuts, seeds, hard boiled eggs, and cut up vegetables all make really good portable snacks.  You never know if you’re going to be stranded somewhere where the best option for food is the local gas station.  If you need a few ideas for some good snacks, check out these homemade ones on my recipe page!

Hydrate Like Crazy

This is really a reminder for me because I am horrible at drinking enough water regularly.  I just get so busy doing things and then by the time dinner rolls around, I realize that I have had one glass of water all day.  Hydration is important no matter what, but traveling really makes it a priority.  Get a reusable water bottle before you leave home and make sure that you are always refilling it.  You can set reminders on your phone or download an app to let you know that it’s time to have some more water.Holiday Travel Tips | Life Healthfully Lived

Also, remember that things like fruit, vegetables, and hot tea all count towards your water intake.  Just don’t let them totally replace glasses of water throughout the day.

Keep Moving

Yes, the place you’re traveling to this Christmas might not have a gym or your favorite Crossfit class, but that doesn’t mean you should totally give up on exercise.  I’m not saying that you have to run a marathon every day of your break, but putting some activity in your day will keep your body, and you, at your best.Holiday Travel Tips | Life Healthfully Lived

Take a walk with a family member.  Go sledding with the kids in your family.  Cross country ski with friends who are also home on break.  Heck, go build a snowman or have a snowball fight.  All of these will keep your body in motion and help you feel your best

Be Ready For An Emergency

Of course, you don’t want to have to worry about an emergency while you’re celebrating Christmas, but sometimes things happen.  Whether you suddenly spike a fever, have an allergic reaction, or injure yourself in that snowball fight I told you to have (you can totally blame me for that one), things happen.  If you are away from home and your doctor, it can be difficult to find the best care.Holiday Travel Tips | Life Healthfully Lived

That’s where Amino comes in.  They make finding a doctor in your area super easy and convenient.  All you have to do is answer a few questions about your condition or what you are looking for, enter your insurance information and they will match you with the right doctors for your needs.  This can be really helpful if you don’t know the area and need medical attention.  It’s also good for when you get back home and want to find the perfect doctor in your area.  Even better?  It’s totally free.

Enjoy It All

Above everything else, enjoy your Christmas.  It only comes once a year and most of us are so stressed about getting everything done that we don’t even take the time to slow down and enjoy the holiday.  The best thing for your health this time of year is to really enjoy this time of year.  Laugh with your family and friends, spend time with your loved ones, celebrate the love that was sent down to us this season, and don’t worry about the last present that needs to be wrapped or the batch of cookies you accidently burned.  If you follow just one tip on this list, let it be this one!  It will do you the most good.Holiday Travel Tips | Life Healthfully Lived

I hope this helps you out as you get ready for your holiday traveling and make sure to check back here on Wednesday because I’m going to have a few last minute recipes for you to whip up!

Happy Monday before Christmas friends!

Salted Caramel Chocolate Swirl Cookie Bars

Salted Caramel Chocolate Swirl Cookie Bars | Life Healthfully LivedWhew!  Yes that is a long name, but I had to get everything in there so you can understand just how awesome these things are.  I was really shocked when I came up with this recipe.  I had been experimenting with making caramel out of dates and after the caramel pieces that I had planned didn’t turn out as I had hoped, I thought about making a no-bake cookie bar.

These aren’t totally no bake, you do have to cook the cookie base, but that takes less than 15 minutes.  The rest you just stir together, pour, and swirl!  Which makes this perfect if you realize at the last second you said you would bring a dessert to that Christmas party you’re going to.Salted Caramel Chocolate Swirl Cookie Bars | Life Healthfully Lived

I have a few other Christmas-y recipes and posts coming your way next week before the big day, so be on the lookout for those.  I plan to spend the majority of my weekend in the kitchen.  The only time that I will be out and about is to go see the new Star Wars movie with my husband.  I have been getting a countdown for about two weeks now, so I think the man is excited.  To be honest, I am too.  While I might not be as passionate about Star Wars as he is, I really do enjoy the movies.

So if you’re going to see the movie this weekend, enjoy!  Then come home and make some hot chocolate and eat these salted caramel chocolate swirl cookie bars!  If the empire, hot chocolate, and cookie bars don’t put you in the Christmas spirit… you may have already crossed over into the dark side.

Salted Caramel Chocolate Swirl Cookie BarsSalted Caramel Chocolate Swirl Cookie Bars | Life Healthfully Lived

Cookie Base- slightly adapted from this recipe by Plated with Style

  • 3/4 cup coconut flour
  • 1/2 cup solid coconut oil (if your oil is liquid-y, put it in the freezer for a few minutes)
  • 1/4 cup maple syrup
  • 1/2 tsp sea salt
  1. Preheat oven to 350.  In a blender or food processor, pulse all of the ingredients together until you have one dough ball.
  2. Grease an 8 x 8 pan with a little more coconut oil.  Don’t skip this step or you will end up with crumbled mess.
  3. Take the dough ball and press it onto the bottom and a little up the sides of the pan.  You can use a cup if you’re having a hard time rolling the dough out. Make sure you have a fairly even layer.
  4. Bake for about 9 minutes or until it is golden brown.  Remove from oven and let it cool before you pour the rest of the layers in.

Salted Caramel

  • 10 Medjool dates, pitted and soaked in hot water for at least 20 minutes (preferably overnight if you remember)
  • 1/2 cup full fat coconut milk
  • 6 tbsp liquid coconut oil
  • 1 tsp vanilla extract
  • 2 tsp almond butter (could use cashew or peanut butter)
  • 1/4 tsp salt (a touch more if your nut butter isn’t salted)
  1. While the cookie layer is baking, make the caramel and chocolate layers.
  2. Make sure that your dates have been either soaking overnight or in boiling hot water.  You want to be able to remove the skins easily.
  3. Once your dates are done soaking, slip the skins off.  Most of them will slide right off, a few might give you a little fight.  As long as you get most of the skin off you should be just fine.
  4. Put the dates and the coconut oil into a blender and blend until you have a smooth and creamy paste.  You may have to scrape down the sides a few times before everything comes together.
  5. In a bowl, combine the date paste and the rest of the ingredients.  Mix until everything comes together.

Chocolate SwirlSalted Caramel Chocolate Swirl Cookie Bars | Life Healthfully Lived

  • 4 oz dark chocolate (I used 100% chocolate)
  • 2 tbsp liquid coconut oil
  • 1-2 tbsp maple syrup (if you used 100% chocolate like I did)
  1. In a medium bowl, grate the dark chocolate so you have little shreds.
  2. Add the coconut oil and maple syrup and stir.
  3. In the microwave or a double boiler, melt the chocolate until it is all melted and smooth.

Putting It All Together

  1. Once the cookie layer has cooled, pour in the salted caramel and smooth evenly over everything.
  2. Pour in the chocolate swirl over the top.  Using a chopstick, toothpick, or butter knife, swirl the chocolate throughout the caramel layer.
  3. Place the pan in the freezer for at least 30 minutes so the caramel and chocolate harden.
  4. To serve, Run a butter knife under hot water for a little bit and slice the bars, wiping the knife clean each time.

Ok, I know you’re panicking at this point because this does NOT look like a simple recipe.  Trust me, this comes together a lot faster than it seems.  I finished making this in about 30 to 40-ish minutes.  And  once you taste these bars, you’ll forget about this super long list.Salted Caramel Chocolate Swirl Cookie Bars | Life Healthfully Lived

Have a great weekend friends and may the force be with you!

DIY Wednesday: Gluten-Free Pie Crust

IDIY Wednesday: Gluten-Free Pie Crust | Life Healthfully Lived 
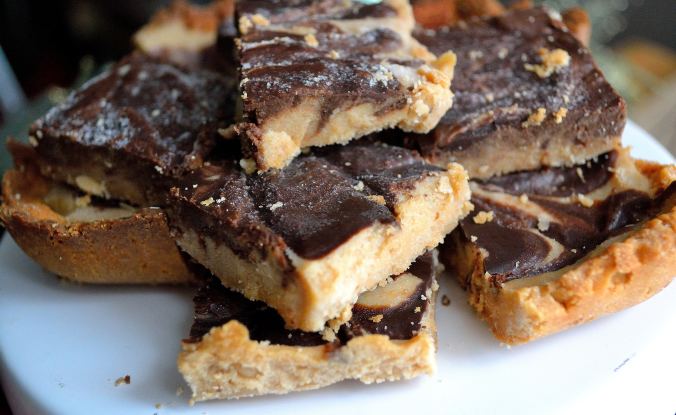
have another holiday edition of DIY Wednesday for you guys today.  Pie is eaten all year round, but I think that it’s most special around the holidays.  From pumpkin to pecan to sweet potato pie, there are some pretty delicious options.

Pies are a little difficult though if you have to stay away from gluten.  The store bought versions can taste a little (ok, a lot) like cardboard plus they are pretty expensive compared to the regular pie crusts.  Homemade gluten-free pie crusts are better, but can sometimes call for ingredients that you might not usually have on hand.DIY Wednesday: Gluten-Free Pie Crust | Life Healthfully Lived

I made this simple one with a pie that my mom made for Thanksgiving.  It was a crustless pumpkin pie and while it was really good, it needed some type of crust.  The beauty of this crust is that you can use it raw or cooked so if you have a tart or treat that you don’t need to bake but still want a crust, you can use this.  It also holds up to baking and adds a nice sweet flavor to any pie.

If you’re looking for a quick crust for your baked goods, try this gluten-free pie crust!

Gluten-Free Pie CrustDIY Wednesday: Gluten-Free Pie Crust | Life Healthfully Lived

  • 10 Medjool dates, soaked in water if needed
  • 1/3 cup almond flour
  • 1/2 cup pumpkin seeds
  • 1/3 cup chopped walnuts
  • 1 tsp cinnamon
  • 1/2 tsp sea salt
  1. If your dates aren’t, soak them in some hot water for 10 to 15 minutes.  Drain (save the water) and slice them in half removing the pits.
  2. Pulse the dates in a food processor or blender for a few minutes until they come together in one ball
  3. Add the rest of the ingredients to the processor and pulse until everything comes together.  If it is too dry add a tablespoon or two of the date soaking water.  If it’s too wet add a little more almond flour or pumpkin seeds/walnuts.
  4. Place the date mixture into the fridge to cool for at least an hour.  This makes it easier to handle when you put it into your pie tin.
  5. Once the date mixture is cool, grease your pie tin well.  Then, press the date mixture into the bottom of the tin and up the sides.  Make sure there are no bare spots.

You can keep it in your fridge if you will be using it later that day, in the freezer if you are going to use it later in the week (just let it thaw a bit before you use it), or pour in your filling and use it right away!DIY Wednesday: Gluten-Free Pie Crust | Life Healthfully Lived

What is your favorite kind of pie to make/eat this time of year?