DIY Wednesday: Chili Cheese Popcorn

DIY Wednesday: Chili Cheese Popcorn | Life Healthfully Lived
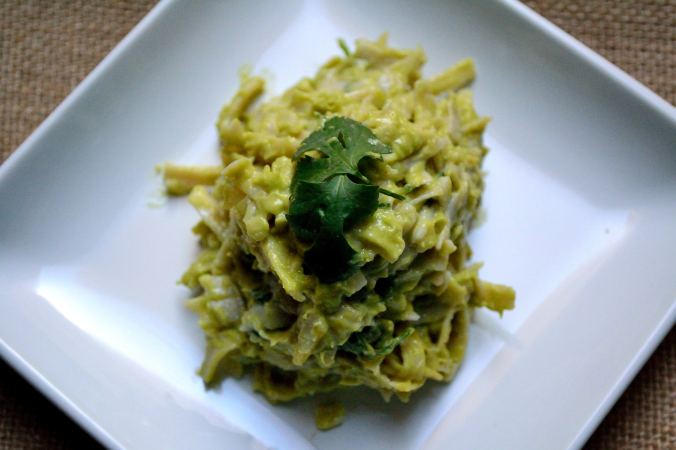
Popcorn is one of my favorite snacks because it’s easy to make and you can eat a huge bowl of it without feeling gross.  I’m a huge fan of volume eating because I like food.  Unfortunately, a lot of popcorn that you can buy in the store is NOT so good for you.  Flavored popcorn tends to be full of artificial ingredients, preservatives, oils, and way too much sodium.  That can be a real bummer when you figure that out after you’ve already inhaled a whole bag by yourself.DIY Wednesday: Chili Cheese Popcorn | Life Healthfully Lived

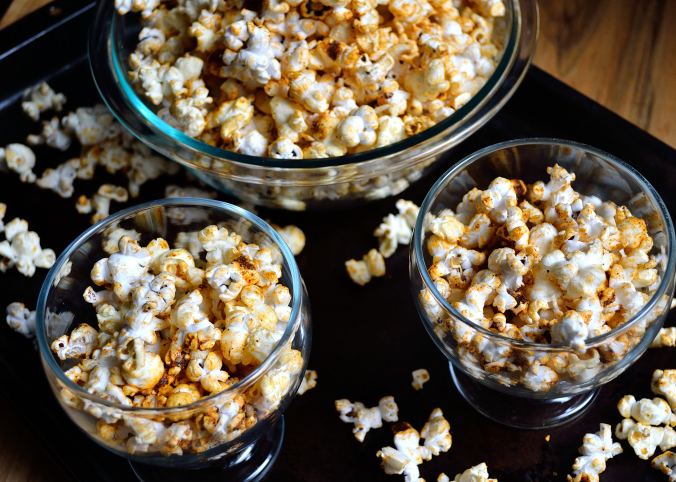
But don’t you worry because I’ve got you covered!  You can make your own flavored popcorn at home with half the bad junk and all the tastiness.  I was surprised by how good these turned out and even Adam who tends to like plain things said these were addictive.  Husband approval means you know it’s good!

You probably have most of these ingredients already and if so you’re only a few minutes away from a healthy snack!

Chili Cheese PopcornDIY Wednesday: Chili Cheese Popcorn | Life Healthfully Lived

  • 3 cups air-popped popcorn (or you can use this method if you don’t have an air-popper)
  • 2 tbsp nutritional yeast flakes
  • 1 tbsp chili powder
  • 1 tsp ground cumin
  • 1 tsp garlic powder
  • 1 tsp dried minced onion
  • 1 tsp sea salt
  • 1/2 tsp smoked paprika
  • 1 1/2 tbsp coconut oil
  1. Mix all the seasonings together and measure out one tablespoon into a small bowl.  Add the melted coconut oil and mix everything together.  You want it to be pourable.  Set this aside.
  2. Pop your popcorn and put it into a large bowl.  Make sure you do this after you get the seasoning mix together.  You want the popcorn to be hot when you mix everything together.
  3. Once the popcorn is popped, pour the spice mix over the popcorn and toss to coat.  It might take a few minutes, but keep tossing and the seasoning will get on all the popcorn.DIY Wednesday: Chili Cheese Popcorn | Life Healthfully Lived


Happy snacking friends and see you on Friday!


Creamy Avocado Fettuccine

I am really into avocados lately.  I buy a big bag at the beginning of the week and add them to my smoothies and soups and anywhere else I can squeeze them in.  They make things creamy and delicious.  Plus they are full of good for you stuff.Creamy Avocado Fettuccine | Life Healthfully Lived

People sometimes shy away from avocados because of the fat content, even though I think most understand it’s good fat.  Fat still scares people because it just makes sense that fat would make you fat.  Don’t worry, I get it.  You want to eat the best food for your body as possible and you don’t want to gain weight.  Don’t fear fat.  Trust me, fat is good and it will help you reach your goals all while being super tasty.

Now, don’t go hog wild on fat.  Too much of anything, even a good thing like fat is a bad thing.  But start including it in your diet and don’t feel guilty or worry.  And if you’re looking for a new way to use avocados other than guacamole, try this creamy avocado fettuccine.

It’s a great weeknight dinner because it comes together in less than 20 minutes.  And it’s good enough that no one will realize that there is no dairy in the sauce.  You can even make it paleo and serve it over vegetable noodles instead of brown rice ones.  It tastes good both ways, trust me, I tried it.

Creamy Avocado FettuccineCreamy Avocado Fettuccine | Life Healthfully Lived

  • 2 Hass avocados
  • 2 tbsp cheesy garlic spread
  •  juice of half a lime
  • 1 tbsp olive oil
  • 1/2 tsp chipotle chili powder OR 3 to 4 fresh chipotle chili’s
  • 1/2 tsp sea salt
  • 1 can full-fat coconut milk
  • 1 package brown rice fettuccine OR spiralized vegetable noodles (butternut squash & sweet potato work really well)
  • 2 to 3 tbsp fresh cilantro
  1. Cook the fettuccine according to the directions on the package, drain, and set aside.  Or if you’re using vegetable noodles, prepare those by cooking on a large baking sheet at 400 for 8 to 10 minutes or sauteing in a large pan with a lid until soft.
  2. Meanwhile, slice the avocados in half and remove the pit.  Scoop out the flesh into a blender.  Add the rest of the ingredients except the coconut milk.  Pulse a few times until everything is pretty mixed together.
  3. Add the coconut milk a few tablespoons at a time until you reach your desired consistency.  I ended up using about 1/3 cup for a fairly thick but still pourable sauce.
  4. Once your sauce is at the right consistency and the noodles are done, add them back to the pot they cooked in and pour all the sauce on top.  Stir everything together until all the noodles are coated.
  5. Sprinkle in the cilantro and stir just to combine.  Serve it up and enjoy!

This recipe is probably going to make it into the regular rotation because it’s quick, healthy, and tastes so darned good! Creamy Avocado Fettuccine | Life Healthfully Lived

Sweet Potato Hash

Sweet Potato Hash | Life Healthfully Lived
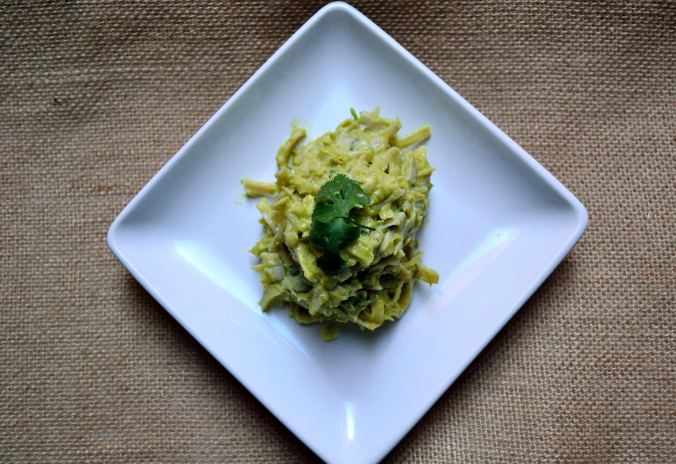
The time has come to share the sweet potato hash that won the hearts of my family over Christmas.  And they have promised me that they really do like it, not just because it was made by me and they have to pretend to like everything that I make.  It’s actually good.

Plus Adam keeps asking for me to make it which is a good indication that he really likes something.  Although the boy did use to but corn syrup on his pancakes and didn’t like mac n’ cheese as a kid.  Seriously, what kind of psycho doesn’t like cheese and noodles as a child?  My husband apparently.

Anyway, back to this sweet potato hash.  I was trying to think of something to make for a crowd for Christmas brunch that tasted good but was still a little healthy.  Gotta balance out those cookies!  I had a bunch of sweet potatoes lying around and instead of just roasting them up like I usually do, I decided to fancy them up a bit.  Ok, not that much but I added some bell peppers, onions, and cilantro and was amazed at how just a few ingredients made such a big difference.

So if you’re looking to change up your normal breakfast hash, give this sweet potato version a whirl.  Promise you won’t be disappointed!

Sweet Potato HashSweet Potato Hash | Life Healthfully Lived

  • 2-3 large sweet potatoes, washed and dried
  • 1 red bell pepper, diced
  • 1 yellow pepper, diced
  • 1 cup onions, diced
  • 2 to 3 cloves garlic, minced
  • 1 tsp Italian seasoning
  • 1 tsp smoked paprika
  • 1/2 tsp salt
  • 1/4 tsp pepper
  • handful of fresh cilantro, stems removed and chopped
  1. Once your potatoes are washed and dried, dice into small cubes.  You want to make sure they are fairly small and uniform inside so they cook properly.
  2. In a large skillet that has a lid, heat a little olive oil over medium-high heat.  Add the onions and saute for a few minutes until a little soft.  Add the bell peppers and saute for another 2 to 3 minutes.  Add the sweet potato cubes and half the minced garlic and mix everything together.
  3. Sprinkle everything with the Italian seasoning, smoked paprika, and a little salt and then cover with the lid.  Let the everything cook for about 15 minutes, stirring occasionally so the potatoes don’t stick to the bottom.
  4. Once the potatoes are fork tender remove the lid and add the rest of the garlic and seasonings.  Cook for another five minutes.  Turn off the heat and add the cilantro and stir to combine.Sweet Potato Hash | Life Healthfully Lived

This hash is awesome served with a poached or fried egg on top.  But then again, most dishes are better with an egg on top.  Tomorrow is Adam’s birthday so we plan to spend some time eating good food downtown and probably going to see Star Wars again.

What does your weekend look like?

Roasted Pepper Vegetable Tomato Soup

Roasted Pepper Tomato Vegetable Soup | Life Healthfully Lived
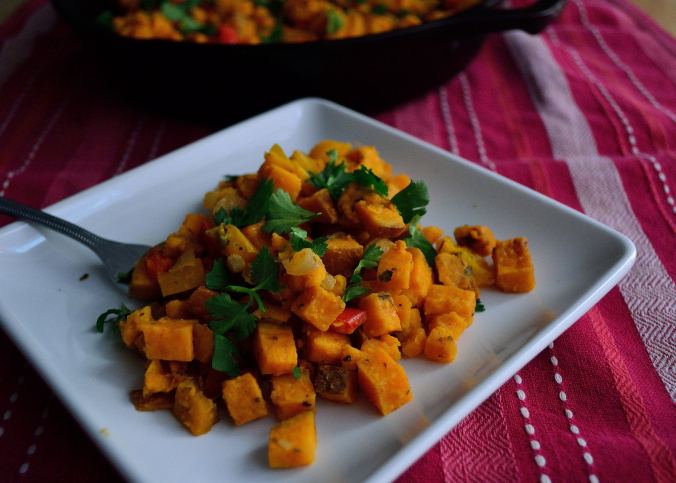
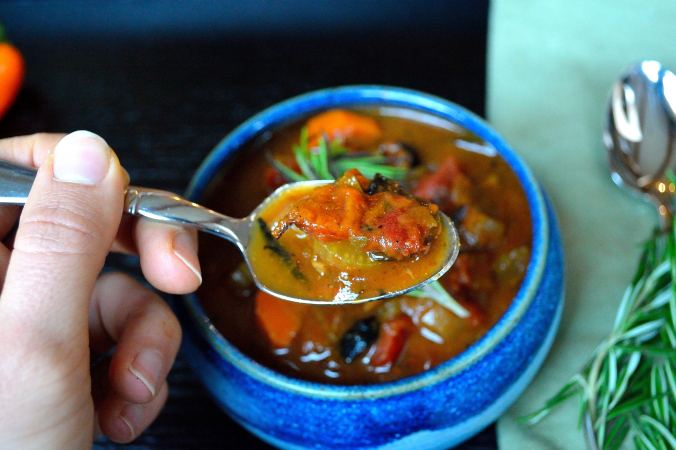
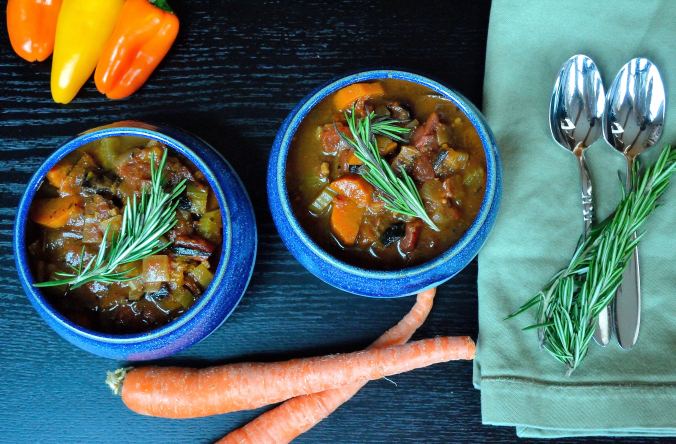
You guys know I’m having a thing with soup lately.  Especially now that Christmas and New Year’s are over.  Brothy soups chocked full of vegetables, herbs, and spices sound pretty amazing right now.  Plus, winter has finally decided to come out to play and cold temperatures always make me crave warm meals like soups or stews.

This is my soup of the moment because of two reasons.  1.  It is absolutely delicious and 2. It is quick and versatile. While the base always stays the same, I can change the vegetables up to whatever I have in my fridge.  Sometimes that includes mushrooms or leeks, other times it’s more peppers and some corn.Roasted Pepper Vegetable Tomato Soup | Life Healthfully Lived

If you can’t or don’t want to do a certain vegetable I have in this recipe, then don’t put it in your soup.  If you want to add a vegetable that I haven’t included, go for it!  That is the beauty of this meal.  As long as the main components are there, you can play around with the other flavors.

If you’re looking for a lighter meal that will still fill you up, give this soup, or any soup for that matter, a try!

Roasted Pepper Vegetable Tomato SoupRoasted Pepper Vegetable Tomato Soup | Life Healthfully Lived

  • 2-3 red or orange bell peppers
  • 1 cup carrots, peeled and sliced
  • 1 cup celery, sliced
  • 1 cup onion, diced
  • 1 leek, green top cut off and white part sliced thin
  • 8 oz package of bella mushrooms
  • 1/2 cup corn kernels
  • 2 cans fire roasted diced tomatoes
  • 6 to 8 cups vegetable broth or water
  • 2 tsp smoked paprika
  • 2 tsp chili powder
  • 2 tsp roasted garlic or 3 cloves minced
  • 2 tsp Mexican oregano (regular if you can’t find Mexican)
  • salt and pepper
  1. Preheat the oven to 400 and arrange the peppers on a large baking sheet lined with parchment paper or a Silpat.  Roast the peppers until the are slightly brown and starting to collapse. Remove and let them cool.  Once they are cool, remove the skins and slice into strips.
  2. If you would like, you can toss the mushrooms with a little oil, salt, and pepper and roast those for 15 minutes.
  3. Heat a little olive oil in a large dutch oven or stock pot.  Saute the carrots, onions, leeks, and celery until they are soft and starting to brown on the edges.  Sprinkle with a little salt and add the roasted peppers, mushrooms, and corn.  Stir everything together.
  4. Add in both cans of roasted tomatoes and then the vegetable broth or water.  Make sure all the vegetables are covered with liquid.  Add all the seasonings and bring the soup to a bowl.
  5. Once boiling, cover with a lid and lower to a simmer.  Let it simmer for 20 minutes.  Taste the soup and adjust the seasonings as needed.Roasted Pepper Vegetable Tomato Soup | Life Healthfully Lived

Italian Pasta Bake

MozzarellaItalian Pasta Bake | Life Healthfully Lived 
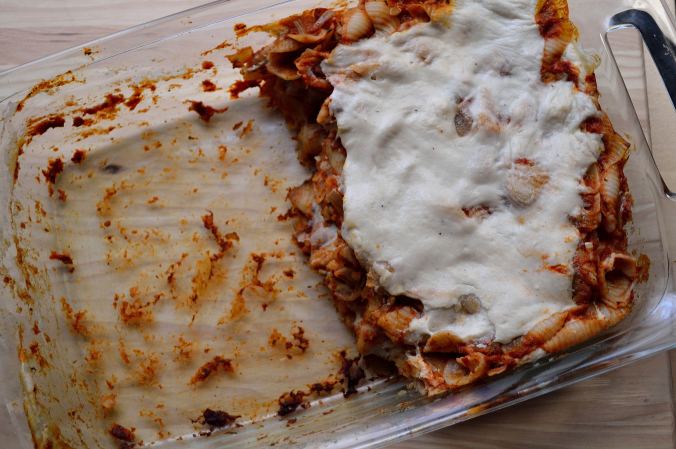
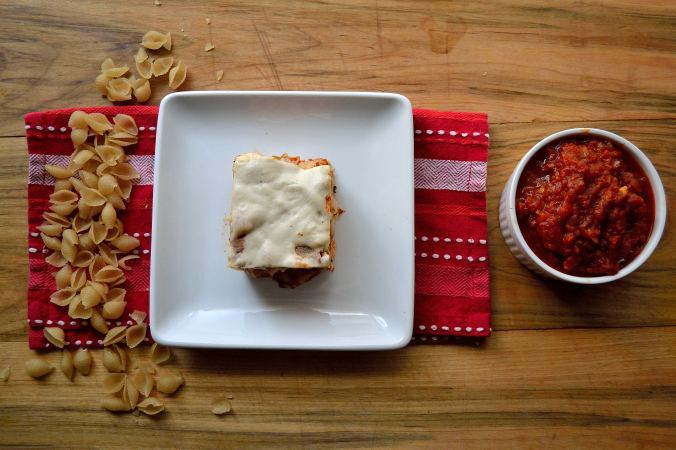
that isn’t really mozzarella.  Confusing I know, but totally awesome.  There are tons of recipes out there for fake cheese as well as plenty of products that you can buy.  My issue with store bought “cheese” is that it’s usually full of ingredients that I would rather not ingest.

I’ve made cheese sauce before for my Fusilli N’ Cheeze, but I wanted to make a cheese that was a little thicker.  My goal?  To try and recreate the mostaccioli that Adam made for me when we first started dating.Italian Pasta Bake | Life Healthfully Lived

About a month or so into our relationship, Adam decided he was going to cook for me.  He made me his mom’s mostaccioli and it was delicious.  It was super simple, but watching him make that meal for me was one of the first times that I started to fall in love with him.  When I stopped eating gluten and dairy, mostaccioli kind of went out the window. But not anymore!

Don’t be freaked out by making “cheese” that isn’t really cheese.  It isn’t difficult and there really aren’t any weird ingredients unless you think tapioca starch is weird. It isn’t.  It’s just a thickener and helps make this cheese stretchy.  You could also use potato starch, but I like tapioca better.  Once you make the cheese, this is a really fast meal and a great one to prep early and pull out for a quick weeknight meal.

Not-Mozzarella, Mozzarella Italian Pasta Bake | Life Healthfully Lived

  • 1/2 cup raw cashews, soaked in warm water overnight
  • 1 tsp apple cider vinegar
  • 1 tsp roasted garlic
  • 1/2 tsp salt
  • 1 tsp olive oil
  • 2 1/2 tbsp tapioca starch (or potato starch)
  • 1 cup hot water
  1. Add everything to a blender and blend for 2 to 3 minutes until it is completely smooth.
  2. Pour the mixture into a medium saucepan and heat over medium-high heat.  Cook while constantly stirring.  After a few minutes, the mixture will start to thicken.
  3. Turn the heat to low and keep stirring it until it is very thick and stretchy.  You can use it right away or keep it in an airtight container in the fridge for 2 to 3 days.

Italian Pasta BakeItalian Pasta Bake | Life Healthfully Lived

  • 1 batch of Not-Mozzarella, Mozzarella
  • 1 batch of my tomato sauce
  • 1 package of gluten-free pasta, I used brown rice shells
  1. Preheat oven to 350.  Cook your pasta according to the directions on the package.  Drain and set aside.
  2. Get a 9 x 13 casserole dish and spoon a thin layer of tomato sauce on the bottom.  Next, put a layer of pasta and then top with tomato sauce.  Spread some of the cheese on top of that.
  3. Keep layering the pasta, sauce, and cheese until it’s gone.  Cover the dish with aluminum foil and bake for 25 minutes.
  4. Remove from oven and take off the foil.  Cook for another 5 minutes until the cheese on top is starting to brown on the edges.
  5. Take out of the oven and let it cool for 10 minutes before you serve it.Italian Pasta Bake | Life Healthfully Lived