Sweet Potato Caprese Pizza

Sweet Potato Caprese Pizza | Life Healthfully LivedWhen I was coming up with the recipe for these tasty pizzas I had such a great idea/method.  I was going to make a hashbrown like crust and then broil some delicious melty cheese, tomatoes, and basil on top.  It was going to be awesome because I was going to use my waffle iron to make this wonderfully crispy crust and then pop everything under the broiler for the final touch.

My waffle iron is now in a garbage dump somewhere in Illinois. Sweet Potato Caprese Pizza | Life Healthfully Lived

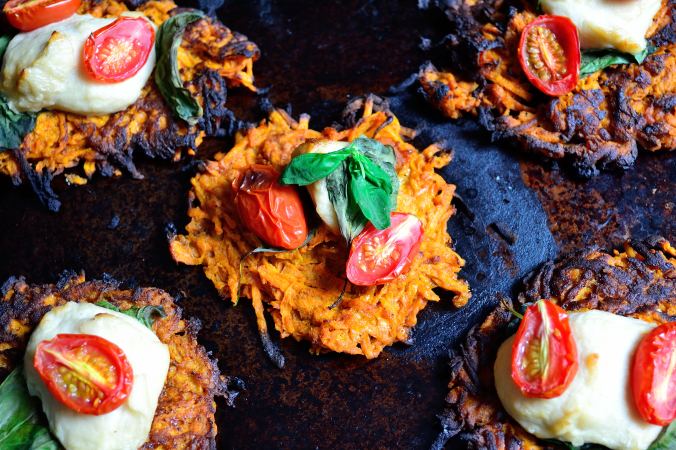
Long story short, if you have an awesome waffle iron that you love you can still make these the way that I intended.  If you have a waffle iron that is literally the spawn of Satan you can use my alternative method and still have pretty delicious results.

Also, just a quick reminder to myself and anyone around me:  Don’t decide to test a new recipe on a Saturday night when you’ve completely lost track of time, haven’t eaten in like 5 hours and it’s almost 9 p.m.

Yes, this really happened.

Yes, Adam had to deal with a hangry wife.

The things I do for you guys. 🙂

Sweet Potato Caprese PizzaSweet Potato Caprese Pizza | Life Healthfully Lived

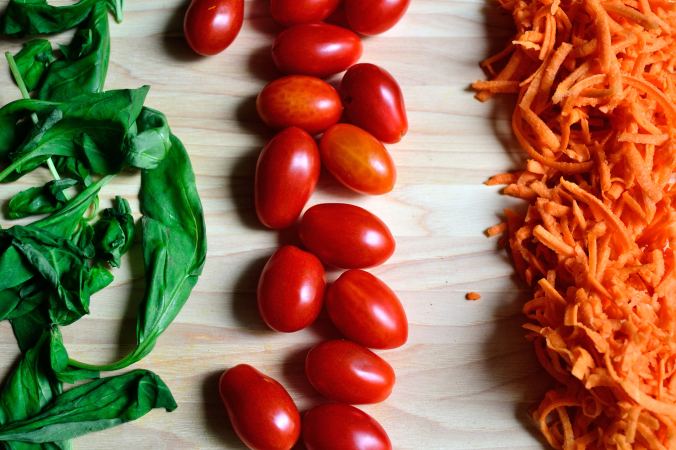
  • 2 large sweet potatoes, shredded (I used my food processor and it was super easy but you can also use a box grater)
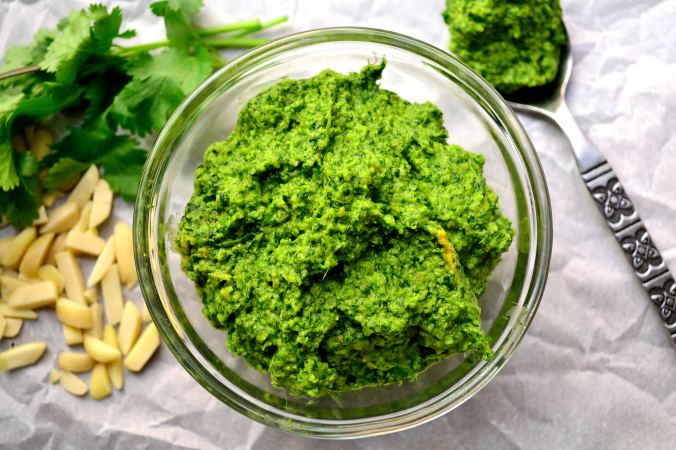
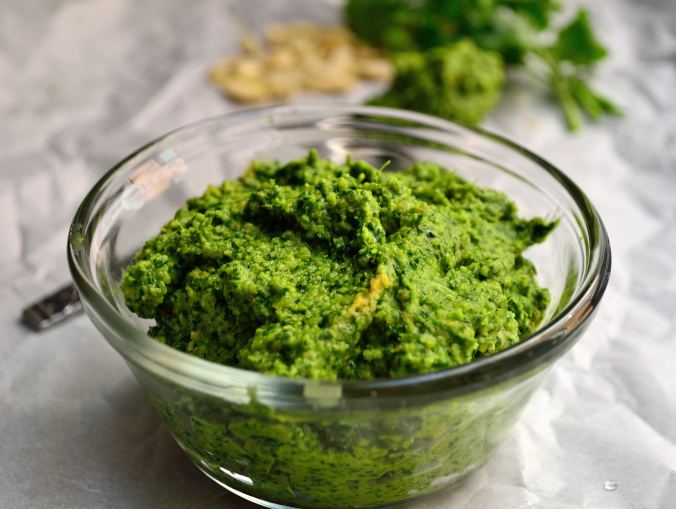
  • 1 batch of my No Mozzarella Mozzarella 
  • 8 oz cherry or grape tomatoes, sliced in half
  • small bunch of basil, stems removed
  • 2 large eggs, beaten (or 3 tbsp flax seed mixed with 6 tbsp water)
  • 1/2 tsp garlic powder
  • 1/2 tsp oregano
  • 1/2 tsp salt
  • 1/4 tsp pepper
  • olive oil or coconut oil for the pan/waffle ironSweet Potato Caprese Pizza | Life Healthfully Lived
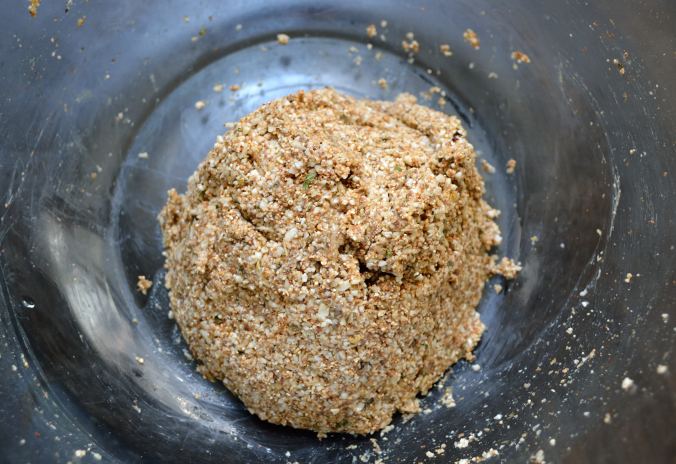
  1. Line a large baking sheet with a Silpat or parchment paper and place the shredded sweet potatoes, eggs, and seasonings into a large bowl and mix together until everything is well combined.
  2. If you are using a waffle iron (lucky duck), grease the iron with a little oil and scoop about 1/4 to 1/2 cup (depending on the size of your iron) of the sweet potato batter into the iron and cook until the edges are crispy.  Or your waffle iron goes ding.  Move the finished crust to the baking sheet and continue until you have used all the batter.
  3. If you don’t have a waffle iron, you can cook this in a skillet (I used this one) or on a stovetop griddle.  Use a little oil, scoop about 1/4 cup batter onto the skillet and let if cook for about 5 minutes on each side or until the edges are crispy and brown. Move to the baking sheet and repeat until you’re out of batter.
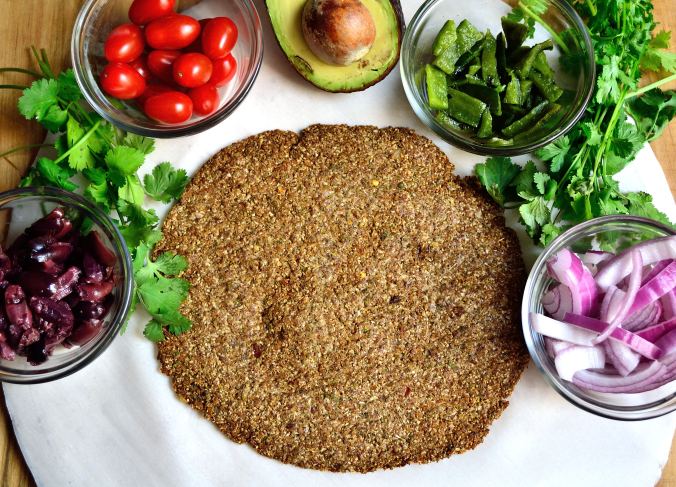
  4. Once your crusts are complete, top each pizza with a dollop of mozzarella, a few tomato slices, and basil leaves.  Sprinkle a little salt and pepper on top and then move the pizzas to the broiler for about 5 minutes or until the cheese starts to get a little brown and the tomatoes have crisped.

The fun part about this recipe is it can be dinner or it can be breakfast!  Or lunch.  Or a snack.  Or if you’re a bit odd, dessert!  I guess what I’m saying is eat this whenever the heck you want and don’t let anyone tell you that you can’t.  You don’t need that negativity in your life. Sweet Potato Caprese Pizza | Life Healthfully Lived

Happy Friday friends and enjoy your weekend!

*There are affiliate links in this post.  If you click on them and buy the product through that link, I get a percent of the sale.  Any money I get from affiliate links goes back into the blog to make it better for you, so thanks! 

DIY Wednesday: Cauliflower Pizza Crust

DIY Wednesday: Cauliflower Crust Pizza | Life Healthfully LivedThe cauliflower pizza crust.  For many, it is an elusive dream.  You see recipes on Pinterest and they claim that it is the best crust ever (just like real pizza) and that will fulfill all your gluten-free pizza dreams.

And then you make it.

And it turns into a soggy wet pile.

Or it has five pounds of cheese and eggs holding it together.

I’ve tried a lot of cauliflower pizza crusts and while some were good, none were great.  Most of them had to be eaten with a fork and a knife and that’s ok if you’re eating a deep dish pizza but not ok when you want to pick up a slice and feel like you’re eating pizza.  That’s what I wanted.

Then I stumbled across Sprint 2 The Table’s quinoa flour crust pizza and it sounded simple enough and didn’t have the cheese that most crust recipes use to keep everything together.  So I gave it a shot and EUREKA!  It worked.  I could actually pick it up and while I won’t go as far as saying it tastes exactly like real pizza it was the closest I had ever come.

I kept playing with the crust and swapping out a few things and came up with one that doesn’t use eggs or grains as the flour.  If you’re totally fine with eating quinoa flour and eggs then go ahead and try Sprint 2 The Table’s pizza crust.  If you want an eggless and grain-free version try this one below.

I’ll give you a step-by-step tutorial (along with pictures) so you can get the best pizza crust possible then you can go crazy with toppings.  And I may have gone crazy with my toppings aka the whole refrigerator on my pizza.

Cauliflower Crust Pizza- Based on this one by Sprint 2 The TableDIY Wednesday: Cauliflower Crust Pizza | Life Healthfully Lived

  • 1 cup of cauliflower with as much of the stems removed as possible
  • 1/4 cup coconut flour
  • 3 tbsp ground flaxseed
  • 6 tbsp water
  • 1 tsp oregano
  • 1 tsp basil
  • 1/4 tsp red pepper flakes
  • 1/2 tsp salt
  1. Preheat your oven to 425 and get out a pizza stone/pan or regular baking sheet.  Line whatever you’re going to use with parchment paper (I used a pizza stone and cut my parchment paper into circles) and then cut another piece of parchment paper to match the first.
  2. In a small bowl, combine the ground flaxseed and water and let it sit and gel for a few minutes.
  3. In a blender or food processor, pulse the cauliflower a few times until it’s in small rice-like pieces and then dump it into a large bowl.  Add the flour and seasonings and whisk to combine everything.  It’s ok if it’s a little clumpy.
  4. Add in the flaxseed and water mixture and start stirring everything together with a spatula.  It should start to form a big dough ball.  If it’s too dry, add a little water a tablespoon at a time.  Remember that coconut flour likes to soak up water like a sponge so as you add water wait just a few minutes to see if it needs more.

    DIY Wednesday: Cauliflower Crust Pizza | Life Healthfully Lived

    Nice dough ball. Not too dry or too soggy.

  5. Once you have your dough ball place it on your stone or pan that’s lined with parchment paper.  Slightly flatten the dough with your hand and then using a rubber spatula start pressing the dough out into a pizza shape.

    DIY Wednesday: Cauliflower Crust Pizza | Life Healthfully Lived

    Spreading out the dough. It takes awhile so don’t rush it

  6. Work from the middle pressing out and keep going until you have about a 10 to 12-inch circle.  You want it to be fairly thin so the crust will cook all the way through and not end up soggy.  As you press the dough out the edges might crack a little but that’s ok just press them back together.

    DIY Wednesday: Cauliflower Crust Pizza | Life Healthfully Lived

    About how thick you want your crust. You could even go a little thinner for a crispier crust.

  7. Place the other piece of parchment paper on top of the crust and bake for about 20 to 25 minutes.  Remove it from the oven.
  8. Ok, this is the slightly tricky part.  You’re going to flip the whole crust over.  What worked for me was putting on an oven mitt and then using the parchment paper to slide the middle part of the crust onto my hand and then flipping it over in a quick motion.  The crust should be mostly cooked at this point and if you rolled it out thin enough won’t break apart on you.  Don’t freak out, I’ve made this crust a dozen times and even if I totally botched the flip it hasn’t broken or ruined the crust.
  9. Once it’s flipped remove the parchment paper from the top of the crust and top with your favorite pizza toppings! Bake for another 5 minutes and enjoy!

    DIY Wednesday: Cauliflower Crust Pizza | Life Healthfully Lived

    Ready for toppings!

A few other tips:

  • Don’t use a crazy amount of sauce because that is just going to turn the pizza to mush.  Trust me.  My favorite sauce so far has been a light layer of my spinach or cilantro pesto.
  • If you put on a lot of heavy toppings your pizza may fall a little bit as you pick it up.  If you don’t care and want all of the toppings go for it!
  • You can make this crust in advance and keep it in the fridge or freezer until you’re ready to use it.  I’ve only done it a few hours in advance so I can’t vouch for the quality after it’s been frozen and thawed but I will update this if I try it.
  • If you put onions or peppers on your pizza and you want them cooked a little more than the five minutes at the end, saute them before you top your pizza.  If not, they might be a little less done than some would prefer.

Zucchini and Pea Cauliflower Risotto

Zucchini and Pea Cauliflower Risotto | Life Healthfully Lived
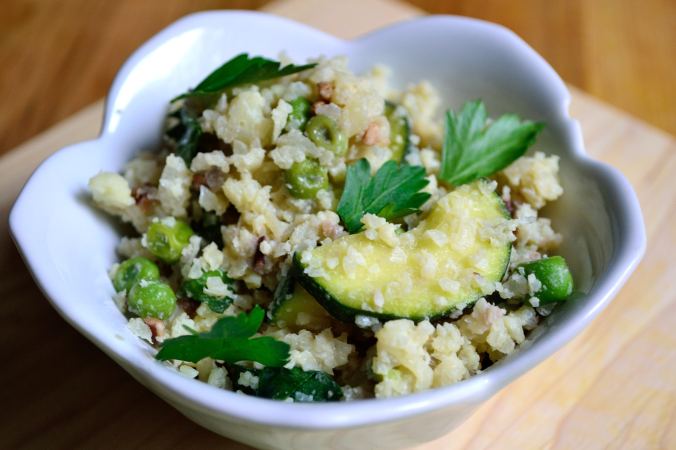
Yup. Cauliflower is back.  I know you’re probably getting a little tired of seeing it featured in my dishes but you know what?  You’re wrong.  Cauliflower is the magical unicorn of the vegetable world and I love turning it into all sorts of things from taquitos to sauce to sweet and sour bites to mac n’ cheese.  It’s awesome and you’re going to have to deal with it.

Which should be easy if you’re stuffing your face with this tasty meal.  Most people tend to shy away from risotto because it takes a really long time to cook and even if you follow all the steps it somehow still tastes like you didn’t do something right.  Or is it just me chomping away and still uncooked rice?  Just me? Ok.  Zucchini and Pea Cauliflower Risotto | Life Healthfully Lived

Moving on.  If you think risotto is too fussy or you’ve never made it before then you need to try this cauliflower risotto because it is the exact opposite of fussy.  It doesn’t take long to make and you don’t have to stand over the stove stirring until your arm falls off like with regular risotto.  Again, just me?  This risotto is still creamy and rich like regular risotto but it’s also nice and light with all the fresh spring-y vegetables.

One other note about this meal, I really think that what gave this dish the depth of flavor I was going for was the Sherry I used to deglaze the pan.  I know some people don’t like to use alcohol in their cooking (to each their own) and you can use water or broth instead but I don’t think it will have the same taste.  Other than that, this risotto is straight forward and will have you licking your plate clean.  Still just me?

Zucchini and Pea Cauliflower RisottoZucchini and Pea Cauliflower Risotto | Life Healthfully Lived

  • 1 large head of cauliflower, riced (you can grate it for bigger pieces which I did or run it through your food processor for smaller pieces)
  • 2 medium zucchini’s, sliced into half moons
  • 1 cup peas, if frozen make sure they’re thawed
  • 3 cloves garlic, minced
  • 3/4 cup onions, diced
  • 2-3 tbsp nutritional yeast or parmesan cheese
  • 1/4 cup sherry (I used this one) or other dry white wine or water/broth
  • 1/2 cup water/broth
  • 1/2-2/3 cup full-fat coconut milk
  • 1/2 cup toasted slivered almonds (or pine nuts if you can shell out the small fortune a 1 oz bag costs)
  • zest from one lemon
  • 1/4 cup fresh parsley, chopped
  • salt and pepper
  1. Heat a little olive oil in a large skillet or saucepan over medium-high heat.  Saute the onions until they’re soft then add in the garlic.  Season this with a little salt and pepper and cook for about 2 minutes.
  2. Add in the riced cauliflower, adding a little more oil if needed, and season again with salt and pepper.  Cook for another five minutes until cauliflower is soft and just starting to get a little brown. Sprinkle the nutritional yeast or parmesan cheese over top.
  3. Pour in the 1/4 cup sherry and deglaze the pan.  Cook and stir everything until most of the liquid as evaporated.  Add the zucchini and peas and pour in the water/broth and coconut milk.  Stir everything together and cook until the liquid has reduced by about half.
  4. Remove from the heat and stir in the lemon zest and parsley.  Top with the toasted almonds and taste to adjust the salt and pepper.  Zucchini and Pea Cauliflower Risotto | Life Healthfully Lived

DIY Wednesday: Everything Bagel Spice Mix

I used to eat a lot of bagels.  Like a lot.  In high school, our cafeteria was mostly a la carte and you could go in and choose from a variety of things.  There were the hot food entrees that would rotate each day but you could also get things like candy, chips, soda, snacks, cookies, and bagels.  Oh, the bagels.  They were huge and fluffy and a perfect vehicle for cramming more cream cheese into my mouth.  Because I didn’t spread my cream cheese onto my bagel like a normal person.  Oh no.  I would rip chunks off my bagel and dip them into my tub of cream cheese and eat it that way.

I have no idea how I didn’t weigh over 500 lbs in high school.

Anyways, I mostly stuck to plain bagels and got fancy with my cream cheese.  Strawberry one day, veggie the next, and sometimes they had a sour cream and chive version that was to die for.  Plus the cafeteria didn’t really have a ton of choices when it came to the bagels.  And then one of my friends introduced me to Panera bagels and it was game on.  Asiago cheese, cinnamon crunch, french toast…. and just as many amazing cream cheese spreads to go along.  But the one bagel that won my heart was the everything bagel.  I could almost (almost) eat that one without any cream cheese.DIY Wednesday: Everything Bagel Spice Mix | Life Healthfully Lived

I can’t remember that last time I had a bagel or cream cheese for that matter, but I love the flavor of those everything bagels so I make my own spice mix and put it on everything (see what I did there?).  You can put it on homemade bread (it tastes great pressed onto the top of rolls), sprinkle it over vegetables or stir-fry, and chicken and pork taste great if you use it as a crust while pan-searing.

So if you’re an everything bagel fanatic and want to add more of that flavor to your life or you don’t eat bagels anymore but still want that flavor try this simple everything bagel spice mix!

Everything Bagel Spice MixDIY Wednesday: Everything Bagel Spice Mix | Life Healthfully Lived

  • 2 tbsp poppyseeds
  • 2 tbsp toasted sesame seeds (place in a pan over medium heat and shake until golden)
  • 2 tbsp dried minced onion
  • 2 tbsp dried minced garlic
  • 2 tsp course sea salt (use less if you have a finer grain salt)
  1. Place everything into a small bowl or mason jar and shake to combine.  Make sure to keep it stored in a sealed container so it doesn’t go staleDIY Wednesday: Everything Bagel Spice Mix | Life Healthfully Lived

Oil-Free Cilantro Lime Pesto

One of the things I hope this blog proves is just because you have a certain dietary restriction/need/preference doesn’t mean you have to sacrifice flavor or some of your favorite things.  There is usually always a way to meet your cravings based on your food needs.  Now, that being said, that doesn’t mean I’m magic and can fix all your dietary woes with a healthy substitution.  Some things just cannot be recreated and more often than not it’s better that we can’t turn all junk food into healthy food.  Who wants to eat a healthy Twinkie anyway?  Or a real one for that matter….

I digress.  Today’s recipe was created because of two things.  1.  While I love fat, it’s super easy to go overboard with it especially when it comes to liquid oil like olive oil, avocado oil, or coconut oil.  Unless you’re measuring everything out, oil can add up pretty quick.  I started to realize I was buying big jugs of olive oil more and more frequently and running out of them fast.  Which leads me to my second reason… 2. I was out of olive oil and I wanted pesto.Oil-Free Cilantro Lime Pesto | Life Healthfully Lived

I want to stress I don’t think good fats are bad.  In fact, they’re awesome and I try to get them in at every meal.  But too much of a good thing can be bad and when you use an entire 1.5-liter bottle of olive oil in less than a week and a half, you might need to evaluate your food situation.  I’ll still use olive oil to make my spinach pesto, broccoli rabe pesto, and all other delicious things that require olive oil but it’s nice to have an option that is oil-free and just as delicious.

I used this last night on Adam’s fish and he deemed it “pretty tasty”, which is husband speak for good.  It has a nice light flavor from the cilantro and even though there is no oil, it’s still creamy.  You can use any green herb or vegetable you would like, I just happened to have a bunch of cilantro I needed to use so that’s what I went with.  This would also be great on pasta or zoodles or panini’s or chicken/pork or crackers or your finger….

Oil-Free Cilantro Lime PestoOil-Free Cilantro Lime Pesto | Life Healthfully Lived

  • 1 bunch of fresh cilantro, rinsed and dried and ends trimmed
  • 1/2 cup slivered almonds, toasted
  • juice of 1 to 2 limes, depending on how lime-y you want it
  • 2 cloves garlic
  • 2 tsp roasted garlic
  • 1/4 tsp salt
  • 2-3 tbsp nutritional yeast (or freshly grated parmesan if you do cheese)
  1. To toast almonds: Add almonds to a medium skillet over medium-high heat.  Shake the pan back and forth every so often and dry toast the almonds until golden brown.  Let them cool while you get everything else together.
  2. Place the rest of the ingredients into a blender or food processor, starting with the garlic, then cilantro, then seasonings, and finally lime juice.  Pulse a few times then add the cooled slivered almonds.
  3. Blend until you have a relatively smooth and creamy sauce.  If it’s a little too thick you can add more lime juice or water 1 tablespoon at a time to thin it out.  Taste and adjust the salt then store in your fridge in an airtight container for about a week. Oil-Free Cilantro Lime Pesto | Life Healthfully Lived