Can you call a quesadilla a quesadilla if there is no queso? Consider this my version of Hamlet’s, “To be or not to be” folks.
I get real deep about food.  Continue reading
Can you call a quesadilla a quesadilla if there is no queso? Consider this my version of Hamlet’s, “To be or not to be” folks.
I get real deep about food. Continue reading
The other day, I wanted to recreate one of my favorite breakfast dishes from a restaurant back in Sycamore, Eggsclusive Cafe. It’s an omelette that has fresh basil, sun-dried tomatoes, and avocado slices on top. So simple but so good.
To the store I went to grab the things I needed that I didn’t already have, one of which was the sun-dried tomatoes. I didn’t want to get the ones packed in olive oil because they tend to make everything else oily and the ones at my store always have some other flavoring like jalapeno added. So I picked up one of the packages, despite the $5 price tag, and flipped it over to read the ingredient list. That’s where I was met with sulfates and sulfites and other preservatives to keep “freshness and color retention”.

No brand at my store had sun dried tomatoes without some kind of chemical or preservative and I didn’t want to spend $5 or more on something that I didn’t want in my body. I almost resigned myself to the oil packed tomatoes when I thought to myself, “Self, can’t you just make your own sun dried tomatoes? I mean obviously not in the sun, that would take too long and you don’t have a sunny spot in the apartment, but in the oven? And wouldn’t it be like way less expensive?”
Yes, my self was correct. I can make sun dried tomatoes in my oven and have fresh, preservative free toppings for my omelettes and whatever else my heart desires. If you have a food dehydrator you probably already know that you can make your own sun-dried tomatoes and it’s fairly simple. If you don’t, you can do like me and make them in your oven!
Sun Dried Tomatoes
* I made mine without oil or salt but you can, it just may take a little longer to dry out.
* Make sure the tomatoes are completely cool and dry before you store them because any moisture in the container will make them mushy and spoil sooner.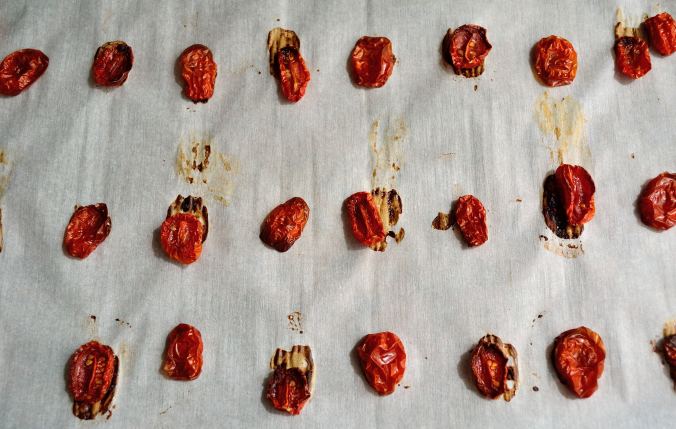
 I was watching Friends the other day, a normal happening in my house and the two random episodes that I watched mentioned mini muffins. This then made me think of the little packages of Hostess mini muffins that were all the rage in middle school. You were someone if you had mini muffins.
Yeah, it was weird.
I usually did not have mini muffins because they were expensive and my mom wasn’t going to waste money on junk food. Because let’s face it, muffins, even in mini form, are generally not a health food. Especially when they’re made by Hostess.
But boy are they delicious. And something about them being mini made them even better. Little food is always better. That’s just science. I decided to attempt to make a better for you mini muffin that would still taste good but wouldn’t be full of all this stuff. That’s what’s in those little bites of happiness. Yum….
My favorite muffin was always banana walnut but I decided to switch the walnuts for chocolate because duh, chocolate. My version uses dark chocolate, but you can use whatever you have on hand. I also decided to add just a few chips to the top rather than mix them throughout because I thought they would be just a little too big for mini muffins. But you do you. And you should do these mini-muffins.
Banana Chocolate Mini Muffins- gluten-free, dairy-free, soy-free, and egg-free. I promise there is something in there! 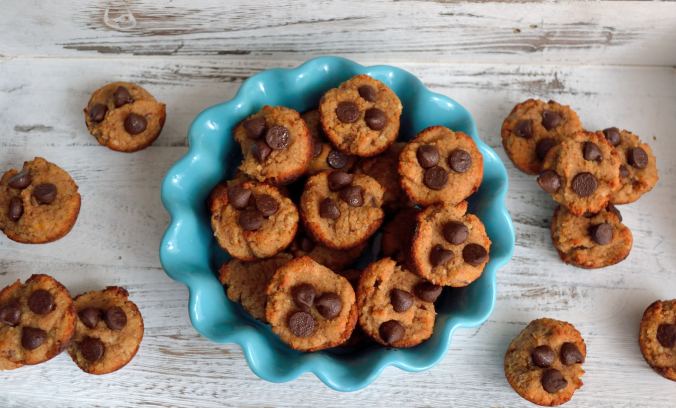

These will keep in an airtight container in the fridge for about a week or you can make a bunch and put them in the freezer to pull out whenever you need a mini muffin!
What were some of your favorite middle school snacks?
 You guys know I’m having a thing with soup lately. Especially now that Christmas and New Year’s are over. Brothy soups chocked full of vegetables, herbs, and spices sound pretty amazing right now. Plus, winter has finally decided to come out to play and cold temperatures always make me crave warm meals like soups or stews.
This is my soup of the moment because of two reasons. 1. It is absolutely delicious and 2. It is quick and versatile. While the base always stays the same, I can change the vegetables up to whatever I have in my fridge. Sometimes that includes mushrooms or leeks, other times it’s more peppers and some corn.
If you can’t or don’t want to do a certain vegetable I have in this recipe, then don’t put it in your soup. If you want to add a vegetable that I haven’t included, go for it! That is the beauty of this meal. As long as the main components are there, you can play around with the other flavors.
If you’re looking for a lighter meal that will still fill you up, give this soup, or any soup for that matter, a try!
Roasted Pepper Vegetable Tomato Soup

 Whew! Yes that is a long name, but I had to get everything in there so you can understand just how awesome these things are. I was really shocked when I came up with this recipe. I had been experimenting with making caramel out of dates and after the caramel pieces that I had planned didn’t turn out as I had hoped, I thought about making a no-bake cookie bar.
These aren’t totally no bake, you do have to cook the cookie base, but that takes less than 15 minutes. The rest you just stir together, pour, and swirl! Which makes this perfect if you realize at the last second you said you would bring a dessert to that Christmas party you’re going to.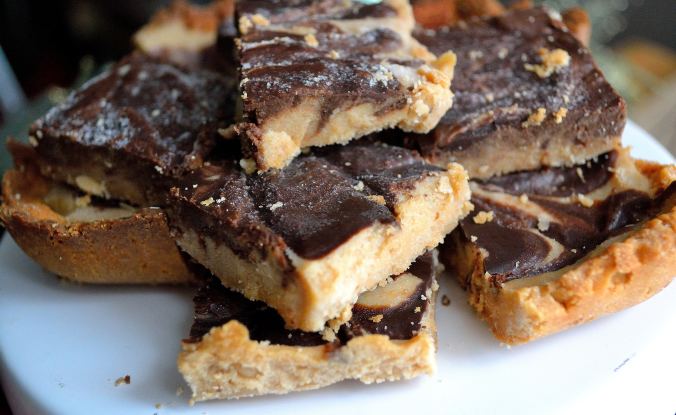
I have a few other Christmas-y recipes and posts coming your way next week before the big day, so be on the lookout for those. I plan to spend the majority of my weekend in the kitchen. The only time that I will be out and about is to go see the new Star Wars movie with my husband. I have been getting a countdown for about two weeks now, so I think the man is excited. To be honest, I am too. While I might not be as passionate about Star Wars as he is, I really do enjoy the movies.
So if you’re going to see the movie this weekend, enjoy! Then come home and make some hot chocolate and eat these salted caramel chocolate swirl cookie bars! If the empire, hot chocolate, and cookie bars don’t put you in the Christmas spirit… you may have already crossed over into the dark side.
Salted Caramel Chocolate Swirl Cookie Bars
Cookie Base- slightly adapted from this recipe by Plated with Style
Salted Caramel
Chocolate Swirl
Putting It All Together
Ok, I know you’re panicking at this point because this does NOT look like a simple recipe. Trust me, this comes together a lot faster than it seems. I finished making this in about 30 to 40-ish minutes. And once you taste these bars, you’ll forget about this super long list.
Have a great weekend friends and may the force be with you!
