Polenta: A Quick Tutorial

Polenta is one of my favorite things because it is so versatile and super tasty.  Maybe you have heard of it or you’re scratching your head right now going, “Po-whatta?”  Polenta is a fairly simple dish made of cornmeal that has been boiled into a porridge like consistency.  After it has been boiled, polenta can be served in a variety of ways.  You can eat it as is, or you can let it set and bake, fry, saute, or even grill it.  It pairs well with so many things; one of my favorite ways to eat it is to top it with a mushroom gravy. Because it is so easy to make, polenta makes a really great side dish, but it can easily be made into the main course.  I have a few different recipes that utilize polenta that I plan on sharing soon, but I thought that I would just give you the basic steps to making polenta as well as a few easy ways to “fancy” it up.


Basic Polenta

Polenta topped with my favorite mushroom gravy

Polenta topped with my favorite mushroom gravy

  • 1 cup yellow cornmeal
  • 3-4 cups water/milk/non-dairy milk*
  • 1 tsp salt

*If you are going to be eating the polenta in it’s porridge like form, use 4 cups of your choice of liquid.  If you want to let it set and then use it, use 3 cups.  I like doing a mix of water and either almond or coconut milk.  Using milk makes it a little creamier than just plain water, but water works just as well.


1.  In a medium saucepan bring your water/milk and 1 tsp salt to a rolling boil.  Once at a boil, grab a whisk in one hand and your one cup of cornmeal in the other.  Slowly add the cornmeal to the water while constantly whisking with your other hand.  This helps to make sure there are no lumps.

2.  Turn the heat down to low and cook until the cornmeal is nice and thick and starting to pull away from the sides of the pot.  Stir often and watch out for polenta splatters!

3.  You can eat it as is at this point or you can let the polenta set so you can slice it and bake or grill it.  Grease or line any pan that has an edge with parchment paper and pour the polenta out.  Spread the polenta evenly and place it in the fridge for at least an hour or in the freezer for 20 to 30 minutes.  Once the polenta is set you can cut it up and prepare it however you would like!


That is seriously it when it comes to making polenta.  I told you it was really easy!  Now there are a few things that you can do to jazz it up and make it even tastier.  You could:

  • Add in shredded cheese or butter to make it even creamier.
  • Try out different seasonings. I like adding in garlic and Italian seasonings as well as taco seasonings
  • Top with gravy, vegetables, meat, or any kind of sauce
  • Use it as the base for a casserole (I have a recipe for this coming soon!)

Experiment with a few different things and find out what you like best.  Polenta is a very neutral canvas when it comes to food, so it is really easy to pair with many different creations.  Go pick up a bag of cornmeal (if you can find it in bulk, it is really cheap!) and get your polenta on!
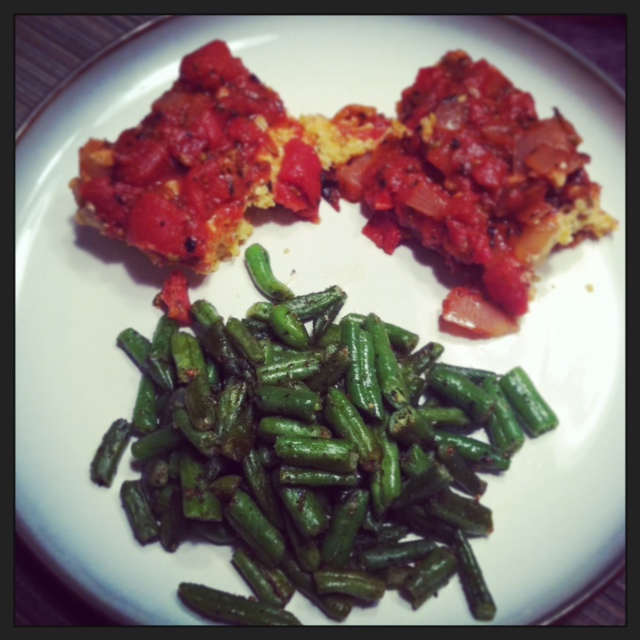
Chickpea Casserole

I had the hardest time thinking up a name for this dish.  I had the idea of making a lasagna type dinner, but without the noodles.  I toyed with the idea of naming it noodleless lasagna, but that just sounded weird.  I finally settled on chickpea casserole, even though it’s not exactly what it is.  I know, first world problems right?  Oh well, regardless of what this meal is called, it is delicious.  We devoured it all and quickly wanted more.  It makes fabulous leftovers and it is a great prepare ahead meal so that come dinnertime all you have to do is heat it up in the oven.  Simple and delicious, what more could you want?


Chickpea Casserole

photo 2 (4)

For the chickpea layer:

  • 3 cups chickpeas, soaked/rinsed/cooked (you could also use 2 cans of chickpeas, but I liked dried better)
  • 3/4 cup raw cashews, soaked overnight
  • 1/3 to 1/2 cup nutritional yeast, depending on how “cheesy” you want it to taste
  • 2 tbsp lemon juice
  • 1 tsp italian seasonings
  • salt and pepper to taste


For the sauce:

  • 1 onion, diced
  • 3 cloves garlic, minced
  • 4 tsp oregano
  • 2 tsp basil
  • 1 to 2 tsp fennel seeds
  • 1 can fire roasted tomatoes
  • 1 can diced tomatoes
  • 1/2 cup vegetable broth or water
  • salt to taste


  1. Make your sauce first.  In a medium saucepan, heat a little olive oil over medium heat.  Saute the onion and garlic for about 5 to 7 minutes.  Once the onion is soft add in the oregano, basil, and fennel seeds.  Stir to combine everything and then add in the tomatoes.  Depending on how thick or thin you want your sauce, add in a little bit of the broth at a time.  Bring the sauce to a boil and then lower to a simmer.  Cover the pan halfway with a lid and simmer while you make the chickpea layer.
  2. Preheat the oven to 400 and put the chickpeas into a food processor or blender and pulse a few times to break them up.  Add in the rest of the ingredients and process until it is all combined and creamy.  If it is too dry you can add in a few tablespoons of water or broth.
  3. Lightly oil a casserole pan and spread the chickpea mixture into the bottom.  Press the chickpeas down and make sure that there are no cracks.  Then pour the sauce over the top and cover the chickpeas.  Cover with foil and cook in the oven for 20 minutes.  Remove the foil and cook for another 5 minutes, until the sauce is bubbly.  Take out of the oven and let sit for 5 minutes and then cut and serve.


After you assemble the casserole, you can keep it covered in the fridge until you’re ready to cook it.  Then simply heat up the oven and pop the casserole in.  This would be a really good meal to take to a potluck or share with a big group of people.  You can easily double it and feed a crowd.  And I’m pretty sure they will gobble it up and ask for seconds!  Or maybe that’s just me…. Enjoy!


Accentuate the Positive, Eliminate the Negative

So often when we make the decision to change our lifestyles, we tend to zero in on the bad habits.  This is very true when it comes to changing our health for the better.  We decide that we want to eat better, exercise more, and just be healthier in general.  Then we start listing all the unhealthy habits we have.  We snack too much, we count walking from the refrigerator to the couch as exercise, the only cooking we do is pressing the start button on the microwave, etc. etc…. In order to be healthy we have to get rid of all those habits, and the sooner the better.  Right?

Not so much.  When I first decided to be healthier, I had the same mindset.  I took a look at my life and immediately saw all the “bad” things that I did.  I was discouraged and felt the urgent need to change everything as fast as possible.  I got rid of all the junk food in my kitchen, bought new exercise DVD’s, and completely overhauled my lifestyle.  All of this sounds really good and is necessary when trying to be healthier, but it shouldn’t all happen at once.  Sure I had gotten rid of all the “bad” stuff, but I had no idea what to do next.  I had essentially changed my whole world over night and that led to more than a few slip-ups and feeling like being healthier was impossible.

Luckily I learned from my mistakes and found a much better approach to changing my lifestyle.  I slowly began to change things.  I started adding healthier recipes to my weekly rotation.  I experimented with a few new exercise routines to see what I liked best and I could stick with.  This gradual change made it much easier to stick with a healthier lifestyle.  The other thing that really helped me was to focus on the good habits that I already had before I decided to live healthier.  Once I saw that I had already had some good habits, it made it feel like I could actually change for good.

If you have recently made the choice to change your lifestyle, try this approach.  Instead of immediately changing every single bad habit in your life, take a look and find the good things.  Maybe you’re really good at drinking a lot of water, or you have a fairly solid workout routine.  Once you find your good habits, find ways to build on them.  If you’re a really good cook, start incorporating healthier ingredients and recipe into your repertoire.  Soon you’ll have a healthy menu and you’ll feel really accomplished and motivated to keep going.  The important thing to remember is to take it slow.  This increases your chances of sticking to your goal of living a healthier lifestyle.  Once you see all the good things you already do and find ways to expand upon them, being healthy won’t seem like such a daunting and unattainable task.  Each positive thing you do will be another step towards living and feeling great!

Pictures-with-positive-quotes-be-positive-patient-and-persistent-

Simple Vegetable Millet

This meal was made on a Sunday night using whatever I had on hand.  I literally looked in my fridge/freezer/pantry and just pulled random things out that I thought might taste good together.  I never said the way I cook was glamorous, but this turned out really tasty and it was quick to put together.  I used millet but you could easily use quinoa or even brown rice, although you might need to cook for a little longer to make sure the rice is done.  Feel free to add whatever vegetables or leftovers you have on hand to this dish and make it your own!

Simple Vegetable Millet

photo (61)

  • 1 onion, chopped
  • 3 cloves garlic, minced
  • 2 tsp cumin
  • 1 tsp coriander
  • 1 cup vegetable broth or water
  • 1 cup frozen peas
  • 1 cup frozen corn kernels
  • 1/2 cup tomato sauce (I used some leftover homemade tomato sauce, but you can use store bought too)
  • 3/4 cup uncooked millet/quinoa/brown rice


  1. In a medium sauce pan, saute the onion and garlic with a little olive oil.  Once the onions are soft, add in the cumin and coriander and mix well.  Add in the broth, vegetables, and tomato sauce and bring to a boil.
  2. Add in your millet/quinoa/brown rice and stir everything together.  Cover your pot and reduce the heat to a simmer.  Cook for about 15 minutes (a little longer for rice) until all the liquid is absorbed.  Fluff with a fork and serve!

Try this version out first and then experiment with different flavors.  I think another good one would be to use Asian inspired flavors like ginger, five spice, and soy sauce.  Make sure to make enough for leftovers because this is even better the next day. Enjoy!

White Chili

While the calendar says that spring is almost here (technically it is already meteorologically spring, but that’s a whole different post), the temperatures here in the midwest have still been frigid.  True, we have escaped the “polar vortex” but it still isn’t quite t-shirt weather.  So in hopes to keep you warm and cozy, I have a slow cooker chili for you.  It is hearty and delicious and will make you feel a little less sad that it just snowed 4 inches in March.

White Chili 

photo (60)

  • 2 cups dried cannellini beans, soaked overnight (you can use canned, but the flavor and texture is better with dried)
  • 1 1/2 cup frozen corn kernels
  • 1 large green pepper, diced
  • 1 onion, diced
  • 2-3 cloves garlic, minced
  • 4-6 cups vegetable broth
  • 2 tsp cumin
  • 2 tsp chili powder
  • 1/2 tsp cayenne, more if you want a spicier chili
  • 1-2 tsp salt

1. If you are using dried beans (which you should!), make sure to soak your beans for at least 8 hours, preferably overnight.  You want the beans to be soft.  Once they are soaked drain and rinse them.  Take about 1 to 1 1/2 cups of the beans and puree them in a food processor or blender until they are nice and smooth.  Add this to your crockpot

2. Saute the onions, corn, garlic, and green pepper until the onions are soft and the pepper and corn have browned, about 7-10 minutes.  Add this to the crockpot.

3. Add in the rest of your beans and the vegetable broth.  You want the broth to just cover the contents of the crock pot by about an inch.  If you need more, you can always add liquid in at the end.  Next, add in your spices and stir to combine everything.  Cook on low for 6-8 hours.  Once it’s done, check that there is enough liquid and add a little salt if needed.

You could easily add cooked and shredded chicken or pork to this chili and I might add that it tastes really good with cornbread and topped with sour cream or greek yogurt.  You could even top it with some of my avocado cream and it would be even more amazing!  Enjoy!