Frosted Pumpkin “Blondies”

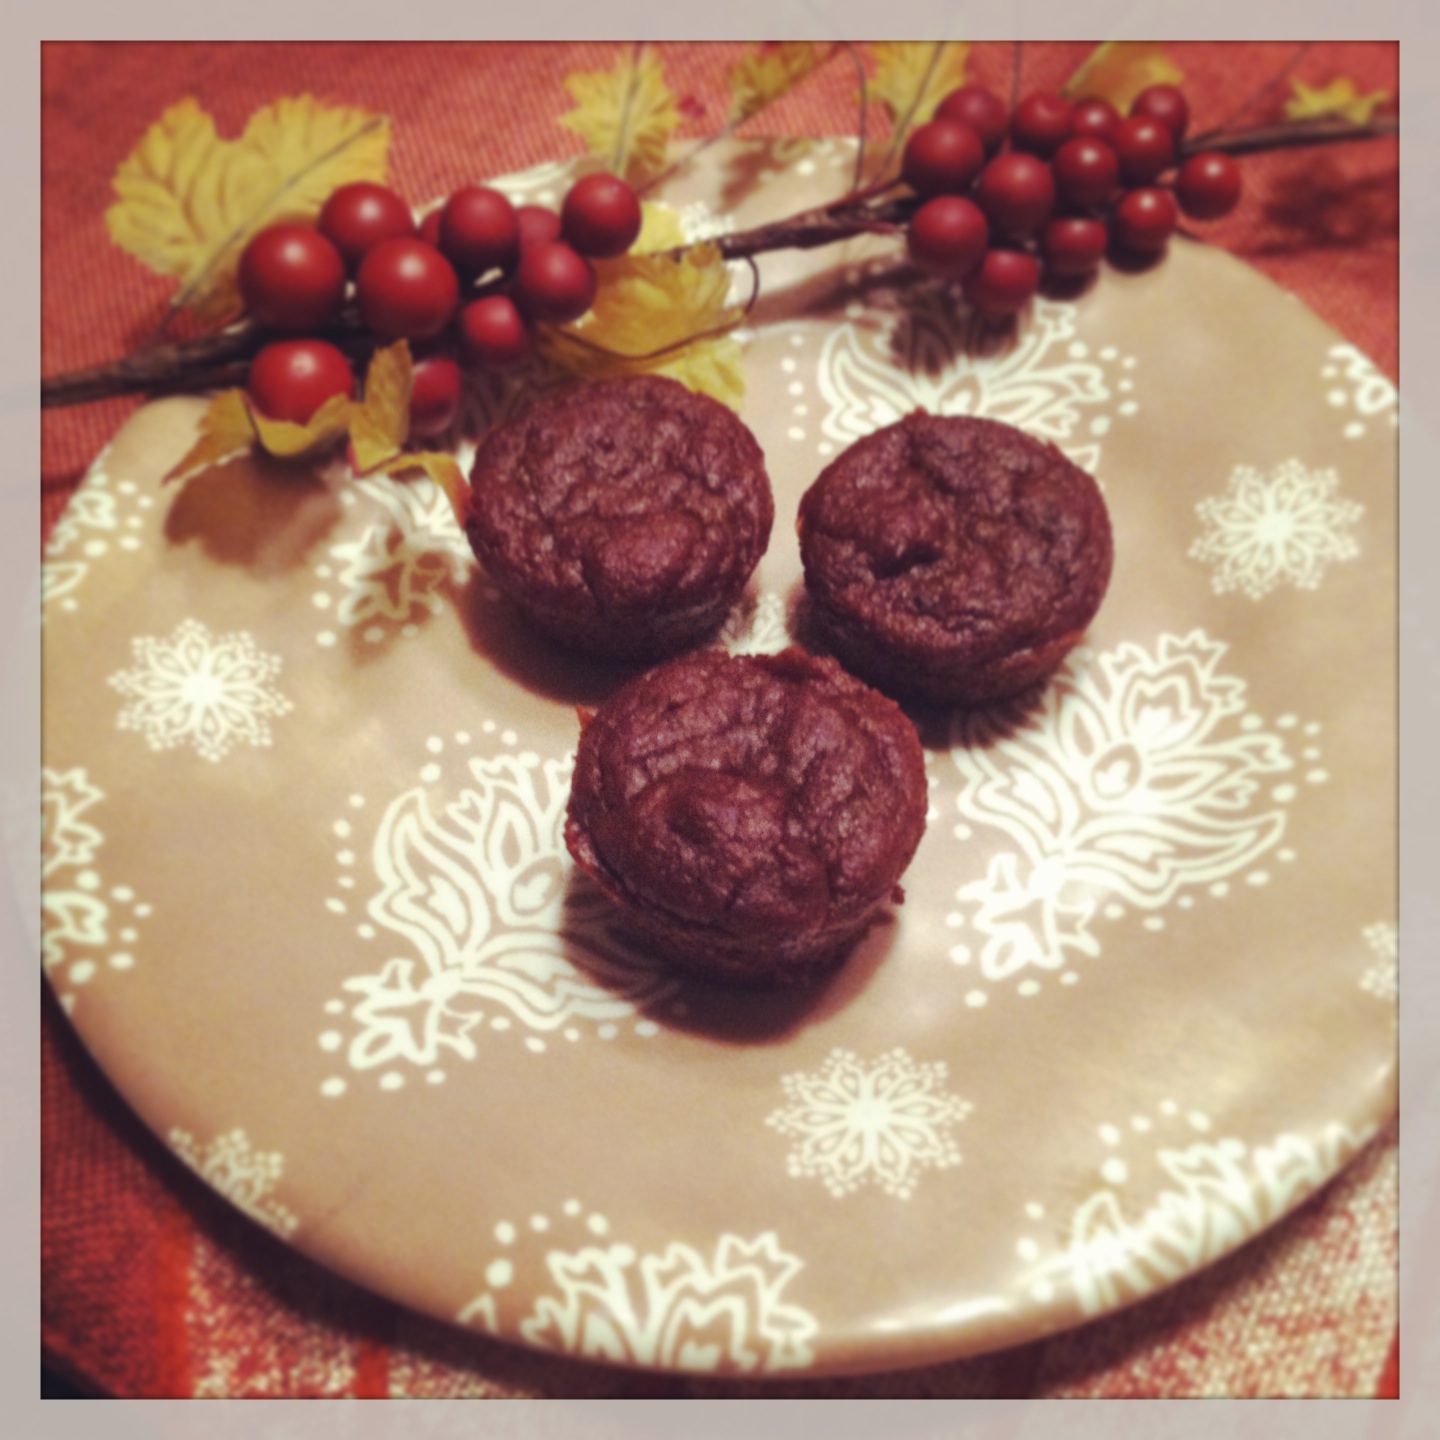
I’m really making myself a hypocrite by saying I’m not a baker and then giving you two dessert recipes in a row.  Oh well, I think you’ll forgive me once you try these!  My biggest struggle with this recipe was what to call it.  They have the texture of a fudgy brownie, but don’t have any chocolate.  It’s a lot thinner than a brownie or blondie, but it’s not really a bread either.  What I do know is that they taste like fall and the frosting adds a nice creamy/salty touch to the sweetness of the blondie.  You can also make these into mini muffins which are great to share at your Halloween party or make a batch for me for my birthday!


Frosted Pumpkin “Blondies” 

DSC_0297

For the blondies

  • 1 cup pumpkin puree (not pumpkin pie filling)
  • 1/4 cup maple syrup
  • 1 tbsp molasses
  • 1 tsp vanilla extract
  • 2 tbsp ground flaxseed (buy whole flax seeds and grind them at home)
  • 4 tbsp water
  • 3 tbsp brown rice flour
  • 1 tsp cinnamon
  • 1/2 tsp ginger
  • 1/2 tsp cloves
  • 1/2 tsp nutmeg
  • 1/4 tsp baking soda
  • 1/4 tsp salt

For the frosting

  • 1 can full fat coconut milk, refrigerated (do NOT shake the can, just put it in the fridge)
  • 1 tbsp maple syrup
  • 2 tsp molasses
  • 1 tsp cinnamon
  • 1/4-1/2 tsp salt

1. Preheat oven to 350.  Mix 2 tbsp flaxseed and 4 tbsp water in a little bowl and place in the fridge while you assemble the rest of the ingredients.

2. In a medium bowl, combine all the dry ingredients and whisk together.  In a separate bowl, mix the pumpkin, maple syrup, molasses, and vanilla extract.

3. Add the dry to the wet and mix well.  Once everything is combined, add in the flaxseed mixture and mix well.  Pour the batter into a greased 9×9 pan or mini muffin tin and place in the oven.  Bake for 25-30 minutes.  Remove and let cool on a rack for at least 5 minutes.

4. While the blondie is baking make your frosting.  Take your can of coconut milk and open it from the BOTTOM and scoop out only the solid parts.  Add the rest of the frosting ingredients to the coconut cream and either with an immersion or hand blender, blend all the ingredients until smooth and fluffy.  It will be a little runny, but just place the frosting in the fridge for 10 to 15 minutes to firm up.

5. Once the blondies are completely cool spread a decent amount of frosting on top.  Cut into slices and enjoy!

DSC_0293


Keep the leftovers, if there are any, in the refrigerator.  I really like the combination of the salty/sweet frosting and the spicy fall-like flavor of the blondie.  It’s a great treat for your Halloween party or even for Thanksgiving.  I hope you have a spooktacular Halloween and an excellent weekend.  Now I’m going to go enjoy these pumpkin blondies and my birthday!

Maple Candy

I am not that good at baking.  When I come up with recipes, I like having freedom to add or subtract or substitute ingredients and that tends to not work as well with baking.  Yes, there are ways to make things healthier or try different ingredients with baking, but you have to be very precise or else you end up with a lot of inedible failures.  And I really hate throwing away food so I tend to shy away from baking.  But I have been trying to come up with some good treats to share with you so that there is a good variety of recipes on this blog.  There has been some success, but there has also been some failure.  This maple candy believe it or not was a failure that ended up turning into a success.  What I was trying to make was a frosting recipe I had made a few times before, what I ended up with was candy.  Figure that one out!  Either way, this is a tasty little candy that is actually good for you.  It is a little salty, a little sweet, and satisfies the craving for a little treat.  No more stalling, onto my frosting failure but candy succes!

Maple Candy

  • 1 cup shredded or flaked coconut, unsweetened
  • 2 to 3 tbsp coconut oil, melted
  • 1 tbsp maple syrup
  • 2 tsp molasses
  • 1/2 tsp salt

1.  In a blender or food processor, blend the coconut shreds until it starts to make a paste.  This might take some time and you will have to stop and scrape the sides down.  You don’t need a perfectly smooth mixture, but it should be sticking together

2.  Add in the maple syrup, molasses, salt and 2 tablespoons of the coconut oil.  Blend together, if you need more oil to help it come together add in another tbsp.

3.  Either on a baking sheet lined with wax paper or silicone molds (I used a silicone ice cube tray) scoop out about 2 teaspoons of the candy mixture.  Place the baking sheet or mold in the freezer for at least an hour.  Remove and keep the candy in a container in either the fridge or freezer.

I like the salty flavor that these candies have but if you would like it a little sweeter, use 1/4 teaspoon salt instead of a 1/2 teaspoon.  Make sure you keep the candy in a cool place or else they will start to melt.  Hope you enjoy my rather fortunate failure and have a great weekend!

Olaf wanted to get in on these candies!

Olaf wanted to get in on these candies!

Date and Almond Sauce

I have been testing out a few new recipes for another project that I’m working on (details later), which means that I have 3 batches of different healthy frostings sitting around my kitchen.  This has been a good thing for Adam because he gets to eat and try all the things that I have been testing, but I still haven’t totally nailed down what I am looking for.  Don’t worry I’m close, and along the way I have made a really great sauce that can be used for a multitude of things.  I don’t usually post sweet recipes here, but I want to make sure I have a good variety for whatever culinary mood you’re in.  And yes, there is sour cream in this recipe.  Trust me on this one.  After the recipe, I’ll give you some ways to use this tasty sauce!


Date and Almond Sauce

DSC_0222

  • 6 large Medjool dates, pitted and chopped
  • 2 tsp molasses
  • 1 tbsp sour cream*
  • 1 tbsp smooth almond butter

* I use a dairy-free, homemade version of sour cream but you can use whatever you normally have on hand.  You can also use greek yogurt if you would prefer.

1. Soak the pitted and chopped dates in warm water for about 15 minutes.  Drain the water, reserving a few tablespoons.  Add the dates and the rest of the ingredients to a food processor or blender.  Process until you have a smooth sauce, adding some of the reserved water to reach the consistency you want.

You can use this sauce right away, but I like it a little better after it has been in the fridge for a few hours.  You can use this sauce in oatmeal, smoothies, ice cream, yogurt, spread on bread, muffins, cookies, or if you’re totally wild you can just eat it with a spoon.  Get creative and see what else this sauce tastes delicious on!  I hope you have a great Friday and an awesome weekend!

Healthy Brownie Bites

Sometimes, you just need some chocolate.  Sometimes, that chocolate needs to come in the form of a brownie.  We all know that brownies are not the healthiest of treats, but they are delicious.  Have no worries though because the brownie bites will satisfy your chocolate/brownie craving without making all the not so good for you ingredients.  Plus they are the perfect snacking size!  With the holidays right around the corner, these are a quick and easy way to have tasty dessert on hand!

Healthy Brownie Bites

photo (44)

  • 1 cup tahini, ground sesame seeds (you could also use almond butter, but the tahini really enhances the chocolate flavor)
  • 3/4 cup canned pumpkin (not pumpkin pie filling)
  • 1 egg or 1 flax egg (1 tbsp flax meal and 3 tbsp water mixed together)
  • 1/3 cup honey or maple syrup
  • 1 tsp baking soda
  • 1/2 tsp salt, optional
  • 1 tsp cinnamon
  • 2 tbsp cocoa powder

1.  Preheat oven to 350.  Mix all the wet ingredients together and then whisk in the dry.  Make sure your batter is smooth with no lumps.

2.  In a mini muffin tin drop in about 1 tbsp of the batter.  Bake for about 15 minutes or until the middle of the bites are set.  Remove from oven and let cool before you pop them out of the tins.

See?  Super quick and easy way to get a brownie in your belly!  You could also make extra because these freeze really well.  Just pull them out of the freezer a few minutes before you want to eat them.  Eat, enjoy, and if you try them out let me know what you think!

Any Fruit Crisp

I have a really delicious treat for you guys today, a dessert recipe!  I realized that I had not posted any kind of dessert recipe and knew that needed to change.  It is entirely possible to eat well and healthy and also enjoy a few treats!  This crisp is probably not what you would immediately think of when you think a typical crisp.  I’ve adapted it to fit into a healthy lifestyle, but also taste just as delicious! It also doesn’t take that long to put together and you can use whatever fruit you have lying around depending on the season.  I’ve done strawberry and rhubarb, strawberry and pear, and more recently peach and raspberry.  An all berry crisp would be delicious and in the fall an apple one would taste phenomenal!

Any Fruit Crisp

DSC_1378


  • 1/2 cup steel cut oats, soaked in just enough water to cover for about 15 minutes
  • 1/2 cup almond flour
  • 2 tsp cinnamon
  • 1 tbsp safflower oil (olive oil would work, but I like the lighter flavor of safflower)
  • 3 tbsp maple syrup
  • 1 tbsp lemon juice
  • 3-4 cups fruit of your choice

1.  Preheat your oven to 400.  Slice your fruit up into bite size chunks and place into a pie dish, or another shallow dish. Add your lemon juice and 1 tbsp maple syrup to the fruit.  Mix well

2.  In a medium bowl add your soaked steel cut oats, almond flour, and cinnamon.  Stir together, it will look a little crumbly at this point, that’s totally fine.  Add in 1 tbsp safflower oil and 2 tbsp maple syrup.  Mix again.  It should start to stick together now but not be too wet looking.

3.  Spoon the oat/almond flour mixture over the fruit making sure to cover as much of the fruit as possible.  It won’t look perfect and that is fine, it isn’t suppose to!

4.  Place in oven and bake for about 20 to 25 minutes.  You want the fruit to be bubbling and the top part should just be starting to brown.  Cool completely and then serve up the yum!

DSC_1368

Because this is such a quick dessert, you can make it often and experiment with what fruit combo you like the best.  It’s also yummy enough to share at a BBQ or party… if you feel like sharing!  Enjoy!