Coconut Garam Masala Cauliflower Rice

Cauliflower power strikes again.  If you weren’t aware, I love cauliflower.  Not only is it delicious simply roasted it is one of THE most versatile vegetables.

Don’t believe me?

Just a few ways you can use cauliflower:

I mean, cauliflower is pretty much on the same level of magical as unicorn tears. Coconut Garam Masala Cauliflower Rice | Life Healthfully Lived Continue reading

DIY Wednesday: Coconut Milk

I use coconut milk a lot.  In curries, creamy sauces, my daily smoothie bowl, for baking, in dressings, in my coffee…. You get the picture.  There are plenty of options for coconut milk in the store and some of them are actually a pretty good deal.  I can get a 1-quart carton of So Delicious unsweetened coconut milk at my Wal-mart for $1.98.  But the price isn’t what’s driving this DIY post.   DIY Wednesday: Coconut Milk | Life Healthfully Lived

Pretty much every brand of coconut milk has some type of thickener or “gum” added to make it that thick and creamy milk we all enjoy.  Some brands have even worse things added but I avoid those.  While the So Delicious brand is good, it still has guar gum added and while in small doses guar gum isn’t horrible, too much can cause some gastrointestinal issues.

Since I use coconut milk pretty much every day, I decided to try making my own.  You guys, this is like the easiest homemade alternative milk that I have ever done.  Nut milks aren’t super hard to make, but if you don’t have a fancy blender it can be time-consuming.  Coconut milk is quick, simple, and pretty much any blender can handle it.  Even an immersion blender.  Oh yes, I tried it.  DIY Wednesday: Coconut Milk | Life Healthfully Lived

Even better, it’s also a cheap way to make coconut milk especially if you can buy your coconut shreds in bulk.  So if you’re looking for a simple way to make coconut milk, look no further!

Just a heads up, though, you will need a nut milk bag or cheese cloth but that’s the only “special” equipment required for this milk.  You could even get away with using a mesh sieve or strainer.

Homemade Coconut MilkDIY Wednesday: Coconut Milk | Life Healthfully Lived

  • 1 package unsweetened coconut shreds, 8 oz
  • 4 cups boiling water
  • 1-2 tsp sweetener of choice, optional (I left it unsweetened)


  1. Get out a large bowl and layer your cheese cloth or nut milk bag over it.  Boil the 4 cups of water.
  2. Meanwhile, measure out 8 oz of coconut shreds and put them into your blender.  Pour the boiling water over the coconut and let it sit for 5 to 10 minutes to soften up.
  3. Blend everything together.  If you have a high-speed blender (jealous) this will take you literally 30 seconds maybe a minute.  My blender took about 2 minutes.  It won’t be completely smooth but you want a thick consistency.
  4. Pour the milk into the bowl with the bag or cheese cloth.  Squeeze out all of the milk (careful if it’s still hot from the boiling water part) and transfer the milk to a pitcher or other container.  It will keep in your fridge for 3 to 4 days.

Two things to note, DON’T throw away the coconut pulp! You can dry it out and use it in baking or cooking.  Also, the milk will get a hard crust on it while it’s in the fridge.  That’s totally fine.  Just break it up and stir or shake the milk and it will be good to go! DIY Wednesday: Coconut Milk | Life Healthfully Lived

DIY Wednesday: Coconut Chips

I’mDIY Wednesday: Coconut Chips | Life Healthfully Lived not a huge snacker, but every now and then the snacking bug will bite and I can’t seem to stop grazing.  Luckily I try to only keep healthy snacks around the house so I’m not binging on cookies and chips, but store bought healthy snacks can be full of unnecessary ingredients.

While some people might crave sweet snacks or salty snacks, I usually crave a combo.  I love the mix of sweet and salty.  Kettle corn is a weakness and Garrett’s Chicago Mix (it will never be anything else to me)?  Forget about it.

I have seen coconut chips in the stores and online for awhile now and they always sound really good.  A nice mix of sweet and salty, healthy fats from the coconut, and the satisfying crunch of the baked chips.  A snacker’s dream.  Not so dream like?  The cost.  A tiny bag of coconut chips at the store can cost almost $15.  Ain’t nobody got time for that.DIY Wednesday: Coconut Chips | Life Healthfully Lived

Good for you and me that it’s really easy to make your own at home!  A few things, don’t worry if you don’t like the flavor of coconut these do not have a very coconutty taste.  You will also want to make sure that you get the coconut flakes and not shreds otherwise you’ll end up with a pile of shriveled and burnt coconut shreds.

These come together fast and don’t require many ingredients, so if you feel a snack attack coming on you’re only a few minutes away from these sweet and savory coconut chips!

Coconut ChipsDIY Wednesday: Coconut Chips | Life Healthfully Lived

  • 2 cups unsweetened coconut flakes, not shreds
  • 2 tbsp coconut aminos, you can also use liquid aminos, soy sauce, or tamari
  • 1 tbsp maple syrup, honey could also work
  • 1/4 tsp sea salt
  • 1/4 tsp garlic powder
  • 1/4 tsp smoked paprika
  1. Preheat the oven to 350
  2. Dump the coconut shreds into a large bowl.  Add in the rest of the ingredients and stir to coat everything.
  3. Place some parchment paper or Silpat onto a large baking sheet and spread the chips in an even layer.
  4. Bake for 5 minutes and stir the chips.  Bake for another 2 minutes, watching carefully so the chips don’t burn.
  5. Remove from oven and let cool…. or dig right in if you can’t wait!

Make sure to keep an eye on the coconut chips in the last few minutes because these can go from golden and delicious to charred very quickly.  Store them in an airtight container for up to a week…. if they last that long! DIY Wednesday: Coconut Chips | Life Healthfully Lived

DIY Wednesday: Cream Cheese Frosting

MyDIY Wednesday: Cream Cheese Frosting | Life Healthfully Lived birthday is on Halloween.  I think because I was born right in the middle of fall, the love of all things fall is sort of woven into my genes.  Usually for my birthday, my mom would make spice cake or carrot cake and one year I think she made a hummingbird cake…. but I could be wrong about that one.  Anyway, the cakes that she made would beg for cream cheese frosting and that was just fine with me.

I love cream cheese frosting.  Most other frostings are WAY too sweet and I can only take a few bites before I start to get nauseated.  But cream cheese frosting? Skip the cake and get me a spoon.  It’s a little sweet, a little tangy, and all delicious. DIY Wednesday: Cream Cheese Frosting | Life Healthfully Lived

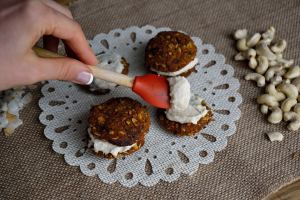
I haven’t had cream cheese frosting in years because it’s basically cream cheese, butter, and sugar.  Since I don’t do dairy or refined sugar anymore, cream cheese frosting isn’t really at the top of my list of things to eat.  With fall baking underway, I thought it would be a good time to try recreating this frosting without any dairy or refined sugar.  Lucky for me, it wasn’t that hard to do!  Just a few ingredients, a little planning ahead, and you have a delicious cream cheese frosting that is ready to top carrot cake or any other fall favorite.DIY Wednesday: Cream Cheese Frosting | Life Healthfully Lived

Oh, and if you think it’s easier to just grab a tub of cream cheese frosting at the store?  Think again.  Not only is it full of chemicals, sugar, and preservatives, but it doesn’t actually contain any cream cheese…. Explain that one to me!  Do yourself a favor and make this simple, dairy-free frosting without the high price and chemicals.

Cream Cheese FrostingDIY Wednesday: Cream Cheese Frosting | Life Healthfully Lived

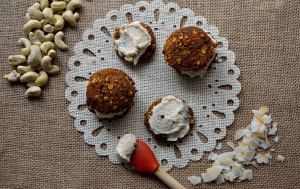
  • 1 cup raw cashews, soaked overnight
  • 2 tbsp lemon juice, 1 more if you like a tangier frosting
  • 1 tbsp maple syrup
  • 2 tsp vanilla extract
  • 1/4 cup water
  • 3 tbsp coconut butter NOT coconut oil
  1. Drain and rinse the soaked cashews and place in a blender or food processor.  Add the lemon juice, maple syrup, and vanilla extract.  Pulse a few times until the cashews are broken up into little pieces.
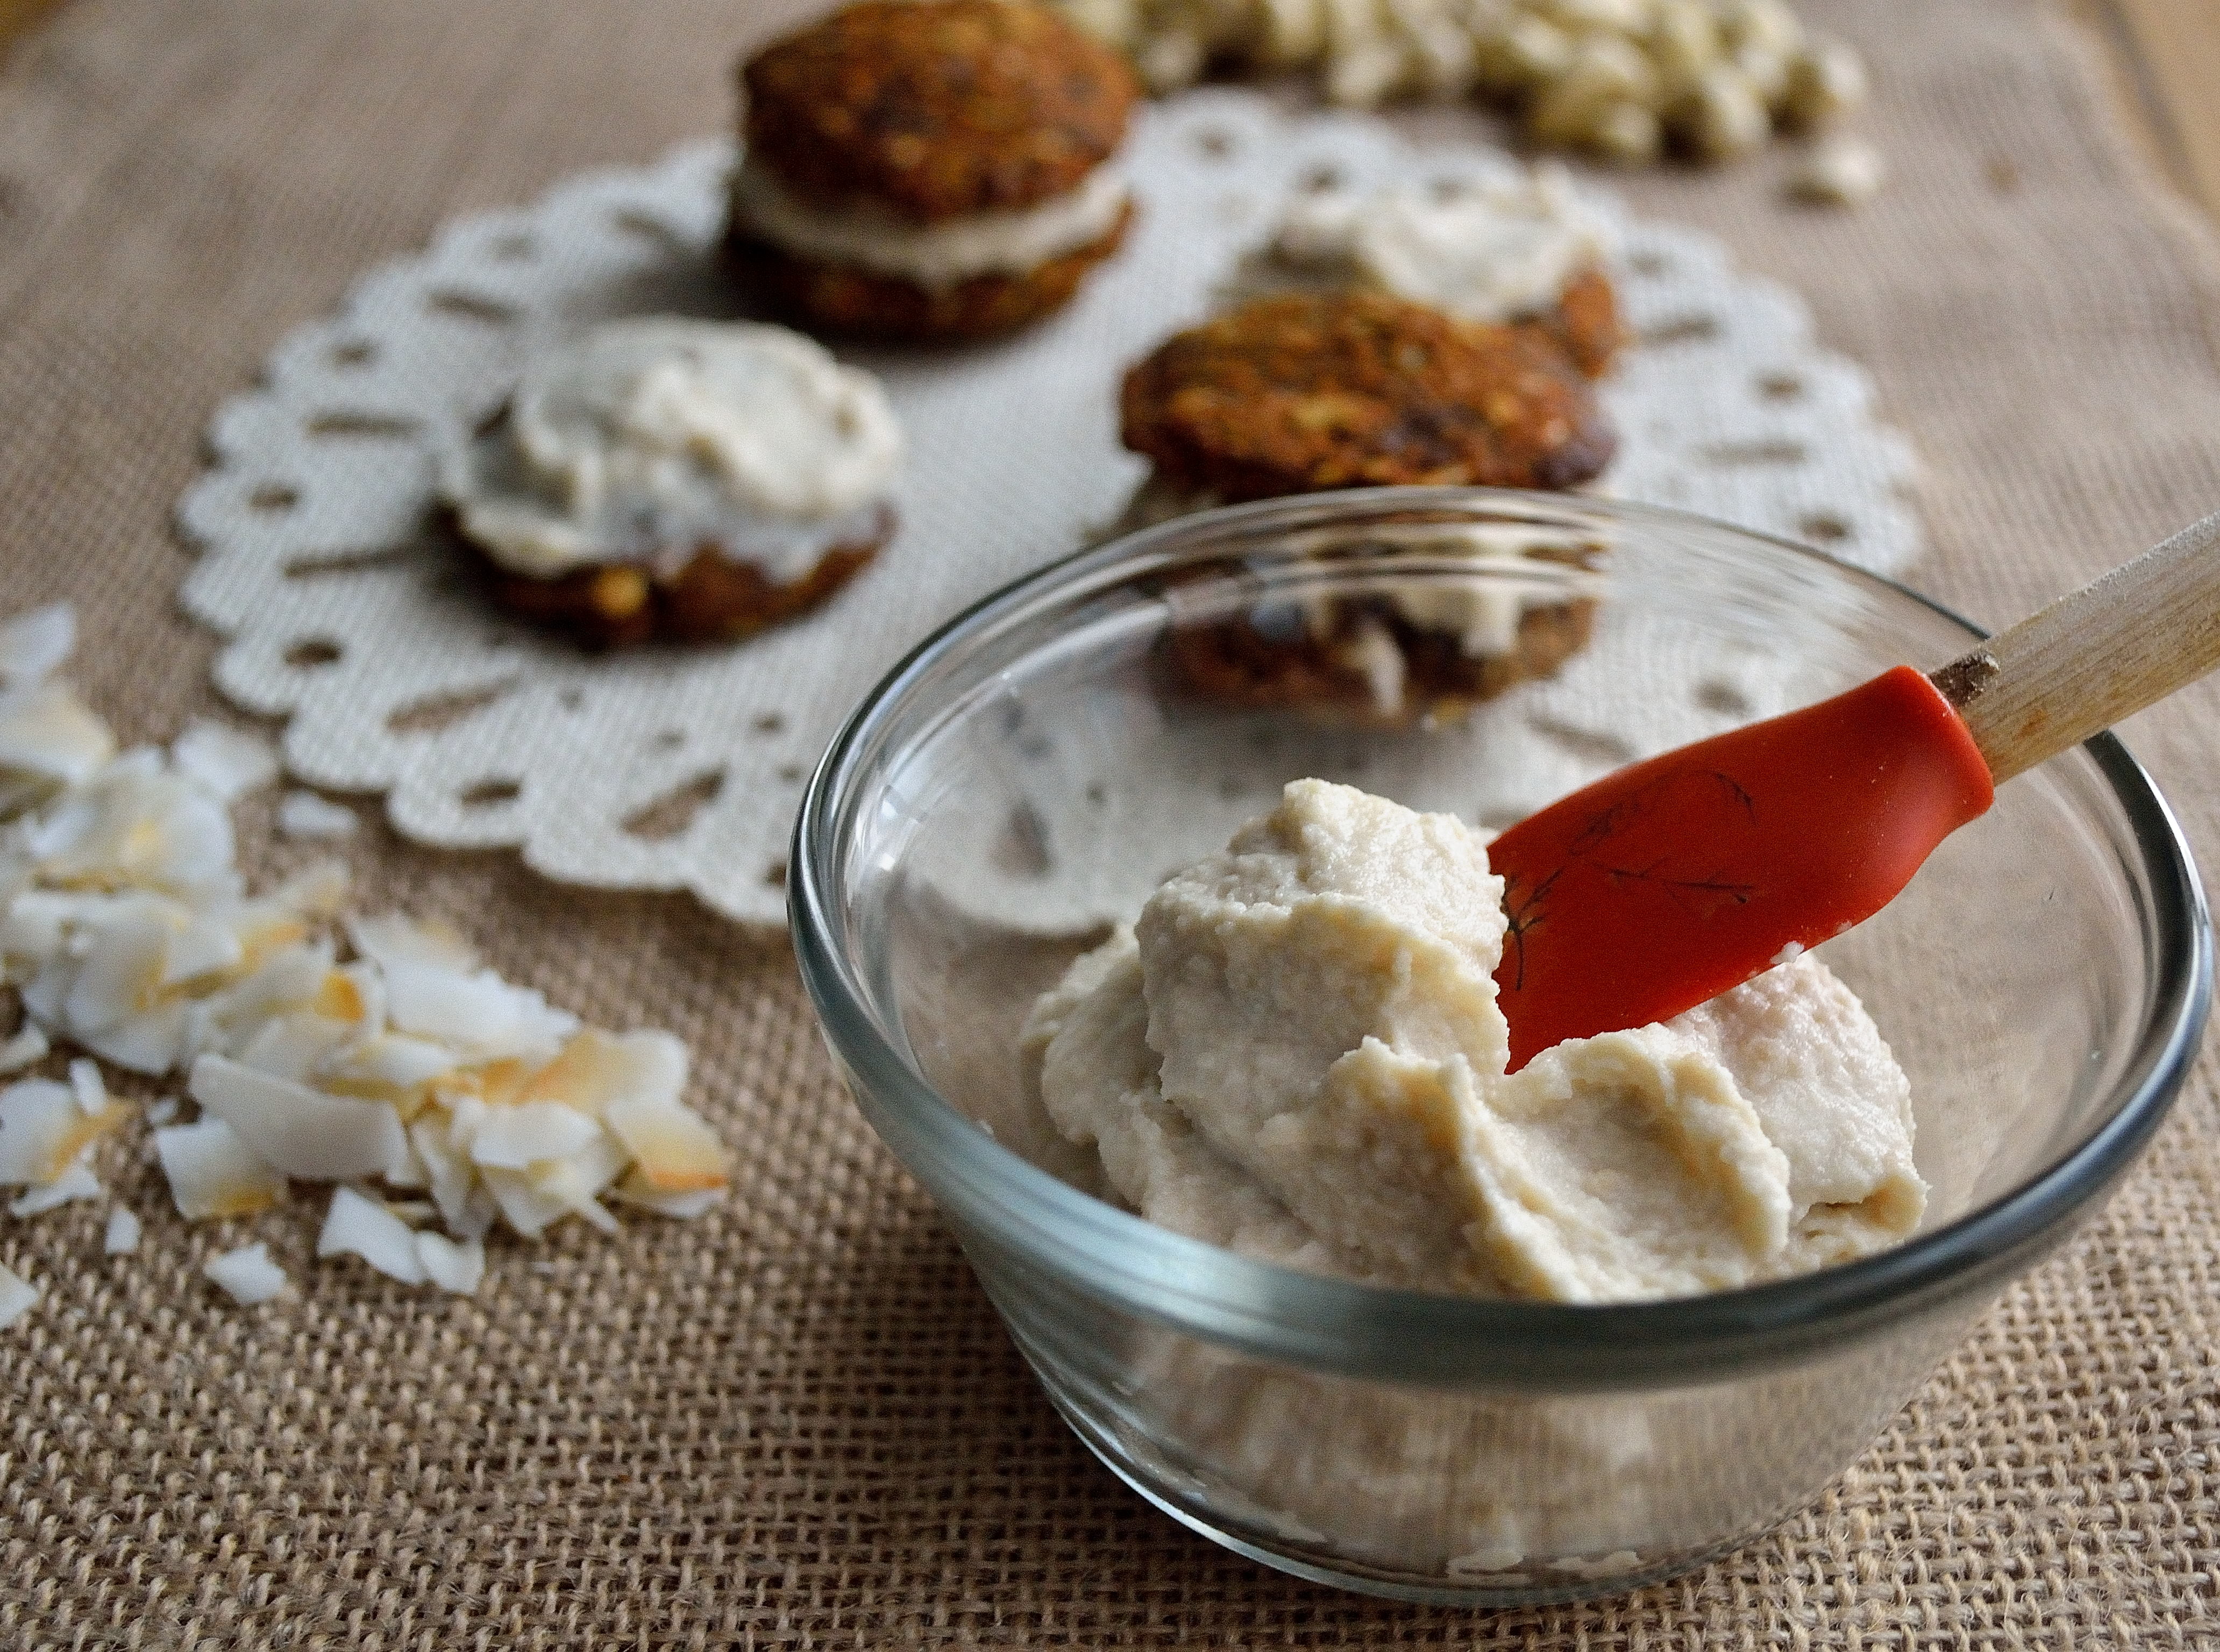
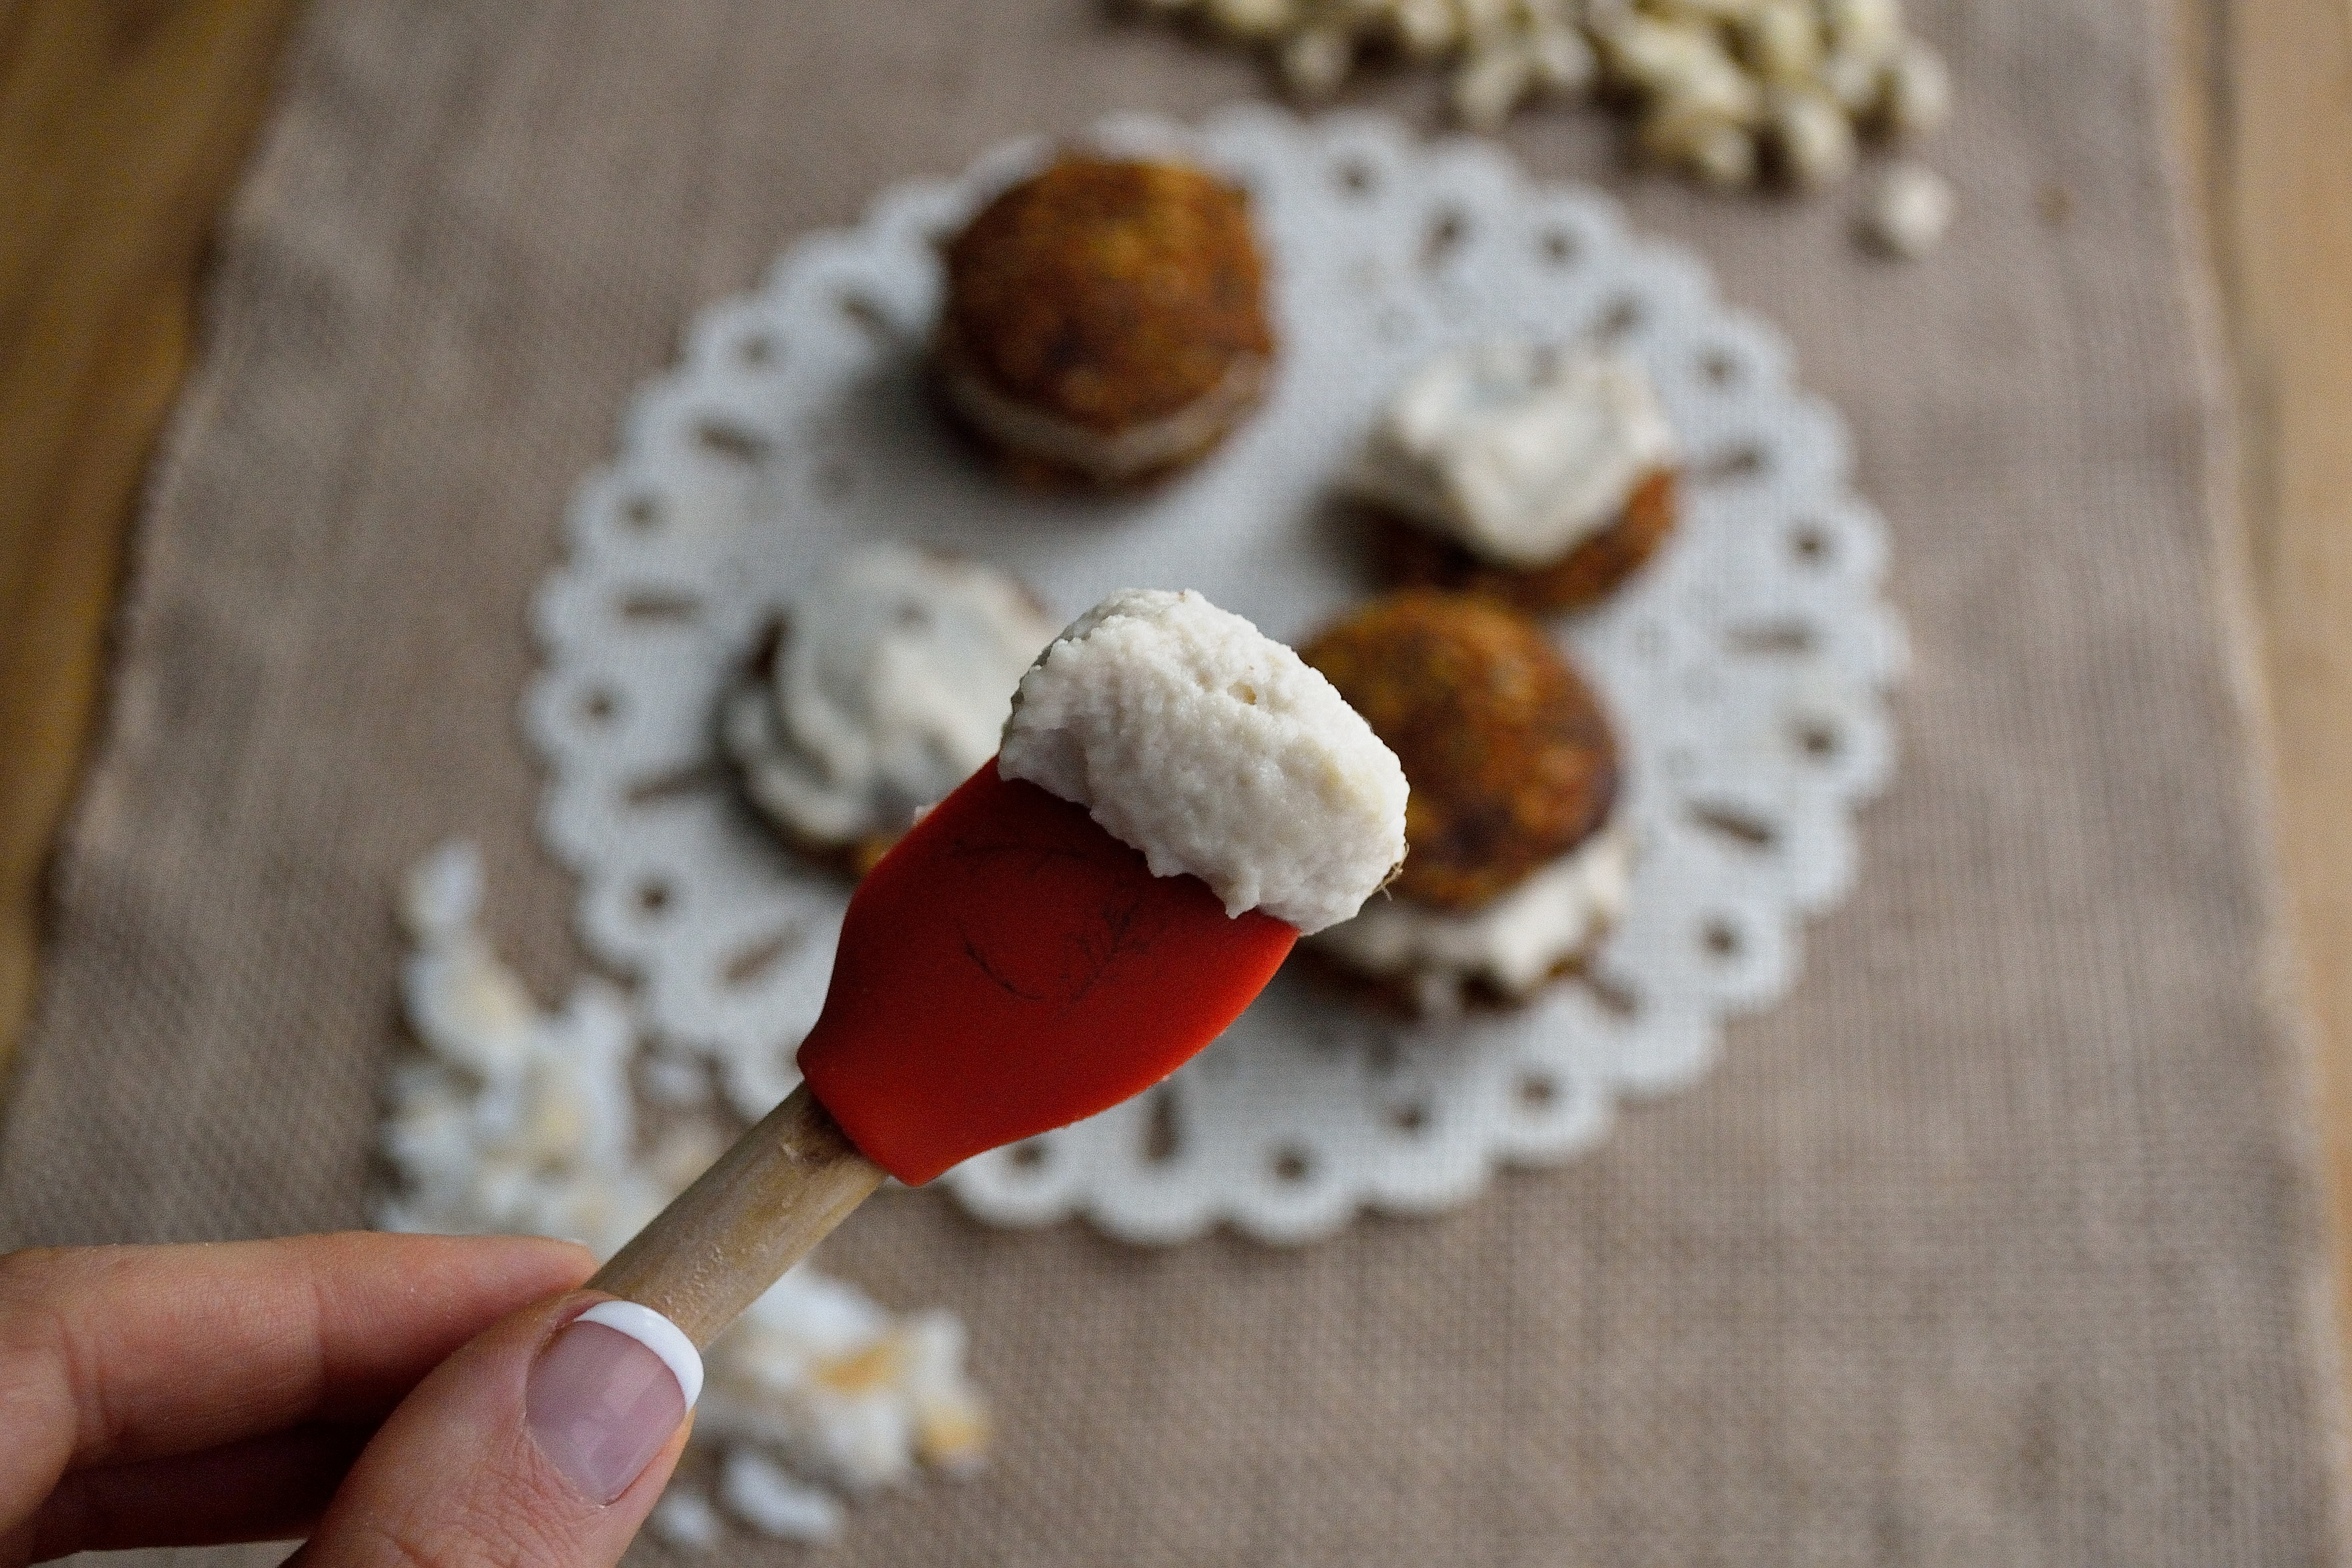
  2. Add the water and blend the cashews until you have a smooth cream.  Add the coconut butter and blend to combine everything.  Taste and see if you need to add more sweet or more tang.
  3. You can use the frosting right away or store in an airtight container in the fridge for up to a week.  If you do store it in the fridge, take it out 20 minutes before you want to use it to let it warm up a bit.

To test out the frosting, I made some carrot cake cookies.  Because if you have frosting you have to have cookies right?  I just threw some things together and the cookies actually turned out pretty good.  I’m going to tweak them a bit and then put them on the blog so you can enjoy your homemade frosting! DIY Wednesday: Cream Cheese Frosting | Life Healthfully Lived

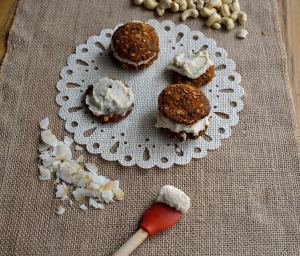
I’ll have a new recipe for you on Friday and then Monday I hope to do a recap of the awesome wedding weekend!  It was a great time and I am so happy for the new Mr. and Mrs. Meyers!