 You guys know I’m having a thing with soup lately. Especially now that Christmas and New Year’s are over. Brothy soups chocked full of vegetables, herbs, and spices sound pretty amazing right now. Plus, winter has finally decided to come out to play and cold temperatures always make me crave warm meals like soups or stews.
This is my soup of the moment because of two reasons. 1. It is absolutely delicious and 2. It is quick and versatile. While the base always stays the same, I can change the vegetables up to whatever I have in my fridge. Sometimes that includes mushrooms or leeks, other times it’s more peppers and some corn.
If you can’t or don’t want to do a certain vegetable I have in this recipe, then don’t put it in your soup. If you want to add a vegetable that I haven’t included, go for it! That is the beauty of this meal. As long as the main components are there, you can play around with the other flavors.
If you’re looking for a lighter meal that will still fill you up, give this soup, or any soup for that matter, a try!
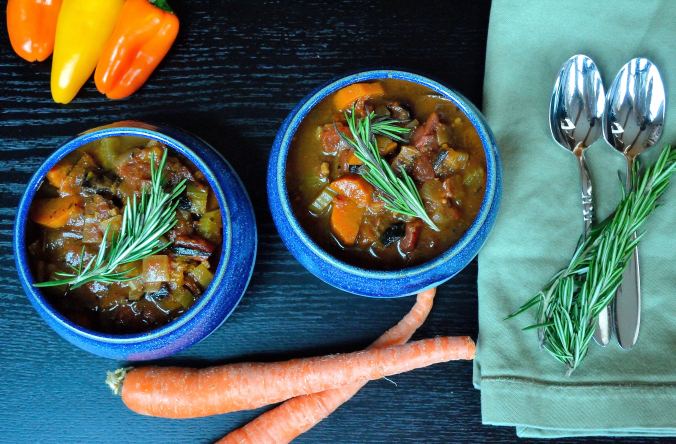
Roasted Pepper Vegetable Tomato Soup
- 2-3 red or orange bell peppers
- 1 cup carrots, peeled and sliced
- 1 cup celery, sliced
- 1 cup onion, diced
- 1 leek, green top cut off and white part sliced thin
- 8 oz package of bella mushrooms
- 1/2 cup corn kernels
- 2 cans fire roasted diced tomatoes
- 6 to 8 cups vegetable broth or water
- 2 tsp smoked paprika
- 2 tsp chili powder
- 2 tsp roasted garlic or 3 cloves minced
- 2 tsp Mexican oregano (regular if you can’t find Mexican)
- salt and pepper
- Preheat the oven to 400 and arrange the peppers on a large baking sheet lined with parchment paper or a Silpat. Roast the peppers until the are slightly brown and starting to collapse. Remove and let them cool. Once they are cool, remove the skins and slice into strips.
- If you would like, you can toss the mushrooms with a little oil, salt, and pepper and roast those for 15 minutes.
- Heat a little olive oil in a large dutch oven or stock pot. Saute the carrots, onions, leeks, and celery until they are soft and starting to brown on the edges. Sprinkle with a little salt and add the roasted peppers, mushrooms, and corn. Stir everything together.
- Add in both cans of roasted tomatoes and then the vegetable broth or water. Make sure all the vegetables are covered with liquid. Add all the seasonings and bring the soup to a bowl.
- Once boiling, cover with a lid and lower to a simmer. Let it simmer for 20 minutes. Taste the soup and adjust the seasonings as needed.


 Whew! Yes that is a long name, but I had to get everything in there so you can understand just how awesome these things are. I was really shocked when I came up with this recipe. I had been experimenting with making caramel out of dates and after the caramel pieces that I had planned didn’t turn out as I had hoped, I thought about making a no-bake cookie bar.


 have another holiday edition of DIY Wednesday for you guys today. Pie is eaten all year round, but I think that it’s most special around the holidays. From pumpkin to pecan to sweet potato pie, there are some pretty delicious options.


