My Review of: Fall FoMo No More from House Vegan

I think that I may have found someone who loves fall just as much, maybe a little more, than I do.  If you have followed me for any length of time, you know that this is my favorite season.  From my love of pumpkins and all things squash to it being my birthday and wedding anniversary time of year, it just doesn’t get any better than fall.  

Hannah TesonMy Review of: Fall FoMo from House Vegan | Life Healthfully Lived pretty much feels that exact same way about fall.  So much so that she decided to write a book about it!  Fall FoMo No More is an ebook for those of you who love everything about fall and want to get the most out of this season.  Not only are there amazing and delicious autumn recipes, there is a whole section of the book that is dedicated to helping you plan out fall activities.  From Halloween to Thanksgiving, Hannah helps you organize your fall so that you can get the most enjoyment from this time of year.  She has a fall shopping list, a cooking and cleaning schedule, fun fall activities, and so much more that make planning your fall activities a breeze.

And then there are the recipes, my favorite part!  I was given the opportunity to help Hannah test out a few of her recipes and I can tell you with the highest confidence that they are absolutely delicious.   The even more surprising part for some of you, they’re all vegan!  She has apple cider donuts, chickpeas and dumplings, onion dip, and of course, all the pumpkin things.  If you aren’t drooling just looking at the list of recipes in her ebook, then you might need to get your taste buds checked!

My Review of: Fall FoMo from House Vegan | Life Healthfully Lived

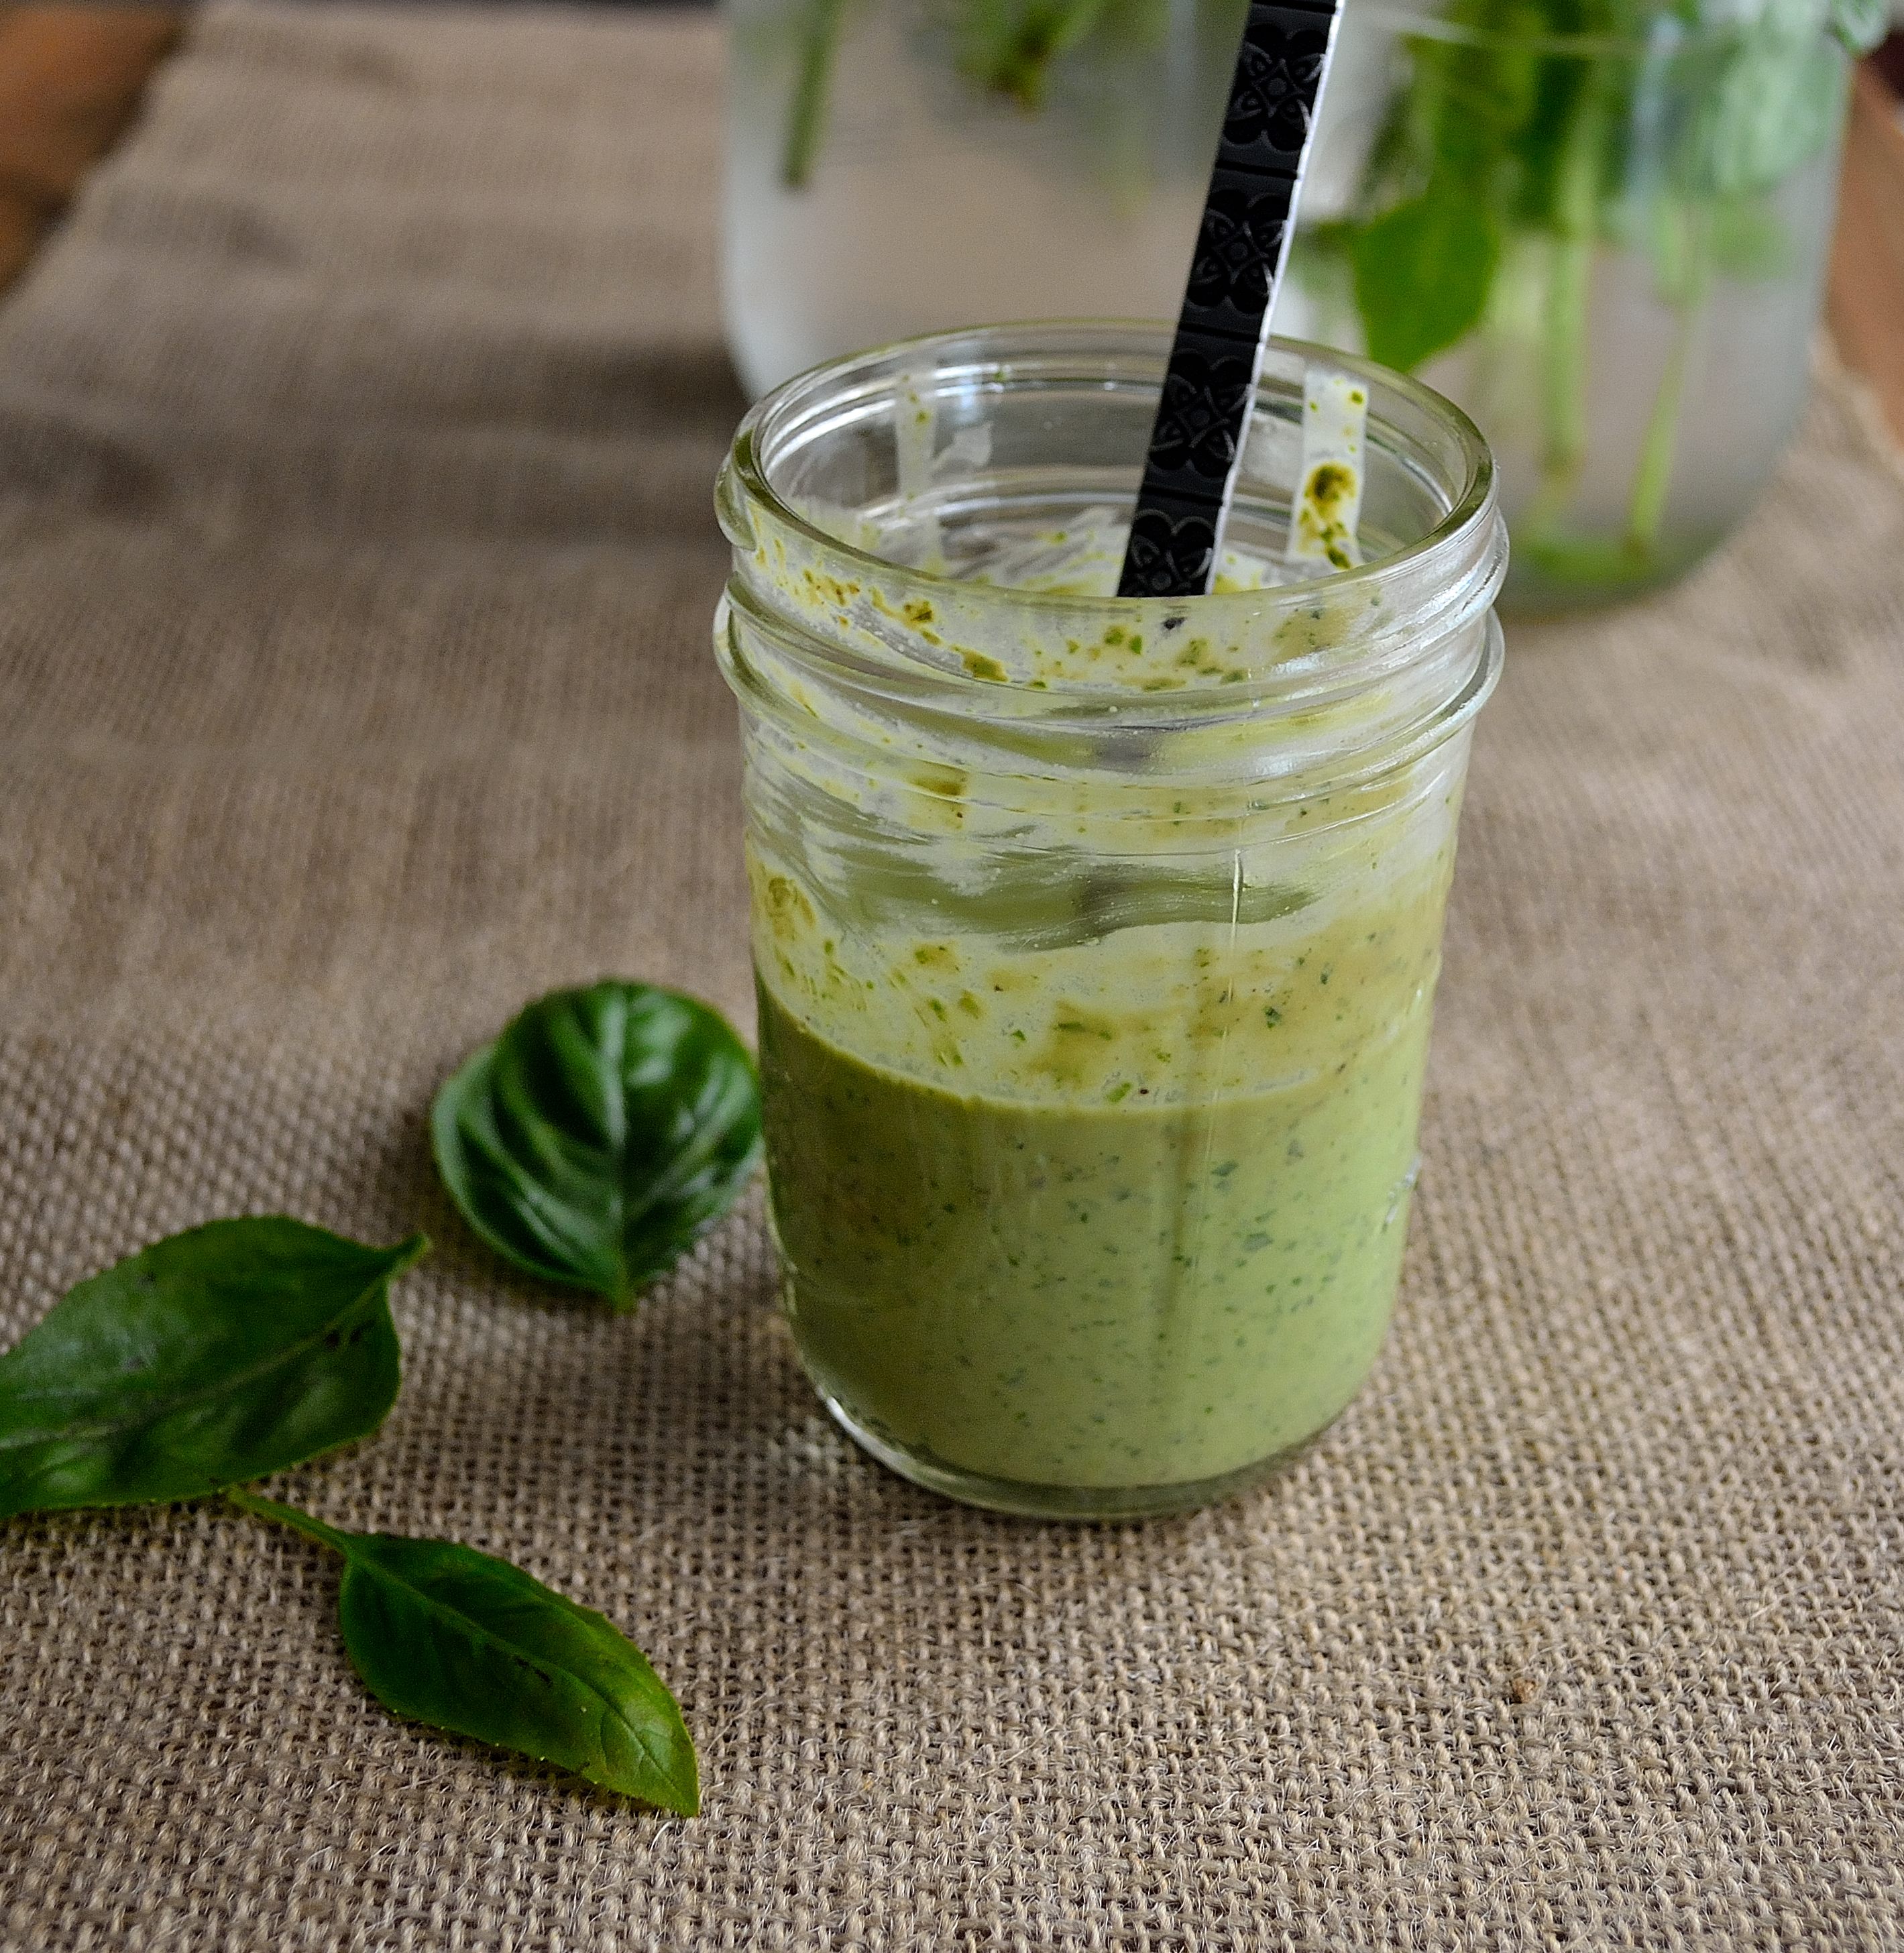
Pumpkin Pie Almond Milk from Fall FoMo

Trust me when I say that you don’t want to miss out on this awesome ebook.  Hannah put so much time, dedication, and pure love of fall into this book and it absolutely shines through.  I’m so happy to be able to share her hard work with you guys and applaud her for the amazing job she has done!

If you want to grab your own copy, you can head over to her blog House Vegan and get the link for the download.  It will be the best $5.99 that you have ever spent, especially if you love fall!  You can also check out two of the recipes from the book and see just how tasty your fall could be if you buy this ebook!  I loved her pumpkin almond milk and the chili con cashew queso just screams sweaters, football, and fun.

My Review of: Fall FoMo from House Vegan | Life Healthfully Lived

Chili Con Cashew Queso from Fall FoMo

What fall things are you guys looking forward to?  I would have to say apple picking, making everything with pumpkin, and fall clothes are at the top of my list this year!  I hope that you have a great Monday and I’ll see you guys on Wednesday!

DIY Wednesday: Basil Salad Dressing

FriendsDIY Wednesday: Basil Salad Dressing | Life Healthfully Lived, I’m ready to admit something.

I’m kind of having a love affair with basil.   I know, I know.  It’s just a summer fling, but I can’t get enough of the stuff.  It smells so good, looks so pretty, and tastes phenomenal.  Even better, it makes any food I put in my mouth taste phenomenal.

I got into the fresh basil game a little late this summer because for most of the summer we were gone every weekend and I couldn’t get to the farmer’s market and I was not going to pay over $3 for the tiny little packages at the store.  But this past month we have made it to the market and one stand there sells fresh herbs of all kind and I can get a whole bunch of basil for $2.  Naturally I load up on it and come home and make all the basil things.

Besides the obvious pesto (which I have like 3 jars of right now) I have been making basil and lemon oil, and this dressing.  I have swooned about this dressing a few times over on Instagram so  I thought that I would share it with you guys.DIY Wednesday: Basil Salad Dressing | Life Healthfully Lived

I’ve talked about making your own salad dressing before and I think it’s the best money and health saving switch you can make.  Making your own salad dressing is SO simple and you get to control the ingredients.  Store bought dressing is full of preservatives and you’re paying a lot of money to ingest those things.

So why not make your own?  This literally comes together in the touch of a blender button and BAM, you have a delicious, basil-filled dressing ready to go on salad, over vegetables, or straight into your mouth with a straw.  Which I’ve never done…

Basil Salad DressingDIY Wednesday: Basil Salad Dressing | Life Healthfully Lived

  • 1 cup loosely packed, whole basil leaves
  • 2 tsp roasted garlic or 2 cloves fresh garlic
  • 2 tbsp tahini
  • 1/3 cup full-fat coconut milk (you could also use almond milk)
  • juice of half a lime
  • 1/4 tsp salt
  • 1/4 tsp black pepper
  1. Ready for this?  Put everything into a blender and blend until smooth.  Taste and adjust seasoning.  Store it in an airtight container in the fridge for up to a week…. if it lasts that long.

I love one step recipes almost as much as I love basil.  See how easy it is to make dressing?  You can even switch up the herbs you do and use parsley, dill, or cilantro.  Whatever your little heart desires! DIY Wednesday: Basil Salad Dressing | Life Healthfully Lived

DIY Wednesday: Date Sugar

SugarDIY Wednesday: Date Sugar | Life Healthfully Lived has been getting a lot of attention lately.  Really, it’s always gotten some type of attention.  Is it good or bad?  Are there better or healthier sugars?  Are no calorie sweeteners ruining our health?  Will you die immediately if you have one of your grandma’s famous chocolate chip cookies?

There are so many opinions, studies, research, and questions swirling around sugar lately as more and more people are trying to adopt a healthier lifestyle.  I don’t have all the answers about sugar, but I can share my experience/relationship with sugar.

When I totally changed the way I ate a few years ago, I cut out refined sugar.  No more white sugar or brown sugar.  I relied mostly on honey as a sweetener, but for a long time I avoided anything sweet other than fruit.  That worked for a little while and eventually I didn’t crave sugar like I used to but every now and then I wanted something sweet.  At first I thought that was a weakness on my part, but I’ve learned that it’s ok to crave things and to address those cravings in the way that makes me feel best.  I still avoid refined sugar, but I use things like honey, molasses, and maple syrup as sweeteners when I’m baking and cooking.DIY Wednesday: Date Sugar | Life Healthfully Lived

Today’s DIY is all about another type of sweetener, date sugar.  I’ve seen it in stores like Whole Foods and usually it’s really expensive for a small amount.  When I saw that dates were the only ingredient, I figured I could make my own.  A quick search on Google confirmed that it is a thing and you can make your own date sugar.  I like this sweetener because it isn’t a liquid sweetener like honey or syrup.  It doesn’t dissolve in liquid like white sugar, but it does add a really nice caramel flavor.  You can use this in oatmeal in place of brown sugar, in baked goods, or even in coffee or tea if you don’t mind the grainy bits.  I also like this sweetener because it offers all the nutritional benefits of dates while adding a sweet flavor.

DIY Date SugarDIY Wednesday: Date Sugar | Life Healthfully Lived

  • 20 Medjool dates, pitted and sliced in half
  1. Preheat oven to 250 and line a large baking sheet with parchment paper or a Silpat.
  2. Arrange the sliced dates on the sheet and bake in the oven for 2-3 hours checking every so often to make sure the dates don’t burn.
  3. Turn off the oven and let the dates sit in the oven for another few hours or overnight until the are completely hard.
  4. Once the dates are cooled and hardened, put them into a blender or food processor and grind until you have a fairly fine powder.

Keep your date sugar in an airtight container and store it in the fridge or freezer if you aren’t going to be using it right away.DIY Wednesday: Date Sugar | Life Healthfully Lived

Told you this one was easy!  Now remember, the one thing about sugar I can tell you is that sugar is sugar.  Your body can’t tell the difference between high fructose corn syrup or date sugar.  It’s ok to have a sweet treat now and then but don’t make this the basis of everything you put in your mouth.  It’s all about balance people!

Hope you have a great Wednesday and tell me, what’s your favorite sweetener?DIY Wednesday: Date Sugar | Life Healthfully Lived

DIY Wednesday: Fruit Roll-Ups

BackDIY Wednesday: Fruit Roll-Ups | Life Healthfully Lived in grade school, having the latest “cool” snack in your lunch was a big deal.  At lunch time, we would eagerly rip open our lunch boxes to see what treasures our moms had packed.  Lunchables were always a hit, fruit gushers, dunkaroos, marshmallow fluff sandwiches, and a can of soda made you a god.  Yes, it was a weird time.

I rarely had any of the packaged snacks that other kids in my class had.  Not only did my mom think they were nutritionally void and classified them as junk food (she was 100% right), but they were also expensive.  Every once in awhile she would put a treat into our lunches and my sister and I got to feel cool for the day.  Again, it was a weird time.

Looking back, I might have felt left out at the time but I think my mom did me a huge favor.  She taught me that food should not only be inexpensive, but it should serve some nutritional purpose.  It was also ok to have the occasional treat.  It’s those food beliefs that are the backbone of my thoughts on food now.DIY Wednesday: Fruit Roll-Ups | Life Healthfully Lived

With those beliefs in mind, I try to find/make snacks that aren’t just glorified junk food.  While I might not be able to recreate fruit gushers or dunkaroos, there are some snacks that can be made with real food.

Remember fruit roll-ups?  The store bought versions have a ton of sugar and dyes added in and rarely have any actual fruit in them.  You can totally make your own fruit roll-ups with less sugar, actual fruit, and cheaper than the ones on the shelves.  There are quite a few recipes/methods out there, but this is the one that I found worked best in my oven.  You might have to experiment with cooking times and temperatures based on your oven.  It takes less than 20 minutes to put everything together and while the cook time is a few hours, it’s all hands off and very simple.

Homemade Fruit Roll-UpsDIY Wednesday: Fruit Roll-Ups | Life Healthfully Lived

  • 1 to 2 cups fruit of your choice, chopped into small pieces (I used peaches)
  • lemon or lime juice (I used the juice from half a lime because that’s what I had)
  • 1-2 tsp cinnamon
  • 1-2 tbsp maple syrup (or honey)
  • water as needed
  1. Put all of your chopped fruit into a medium saucepan and turn heat to medium-low.
  2. As the fruit is cooking add in the lemon or lime juice and cinnamon to taste. Keep cooking until the fruit starts to break down.  If the compote seems dry, add in a little water.  You don’t want a super watery mixture, just enough to keep the fruit from sticking.
  3. After about 15 minutes, remove the fruit from heat.  Add in maple syrup to reach desired sweetness level.  My fruit was really ripe so I only used 1 tbsp.
  4. Now it’s time to puree the fruit.  You can use an immersion blender, food processor, or regular blender.  Whichever you choose, blend until it is completely smooth.  You don’t want any chunks left.
  5. Line a large rimmed baking sheet with parchment paper or a Silpat.  Do NOT use aluminum foil, it will just be a mess.  Pour the fruit puree onto the sheet and spread into a thin layer.  This part will take some time to spread everything out to the right height.  You don’t want it too thick or it won’t cook right and if it’s too thin it won’t hold together.  Take your time and you’ll get it.
  6. Set your oven to the lowest setting, mine is 200, and cook for 3 to 4 hours.  You’ll know it’s ready when it is no longer sticky or wet.  Depending on how low your oven can go, this might take longer or shorter.  Just occasionally check so it doesn’t turn into fruit brittle.
  7. Once the fruit is done, slice it into strips and roll it up with a little bit of parchment paper.  You can keep these in the fridge for up to a week and use them in lunches for a healthy and delicious snack! DIY Wednesday: Fruit Roll-Ups | Life Healthfully Lived

Quick BBQ Dishes

Happy Labor Day everyone!  As we all enjoy this last long weekend of summer, I thought I would bring you a quick post highlighting some of my recipes that are easy to make and great to bring along to a party.

Maybe you totally forgot that you said you would bring something for the BBQ you’re headed to later today, don’t worry I’ve got you covered.  These recipes come together quick and are a big hit with the masses.  Plus they’re healthy, what more could you ask for?!

Even Better BBQ Sauce– Quick, delicious, and great for meat or vegetables!BBQ

Quinoa Cornbread Bites– Tasty little bites that are quick and gluten free! 

Tomato Cucumber Salad– One of my favorites, and perfect on a hot dayDSC_1760

Avocado Chicken Salad– A fun and tasty spin on the classic chicken salad

Tahini BBQ Summer Vegetable Bake– This one is great because it can be served hot or coldDSC_1843

Penne Pesto Pasta with Roasted Tomatoes– Who doesn’t love pasta, pesto, & tomatoes?DSC_1172

Key Lime Popsicles Make these immediately.  You and other party-goers will thank me. DSC_1818

Healthy Brownie Bites– A healthy version of brownies and a crowd pleaser! 

Hope these help you out and you enjoy your Labor Day!  See you on Wednesday!