Gluten-Free Banana Bread with Avocado

Don’t turn away in disgust.  You can, and totally should, bake with avocado.  They are good for you and replace a lot of the less than healthy fats you normally find in baked goods. Gluten-Free Banana Bread with Avocado | Life Healthfully Lived

A few weeks back Liz from I Heart Vegetables posted this recipe for chocolate muffins made with avocado and that got my wheel turning.  I started thinking of other things I could make with avocado and then I saw a recipe for banana bread and the baking heavens opened. Gluten-Free Banana Bread with Avocado | Life Healthfully Lived

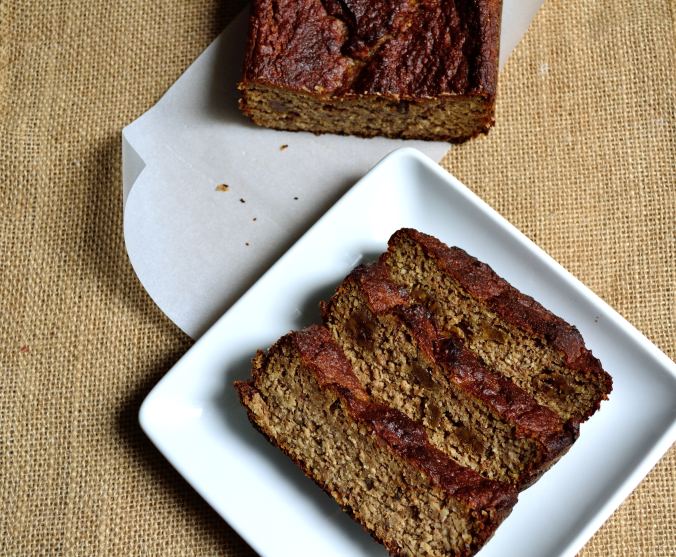
Banana bread is awesome, but regular banana bread is usually a little too sweet for me so I toned it down in this recipe.  Feel free to add maple syrup if you want, but try it without first.  The avocado keeps this bread moist and full of healthy fats and DOESN’T taste like banana guacamole.  That wouldn’t be so good. Interesting…. but not tasty.

So if you have some super ripe bananas, an avocado, and a hankering for something delicious try this quick gluten-free bread!

Avocado Banana BreadGluten-Free Banana Bread with Avocado | Life Healthfully Lived

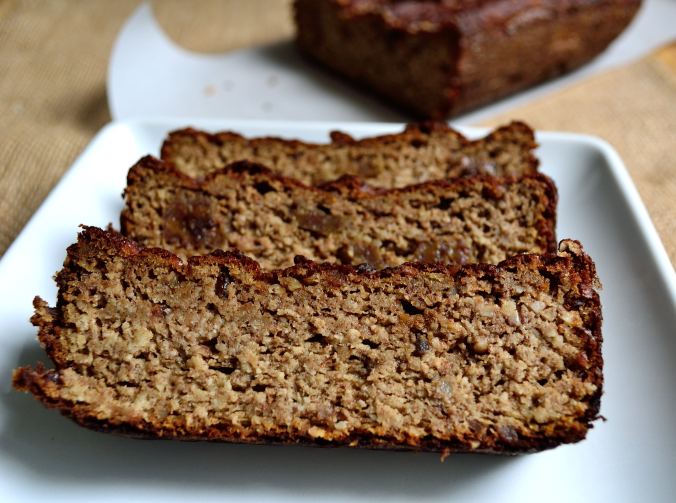
  • 1 medium avocado, about 1 cup diced up
  • 2 medium ripe bananas
  • 1 tbsp coconut oil
  • 1 large egg or 1 flax egg (3 tbsp ground flaxseed and 6 tbsp water combined)
  • 1 and 1/2 cup almond flour
  • 2 tsp cinnamon
  • 1 tsp baking powder
  • 1/4 tsp baking soda
  • 1/2 tsp salt
  • 3-5 tbsp maple syrup, optional
  • 1/4 cup pecans, optional
  • 1/2 cup dried bananas, optional (but really delicious even if it sounds odd)
  1. Preheat oven to 350 and oil a bread pan with a little coconut oil and line with parchment paper.
  2. Put the avocado, bananas, and coconut oil into a blender and blend until it’s smooth.  Add the egg or flax egg, maple syrup if you’re using, and blend again.
  3.  Combine all the dry ingredients in a large bowl and then pour in the wet.  Use a spatula and stir to combine.  If you’re adding nuts or dried bananas stir those in now.
  4. Pour the batter into the bread pan and bake for 45 minutes.  Pull out the bread and check to see if the middle is still wobbly.  If it is, cook for another 5 to 10 minutes.
  5. When the bread is done, pull it out and let it cool in the pan for 5 minutes then take it out and let it cool on a rack completely.   Gluten-Free Banana Bread with Avocado | Life Healthfully Lived

DIY Wednesday: Sun-Dried Tomatoes

The other day, I wanted to recreate one of my favorite breakfast dishes from a restaurant back in Sycamore, Eggsclusive Cafe.  It’s an omelette that has fresh basil, sun-dried tomatoes, and avocado slices on top.  So simple but so good.

To the store I went to grab the things I needed that I didn’t already have, one of which was the sun-dried tomatoes.  I didn’t want to get the ones packed in olive oil because they tend to make everything else oily and the ones at my store always have some other flavoring like jalapeno added.  So I picked up one of the packages, despite the $5 price tag, and flipped it over to read the ingredient list.  That’s where I was met with sulfates and sulfites and other preservatives to keep “freshness and color retention”.DIY Wednesday: Sun-Dried Tomatoes | Life Healthfully LivedDIY Wednesday: Sun-Dried Tomatoes | Life Healthfully Lived

No brand at my store had sun dried tomatoes without some kind of chemical or preservative and I didn’t want to spend $5 or more on something that I didn’t want in my body.  I almost resigned myself to the oil packed tomatoes when I thought to myself, “Self, can’t you just make your own sun dried tomatoes?  I mean obviously not in the sun, that would take too long and you don’t have a sunny spot in the apartment, but in the oven? And wouldn’t it be like way less expensive?”

Yes, my self was correct.  I can make sun dried tomatoes in my oven and have fresh, preservative free toppings for my omelettes and whatever else my heart desires.  If you have a food dehydrator you probably already know that you can make your own sun-dried tomatoes and it’s fairly simple.  If you don’t, you can do like me and make them in your oven!

Sun Dried TomatoesDIY Wednesday: Sun-Dried Tomatoes | Life Healthfully Lived

  • One 8 oz. package of grape or cherry tomatoes
  • olive oil, optional
  • salt, optional

* I made mine without oil or salt but you can, it just may take a little longer to dry out.

  1. Preheat your oven to the lowest setting.  If it’s 150-170 lucky you, the rest of us will have to make due with 200.
  2. Wash and dry the tomatoes and then slice in half.  Arrange the tomatoes on a baking sheet lined with parchment paper or a Silpat.  If you want to add olive oil and salt, toss the tomatoes in a bowl and make sure they’re covered then arrange on your baking sheet.
  3. Place the sheet in the oven to dry out.  Now, if your oven only goes to 200 you’re going to have to keep an eye on things to make sure the tomatoes don’t burn.  I opened my oven every 10 minutes or so to let out some of the heat.
  4. Turn over the tomatoes every so often.  Remember you’re just trying to dry them out, not roast them.  They’re done when they look shriveled like red raisins.  Take them out of the oven and let them cool completely before storing in an airtight container.

* Make sure the tomatoes are completely cool and dry before you store them because any moisture in the container will make them mushy and spoil sooner.DIY Wednesday: Sun-Dried Tomatoes | Life Healthfully Lived

DIY Wednesday: Baba Ganoush

Ok, before making this recipe I had never had baba ganoush.  In fact, I didn’t even really know what baba ganoush was and the only reason I thought about it was because of the movie Wedding Crashers.  Yes, the movie with Vince Vaughn and Owen Wilson.  It’s one of my sister’s and my favorite movies and it’s awesome and if you’ve never seen do it now.

Well, in the movie Owen Wilson’s character affectionately calls Vince Vaughn’s character “Baba Ganoush”.  So the other day I was randomly thinking about the movies and I decided to figure out what baba ganoush meant and when I saw that it was an eggplant and tahini spread I decided I needed to make it for myself.DIY Wednesday: Baba Ganoush | Life Healthfully Lived

Yes, this is how my brain works.

I really love how light and simple this dip is and it’s amazing on chips (particularly pita), cut up vegetables, and while I haven’t tried it yet I bet it would be good spread on fish or chicken.  You could buy baba ganoush at the store but the kind I found had odd ingredients and was way more expensive and why buy it when you can easily make it?DIY Wednesday: Baba Ganoush | Life Healthfully Lived

While this dip won’t replace hummus (hummus love forever yo) it is a new fun dip!

Baba GanoushDIY Wednesday: Baba Ganoush | Life Healthfully Lived

  • 1 medium sized eggplant
  • half a lemon
  • 1 clove garlic minced
  • 4 cloves garlic, roasted
  • 2 tbsp tahini*
  • 1/2 tsp cumin
  • 1/2 tsp smoked paprika
  • 2 tsp fresh parsley, chopped or 1 tsp dried parsley
  • roasted sesame seeds for garnish, optional
  1. Preheat oven to 400 and prepare a large baking sheet with a Silpat or parchment paper.
  2. Wash and rinse the eggplant really well and poke it all over with a fork.  Place it on the baking sheet.  Take 4 cloves of peeled garlic and wrap them in a little foil pouch with a little olive oil and salt and place the pouch on the pan with the eggplant.
  3. Roast the eggplant until it’s soft and starting to collapse rotating it halfway through. About 30 to 35 minutes.  Roast the garlic for about 15 to 20 minutes or until golden brown.
  4. Once the eggplant and garlic are done roasting, let them cool until you can easily handle the eggplant.  Slice in half and scoop out the flesh and place it into the food processor along with the rest of the ingredients, except the sesame seeds.
  5. Process until it’s smooth.  Scoop into a bowl and if you’re serving right away top with toasted sesame seeds and a drizzle of olive oil.

* I also tried this with almond butter and it worked just fine but I like the flavor tahini adds. Use whatever you like and have on hand.DIY Wednesday: Baba Ganoush | Life Healthfully Lived

Broccoli Rabe Pesto

I have another recipe for you today that uses up leftover vegetables and still tastes delicious.  Broccoli rabe has been one of my favorite things lately.  It’s a little bitter and earthy, but if you prepare it right and use all the garlic it turns into this amazing dish that I have been putting in my veggie noodle bowls every weekend.

It’s a vegetable-palooza up in here.

Well, last week I was not digging the greens and ended up with a pile of cooked broccoli that was just about to go bad.  I was so tempted to throw it away because what can you do with almost mushy vegetable? Broccoli Rabe Pesto | Life Healthfully Lived

Turn it into pesto!  Yes, you can use anything to make pesto and I will use any excuse in the book to make and use pesto because as Phoebe would say, pesto is the besto.

I kind of threw stuff together and hoped that everything would turn out and I got pretty lucky.  I thought I was so revolutionary but then a quick internet search proved me wrong BUT my version is dairy-free so I think that counts for something.  You can also make this pesto with regular broccoli if you haven’t jumped on the broccoli rabe bandwagon or can’t find it.  Just make sure whatever you use is already cooked because raw broccoli rabe pesto would definitely not be the besto.

Broccoli Rabe PestoBroccoli Rabe Pesto | Life Healthfully Lived

  • 1 1/2 cup cooked broccoli rabe or plain broccoli
  • 1/3 cup slivered almonds (you could use slices too)
  • 3 tbsp nutritional yeast (if you do dairy you could use parmesan)
  • 2 cloves garlic
  • 1/3 cup olive oil
  • salt and pepper to taste
  1. Preheat oven to 325 and spread the almonds onto a baking sheet and toast for about 5 minutes.  Check often to make sure you don’t end up with burnt almonds.  Remove from oven and let cool.
  2. While the almonds are toasting, check your broccoli rabe and remove any pieces that are too brown or mushy (a little mushy is ok as everything will be blended up)
  3. Put the garlic cloves into a blender or food processor and pulse a few times until it’s fairly minced.  Add the almonds and nutritional yeast or cheese and pulse until you have a crumbly mixture.
  4. Add the broccoli rabe and pulse again and then add the olive oil.  Blend until you have a smooth and creamy sauce.  Taste and add salt or pepper if needed. Broccoli Rabe Pesto | Life Healthfully Lived

You can use this pesto anywhere that you would use regular pesto.  Pasta, bread, vegetables, vegetable noodles, spoons, fingers… You know, the usual.  It would be a great spring-like dish to bring to your Easter feast on Sunday and a great way to get in extra vegetables.

I hope you have a great Easter weekend and I’ll see you on Monday!

DIY Wednesday: Cauliflower Stem Cream Sauce

Ok, so if you read my post on Monday then you know that last week I was fighting off a stomach bug/virus.  It really knocked me on my butt and I’m still trying to get back to completely normal.  Because I couldn’t eat anything more than baby carrots and brown rice cakes (totally weird combo I know, but it’s the only thing that didn’t make me want to run to the bathroom) I ended up with a lot of vegetables that were just about to go bad.

Instead of throw them away, because I hate wasting food, I decided to come up with new interesting ways to use them.  One of my biggest missions is to reduce the amount of food waste we create each year.  There are so many things that we can do with food rather than throw it away but sometimes you have to get creative.  If you want a few other ways to cut down on food waste, you can check out this postDIY Wednesday: Cauliflower Steam Cream Sauce | Life Healthfully Lived

So today we have a recipe that uses a part of the vegetable that most of us throw away, cauliflower stems.  Yup, you can eat the stem but because gnawing on a big old stem doesn’t sound too appealing, we’re going to make a creamy sauce that can go on pasta, vegetables, meat, or even used as dressing.  The best part is it only requires a few ingredients and minimal effort.

Stop throwing away food that you think you can’t eat because I bet you can use it in a unique and delicious way!

Cauliflower Stem Cream SauceDIY Wednesday: Cauliflower Steam Cream Sauce | Life Healthfully Lived

  • 1 1/2 cauliflower stems, cut into chunks
  • 1 tsp roasted garlic (or 1/2 tsp garlic powder)
  • 1 tsp dried parsley
  • 1/2 tsp salt
  • 1/4 tsp black pepper
  • 1 to 2 tbsp nutritional yeast (or 1/4 cup parmesan cheese if you do dairy)
  • 1/2 to 1 cup reserved steaming water
  1. Save the large main cauliflower stem from your bunch along with any other trimmed pieces you aren’t using with the cauliflower florets.  Trim off the green leaves and the tough woody bottom of the large stem and then cut everything into bites size chunks.
  2. Fill a medium pot with about 2 cups water and set up a steamer basket if you have one.  If not, you can just boil the cauliflower right in the pot.  Steam the cauliflower until very soft and easily pierced with a fork.
  3. Transfer the cauliflower to a blender or food processor and save the steaming water.  Add the rest of the ingredients to the blender and blend until you have a thick paste.  Add the reserved water a few tablespoons at a time until you reach the consistency you would like.  Thinner for things like dressing and pasta sauce, a little thicker for meat and vegetables. DIY Wednesday: Cauliflower Steam Cream Sauce | Life Healthfully Lived